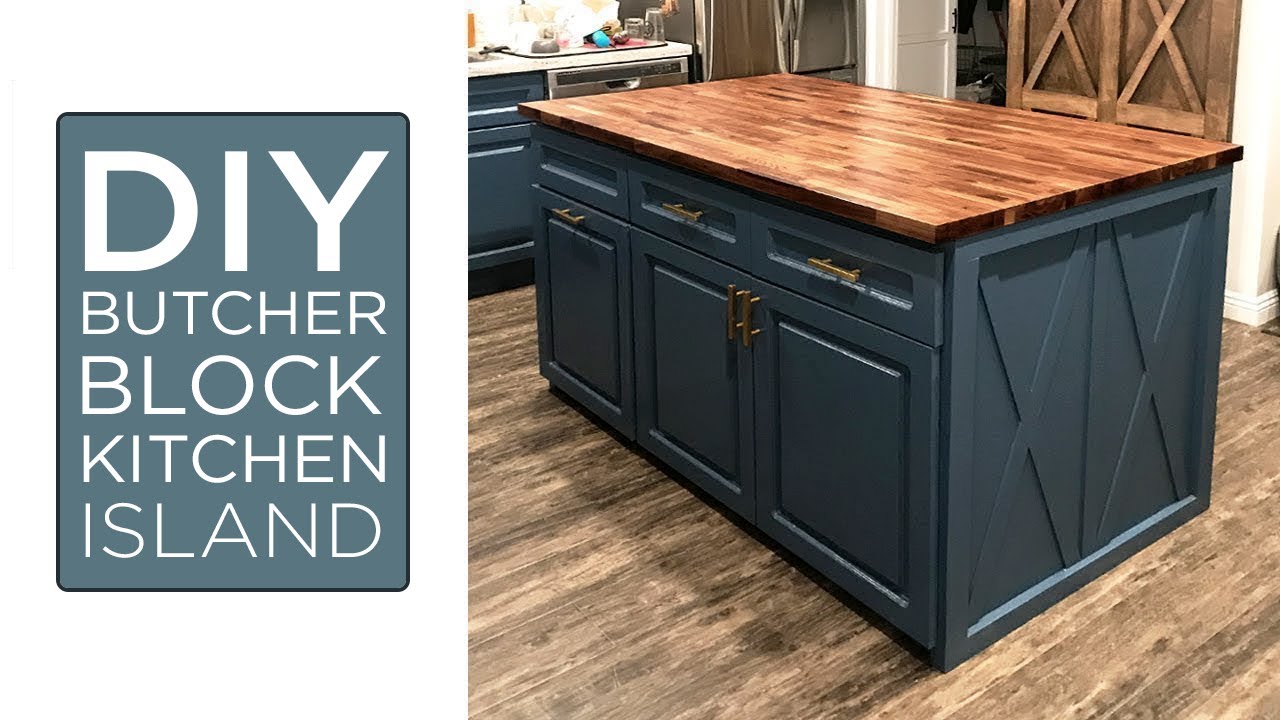
Creating an island in your kitchen can be a great way to increase the storage and work surface space in your home. It can also be a great way to add a unique design element to your kitchen. Building an island for your kitchen can be a challenging task, but with the right planning and materials, it can be done! This guide will provide you with the steps necessary to build an island for your kitchen.
Materials Required
Creating a beautiful and functional kitchen island is a great way to update the look and feel of your kitchen. Building your kitchen island is relatively simple with the right materials. To get started, you’ll need to gather the following materials:
Wood: For the base, you’ll need solid wood planks in your choice of size and finish. Plywood or medium-density fiberboard (MDF) can also be used as an alternative.
Hardware: You’ll need screws and nails to secure the wood planks together. If you plan to install shelving or any other fixtures, you’ll need to get the appropriate mounting hardware.
Worktop: To give your island its finished look, you’ll need to choose a suitable worktop material. This could be granite, marble, quartz, laminate, stainless steel, or a combination of these options.
Cabinet doors: If you plan to install cabinets on your kitchen island, you’ll need to buy cabinet doors to match your existing kitchen cabinets.
Tools: You’ll need basic tools such as a drill, saw, hammer, and measuring tape. To ensure accuracy and precision, you may also need a jigsaw, router, and other power tools.
Once you have the right materials, you can get started on building your own kitchen island. With a little bit of patience and creativity, you can create a beautiful and functional piece of kitchen furniture that will dramatically improve the look and feel of your kitchen.
Preparing the Space
Creating your dream kitchen island is a process that begins with proper preparation. Before you start your project, it’s important to measure the space where the island will go, so that you know exactly how much room to work with. Additionally, it’s wise to make sure you have all the necessary materials, tools, and supplies on hand. Once you’ve determined the size and scope of your project, it’s time to begin building your island.
Start by removing any old furniture, cabinets, or appliances that may be in the area. Next, you’ll need to clear the space and make sure that it is leveled. If the floor is uneven, you may need to use a self-leveling compound to ensure that the island is stable. Once the space is ready, you can begin to plan your island’s design. Consider the size, shape, and materials you’d like to use, and draw up a plan that includes measurements and a list of supplies needed.
Once the design is finalized, it’s time to start constructing your island. Begin by assembling the frame, and then add in the shelves, drawers, or cabinets. To finish, you can add countertops, trim, and other decorative details. And, once the island is complete, you can enjoy all the extra storage and work space you’ll have in your kitchen.
Building the Framework
Creating an island for your kitchen can be a daunting task for some; however, with the right steps, it can be done with ease. To build an island for your kitchen, you’ll need to start with the framework. The framework of an island is the most important part, as it provides the structure that will hold the cabinets, countertop, and other features.
First, you’ll need to measure the space you have available in your kitchen to determine the size of the island you can build. Is the space large enough for a full-size island or will a half-size island be better? Once you’ve determined the size, you’ll need to measure the walls and ceiling to ensure that the framework fits securely.
Next, you’ll need to select the materials for the framework. Wood is the most common choice, but you can also use metal or plastic. Depending on the size of the island, you may also need to use additional supports such as beams or posts to ensure the island is stable and secure.
Finally, you’ll need to assemble the framework. This can be done using screws, nails, or bolts. It’s important to use the right type and size of fastener to ensure the island is strong and secure. Once the framework is assembled, you’ll be ready to add the cabinets, countertop, and other features. With careful planning and the right materials, you can build a beautiful and functional island for your kitchen.

Installing Countertops and Cabinetry
Installing countertops and cabinetry is an important part of creating a stunning and functional island for your kitchen. Countertops provide a durable and attractive surface for food preparation and storage, while cabinetry can add storage and style. When selecting materials for your island, consider features like durability, maintenance, and cost. Popular countertop materials include granite, quartz, marble, and laminate. Cabinetry can be made of wood, metal, or even plastic, depending on your style and budget. When installing countertops and cabinetry, be sure to measure the space accurately and use the proper tools and techniques to ensure a secure fit. Once installed, you can customize your island with hardware, backsplashes, and decorative accents to fit your design vision. With the right materials and installation, you can create the perfect island for your kitchen.
Finishing Touches
Once you have constructed the main body of your kitchen island, the finishing touches are the last steps in the process. To complete your island, start by selecting the countertop material of your choice. Different types of countertops come with their own sets of advantages and disadvantages, so consider which option works best for your needs. Next, consider the type of island legs you would like to use. While standard legs are the most popular choice, you may want to consider a drop leaf or barstool island for additional seating. Finally, add details such as cabinet hardware, drop-down shelves, and other features that make the island look and function just the way you want it. With these finishing touches, your kitchen island will be ready to use and enjoy for years to come.
Electrical and Plumbing Considerations
When building an island for your kitchen, it is important to consider the electrical and plumbing elements of the project. If you are adding a sink, you will need to run water lines and drains, as well as access electrical outlets for the sink or other appliances on the island. If you are adding any other electrical features to the island, such as lighting or a range hood, you will need to install wiring and conduit to power those features. Additionally, you will need to consider the various safety requirements for plumbing and electrical work. Before beginning any electrical or plumbing work on your island, it is important to check local building codes and contact a certified electrician or plumber if necessary. Taking the time to plan out all the electrical and plumbing requirements for your new kitchen island will help ensure the project is completed safely and efficiently.
Maintenance and Care
When it comes to maintaining and caring for your kitchen island, the key is to keep it clean and protected from damage. Regular cleaning is essential to keep your island looking its best. Wipe down the surface with a damp cloth and mild detergent to remove any dirt or debris. You should also seal the surface of the island with a sealant every few months to protect it from spills and other damage. In addition, you should inspect the island periodically for any signs of wear and tear and repair or replace any damaged pieces. Finally, you should ensure that the island is securely fastened to the ground to prevent it from shifting or wobbling. By taking the time to properly maintain and care for your kitchen island, you can ensure that it looks great and lasts for years to come.
Conclusion
Building an island for your kitchen is a great way to add extra storage, counter space, and style to your kitchen. It is important to plan before beginning your project so that you know exactly what materials you need, the dimensions and style of the island, and the budget you will need to complete the project. Building an island for your kitchen is a fun and rewarding project that can help transform your kitchen into a more efficient and stylish space. With the right planning and materials, you can create an attractive and functional island that you will enjoy for years to come.


