Regrouting kitchen tile is a relatively easy and inexpensive project that can make a huge difference in the look of your kitchen. It is important to properly prepare the surface before starting the project, as this will help ensure the best results. Once the surface is ready, you will need to remove the old grout and replace it with new grout. After that, you can apply a sealer to protect the grout and give the tile a fresh, new look. With the right tools and supplies, regrouting kitchen tile can be done quickly and easily.
Preparing to Regrout Kitchen Tile
If you want to successfully regrout your kitchen tile, preparation is key. Before starting the job, make sure you have the right supplies. Properly regrouting tile requires the right type of grout, the right tool for applying it, and a good sealant to protect it. Additionally, you’ll need to set aside enough time to do the job correctly.
Before beginning, you’ll need to remove the existing grout. Use a grout saw to carefully cut out the old grout. Make sure to work slowly and carefully to avoid damaging the tiles. Once you’ve removed the old grout, use a vacuum cleaner to remove any dust and debris.
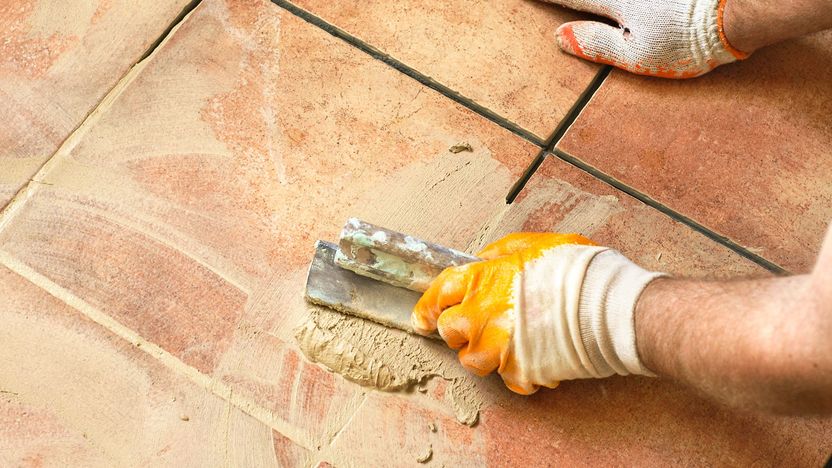
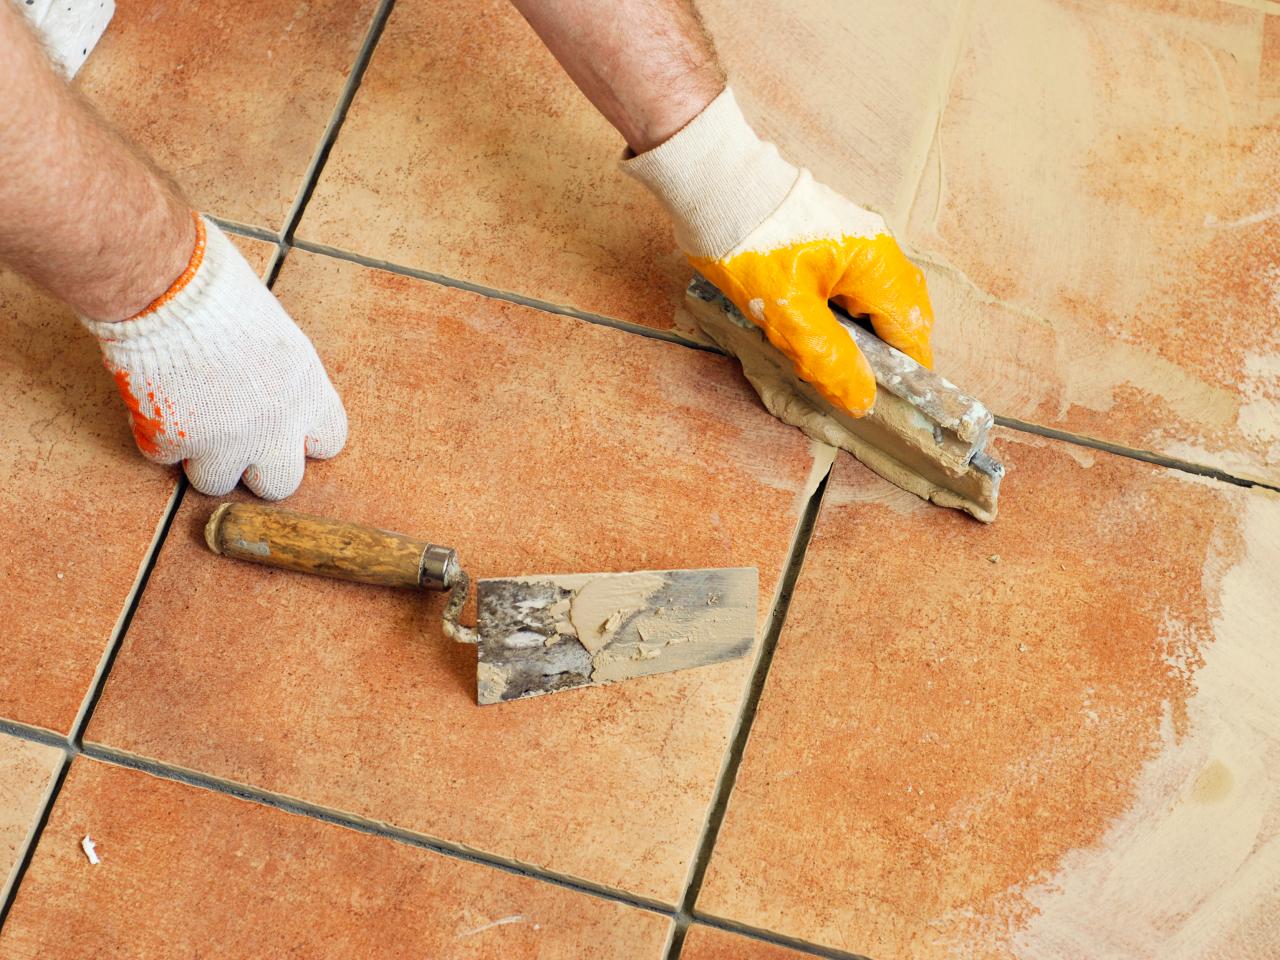
Next, you’ll need to apply the new grout. This can be done using a rubber grout float. Make sure to push the grout into the joints between the tiles and wipe away any excess grout. Once the grout has dried, you’ll need to apply a sealant. This will help protect the grout from staining and make it easier to clean.
Finally, be sure to give the grout enough time to dry and cure. Depending on the type of grout you’ve used, this could take anywhere from several hours to several days. Once the grout is fully set, you can enjoy your newly regrouted tile.
Removing the Old Grout
Removing the old grout from your kitchen tile can be a daunting task, but with the right tools and a bit of patience, it doesn’t have to be. Before you begin, make sure the area is clear of any furniture or other objects, and that you have all the necessary tools. Begin by using a grout saw or oscillating multi-tool to remove the existing grout from the surface of the tile. Make sure to cut slowly and evenly, being careful not to scratch the surface of the tile. If the grout won’t come up easily, you may need to use a hammer and cold chisel to remove larger pieces. Use a vacuum or wet/dry shop vac to remove all the old grout and debris from the area. Be sure to wear safety glasses and a dust mask to protect yourself from any particles in the air. Once the old grout is removed, clean the area with a wet cloth to prepare the surface for the new grout.
Cleaning the Tile
Cleaning the tile before regrouting is essential for a successful regrouting job. Without proper cleaning, dirt and debris can be trapped between the tiles, resulting in an uneven and unprofessional finish. Start by vacuuming the tiles to remove dust and dirt, then use a damp cloth to clean the tile surface. Be sure to use a mild, non-abrasive cleaning solution to avoid damaging the tile. Rinse the tiles with clean water, then allow the tile to dry completely before starting the regrouting process. This step is important for ensuring a professional-looking end result. Taking the time to properly clean the tile before beginning the regrouting process will help ensure a successful job.
Mixing and Applying the New Grout
The grouting process is the most involved step in regrouting kitchen tile. The first step is to mix the new grout. It is important to mix the grout according to the manufacturer’s instructions. The grout should be mixed with water until it is a thick paste, the consistency of peanut butter. Once the grout is mixed, it is ready to be applied.
Using a rubber grout float, apply the grout along the lines between the tiles. It is important to press the grout firmly into the lines and to wipe away any excess. After the grout dries, use a damp cloth to remove any haze left on the tiles.
Finally, seal the grout with a sealant. This will protect the grout from staining and discoloration. Sealing the grout is an important step in regrouting kitchen tile and should not be overlooked.
With the proper steps, regrouting kitchen tile is a relatively simple process. It is important to follow the instructions carefully and to use the right tools and materials. With patience and careful attention to detail, you can have a kitchen with clean, fresh-looking tile.
Finishing and Sealing the Grout
When it comes to regrouting kitchen tile, the last thing you need to do is finish and seal the grout. Sealing the grout is a critical step in the regrouting process, as it provides a layer of protection against staining and discoloration. In addition, it also makes your kitchen tile easier to clean.
To seal your grout, start by cleaning the tile with a damp cloth to remove any dust or debris. Once the tile is clean, use a sealer or grout release and apply it evenly over the tile. Be sure to cover the entire tile and grout line for maximum protection. Allow the sealer to dry completely before applying a second coat. Once the sealer is completely dry, use a sealant to give the grout an extra layer of protection.
When selecting a sealant, be sure to choose one that is designed specifically for kitchen tile. This will ensure that the sealant is long-lasting and durable. Apply the sealant to the grout line using a brush or a roller and allow it to dry completely. After the sealant is dry, your regrouted kitchen tile is ready to be used.
Dealing with Special Situations
Dealing with special situations when regrouting kitchen tile can be difficult. Whether it’s due to the tile’s unique shape, age, or other factors, it can be difficult to know how to approach the job. In some cases, the tile may need to be replaced entirely, but in other cases, it may just require special techniques to get it right. It’s important to familiarize yourself with the different methods for regrouting tiles in special situations so you can make sure the job is done properly.
For instance, if you are dealing with unusually shaped tiles, such as those with curved edges, it may be necessary to cut the new grout around the curve in order to ensure a good fit. Additionally, it’s important to make sure the new grout matches the original grout’s color and texture as closely as possible. If the tile has been in place for a while, it may have discolored, so it’s important to choose a grout color that is close to the original.
In some cases, old grout may be extremely difficult to remove due to its age and deterioration. In these cases, it may be necessary to use a grout removal tool such as a grout saw or grinder to get the job done. It’s important to make sure that the tool is properly adjusted and used correctly to ensure the job is done safely and correctly.
Finally, when regrouting kitchen tile in special situations, it’s important to make sure that the new grout is properly sealed. This will protect it from water damage and make it last longer. Sealing grout also helps to prevent mold and mildew growth, which can cause health issues.
By familiarizing yourself with the different methods for regrouting kitchen tile in special situations, you can ensure that the job is done properly and that the tile will look great for years to come.
Safety Tips for Regrouting Kitchen Tile
With age, kitchen tiles can start to look dull and discolored, which can make your kitchen look outdated. Regrouting your kitchen tile is a great way to give it a fresh, new look, but it can be a daunting task. Before you get started, it’s important to take the necessary safety precautions to ensure the project goes smoothly.
One of the most important safety tips when regrouting kitchen tile is to use protective gear. This includes safety glasses, gloves, and a dust mask to protect your eyes, hands, and lungs from dust and particles. Additionally, make sure to cover your counters, cabinets, and appliances to prevent them from getting damaged.
It’s also important to make sure the room is well-ventilated to prevent the accumulation of dust. Open windows or use an exhaust fan to help clear the air. You’ll also want to use a sealant to help protect the regrouted tile from moisture and protect the grout from bacteria.
When handling grout, make sure to wear a dust mask. The grout can contain harmful particles that can be hazardous to your health. It’s also a good idea to wear long sleeves and pants to protect your skin.
Finally, remember to take frequent breaks throughout the project. Regrouting kitchen tile can be a time-consuming task, and it’s important to take breaks to help avoid fatigue and ensure you’re completing the job safely.
By following these safety tips, you can ensure that your kitchen tile regrouting project goes smoothly and safely. From protective gear to ventilation, these tips can help you get the job done quickly and efficiently.
Choosing the Right Grout for Kitchen Tile
Changing the grout in your kitchen tile can make a world of difference. However, it’s important to select the right type of grout for your tile, as it can make the difference between a job that lasts and one that needs to be redone in the near future. It’s important to consider the size of the grout lines, the porosity of the tile, and the type of grout you want to use.
For larger grout lines, a sanded grout is the best choice. This type of grout is made of a mix of Portland cement, sand, and water, and is usually recommended for grout lines of 1/8 inch or larger. It’s a strong and durable option, and can withstand a lot of wear and tear.
For smaller grout lines, an unsanded grout is the better option. This type of grout is made of a mixture of Portland cement and water, which makes it more flexible and less likely to crack. It’s also the best choice for porcelain and ceramic tiles, as it won’t scratch or damage them.
Finally, you’ll need to decide what color grout you want to use. There are a variety of colors available, including white, gray, black, and even colored grout. The color you choose depends on your personal preference and the look you’re going for in your kitchen.
Overall, choosing the right grout for your kitchen tile is an important step in the regrouting process. Make sure to consider the size of the grout lines, the porosity of the tile, and the type of grout you want to use in order to get the best results.
Maintaining Kitchen Tile Grout
Kitchen tiles are a great way to add a touch of style to any kitchen. But they can easily become damaged and dingy if not properly maintained. One of the most important aspects of kitchen tile maintenance is regrouting the grout. Regrouting is the process of removing the existing grout, cleaning the tile and then reapplying new grout. This can help improve the look of the tile and make it easier to clean.
In order to regrout kitchen tile, start by removing the existing grout. This can be done using a grout saw or grout remover tool. Once the old grout has been removed, use a vacuum to ensure all the dust is cleared away. Then, clean the tile with a damp cloth and an appropriate cleaner to remove any dirt or residue. Finally, apply the new grout with a grout float and a wet sponge. Allow the grout to dry for at least 24 hours before using the kitchen.
Regrouting kitchen tile can help keep your kitchen looking great. It’s an important part of kitchen maintenance and should be done regularly to ensure the tile looks its best. Doing it yourself can save time and money, but it’s important to make sure you do it properly in order to avoid any potential problems. Use the right tools, materials and techniques for the job, and you’ll be able to keep your kitchen looking spick and span.
Common Regrouting Mistakes
Regrouting kitchen tile is a great way to keep your kitchen looking like new. But not all grout jobs are created equal, and there are several common mistakes that can lead to a subpar result. Knowing what to look out for can help you avoid these pitfalls and ensure that your kitchen tile looks great for years to come.
One of the most common mistakes when regrouting kitchen tile is not removing the old grout completely. This can cause the new grout to crack or crumble, leaving your tiled surfaces looking worse than before. It is important to use a grout saw or grout chisel to remove all the old grout before you begin.
Another mistake is not preparing the area properly. This includes making sure the surface is clean and dry before you apply the new grout. Any dirt or moisture will interfere with the grout’s ability to bond properly. You should also apply a sealer to the tile after you have regrouted it to prevent water damage and staining.
Finally, it is important to make sure you use the right kind of grout for the job. You should choose a grout that is compatible with the type of tile you are using. If you use the wrong kind of grout, it can cause damage to the tile and may not last as long as it should.
By avoiding these common mistakes, you can ensure that your kitchen tile looks great for years to come. With proper preparation and the right materials, you can easily regrout your kitchen tile and keep it looking like new.
Troubleshooting Grout Issues in the Kitchen
Having to regrout kitchen tile is a common kitchen occurrence, no matter how well you take care of your space. It’s usually caused by exposure to water, oils, and grease, combined with regular foot traffic. If you’re having trouble with grout in your kitchen, there are certain steps you can take to troubleshoot the issue and prevent it from happening in the future.
Firstly, it’s important to understand what kind of grout you’re dealing with and whether it’s resilient enough for its intended purpose. For instance, sanded grout is best for areas with a larger area of tile coverage, such as flooring, whereas non-sanded grout is better for countertops and backsplashes. Secondly, make sure to inspect the grout joints thoroughly to look for any signs of wear and tear, discoloration, or cracking. Thirdly, consider resealing the grout to reduce the likelihood of future damage.
If the grout is beyond repair, then it’s time to regrout the kitchen tile. This process involves meticulously removing the old grout using a grout saw and replacing it with new grout. If you’re planning on regrouting your kitchen tile yourself, make sure to follow the manufacturer’s instructions carefully. Furthermore, choose a grout color that best matches the tile to ensure a neat and uniform look.
By following these steps, you can easily troubleshoot grout issues in the kitchen and regrout the tile for a renewed look.
FAQs About the How To Regrout Kitchen Tile
1. What materials do I need to regrout kitchen tile?
A. You will need a grout removal tool, grout, grout sealer, grout colorant, painter’s tape, and a damp sponge.
2. How do I prepare the tiles for regrouting?
A. First, you must use the grout removal tool to remove the existing grout from between the tiles. Then, you should clean the tiles with a damp sponge.
3. How do I mix the grout?
A. You should add water to the grout according to the manufacturer’s instructions and mix it to a peanut butter-like consistency.
4. How do I apply the grout?
A. Apply the grout using a grout float. Make sure to press the grout into the seams between the tiles. Once the grout is dry, use a damp sponge to wipe away excess grout.
5. Do I need to seal the grout?
A. Yes, you should apply a grout sealer to protect the grout from staining and moisture.
Conclusion
Regrouting kitchen tile is an effective and inexpensive way to give your kitchen a fresh, new look. It can be done quickly and easily, and requires minimal tools and supplies. With just a few simple steps, you can make your kitchen look like new again. Whether you’re a DIY enthusiast or a professional, regrouting kitchen tile is an easy way to brighten up your kitchen and keep it looking great for years to come.

