If you notice that water is leaking from the drainpipe of your kitchen sink, it’s important to seal the drainpipe as soon as possible. Sealing a kitchen sink drain is a relatively easy DIY project that can help keep water from leaking and prevent costly damage. This article will provide a step-by-step guide on how to seal a kitchen sink drain, so that you can keep your kitchen sink in top condition.
:max_bytes(150000):strip_icc()/plumbers-putty-2718686-hero-cb0dbb2b83524275a3710c09d1c8aa85.jpg)
Understanding the Basics of Kitchen Sink Drain Sealing
Kitchen sink drain sealing is an important part of kitchen maintenance. A properly sealed drain will keep your sink free of odors, debris, insects, and other unwanted pests. Knowing how to seal your kitchen sink drain properly can save you time, money, and headaches in the long run.
When sealing a kitchen sink drain, the key is to use the right materials to ensure a proper seal. You’ll need a good-quality silicone caulk, a caulk gun, and a putty knife. Start by cleaning the area around the sink drain thoroughly. Next, apply the caulk to the sink drain, using a circular motion to ensure an even application. Allow the caulk to dry for at least 24 hours before using the sink.
Once the caulk is dry, use the putty knife to smooth it and seal the sink drain. Be sure to press the caulk firmly into the sink drain and around the edges. Finally, apply a second layer of caulk, if desired, for extra protection.
By taking the time to properly seal your kitchen sink drain, you can reduce the risk of water damage, pest infestations, and other problems. With a little bit of effort, you can keep your sink looking and functioning like new.
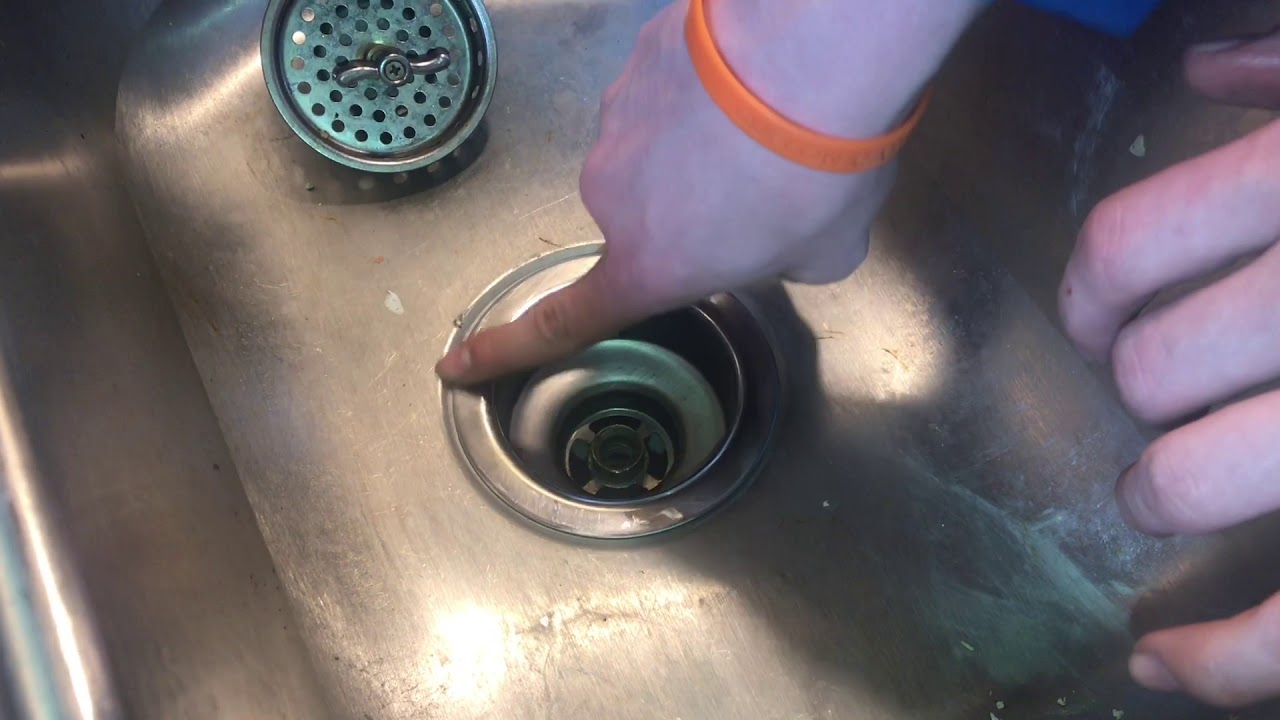
Preparing to Seal the Kitchen Sink Drain
Keeping a kitchen sink drain in good condition is essential for a well-functioning kitchen. Preparing the drain prior to sealing is a necessary step in the process. Before beginning, make sure all necessary tools and materials are gathered and ready. This includes a basin wrench, sealant, and a rag.
Begin by turning off the water to the sink and removing the drain from the sink. To do this, use the basin wrench to loosen and unscrew the drain from the bottom of the sink. Once unscrewed, the drain can be pulled out of the sink.
Next, inspect the drain for any damage. If any cracks or leaks are visible, they should be fixed before sealing the drain. A sealant specifically designed for plumbing is necessary for this step. Clean the area around the drain of any dirt or debris, then apply the sealant.
Once the sealant has been applied, the drain can be reattached to the sink. Use the basin wrench to tighten the drain into place. Wipe away any excess sealant and allow the sealant to dry before turning the water back on.
By following these simple steps, sealing a kitchen sink drain can be done quickly and efficiently. With the right materials and a bit of elbow grease, an effective seal can be achieved that will help keep the kitchen sink functioning properly.
Choosing the Right Supplies for Sealing the Kitchen Sink Drain
Sealing your kitchen sink drain is an important task that is often overlooked. While it may seem like a daunting task, with the right supplies, it doesn’t have to be. It’s important to choose the right supplies for sealing the kitchen sink drain to ensure a successful installation.
First, you’ll need to determine the size of the sink drain, as well as the type of material it’s made from. This will help you choose the right sealant for the job. You’ll also need to select the appropriate sealant for the type of material your sink is made from.
Once you’ve chosen the right sealant for the job, you’ll need to ensure it’s applied correctly. It’s important to use the right amount and apply it properly so that it provides an effective seal. If you’re unsure of the correct procedure, you may want to consult a professional.
Finally, you’ll need to choose a method for sealing the sink drain. Depending on the type of sink drain, you may be able to use a caulking gun or tape in order to seal it. Alternatively, you may need to use a specific type of sealant.
Choosing the right supplies for sealing the kitchen sink drain can make the job easier and ensure that your sink stays sealed. With the right supplies and a bit of patience, you can easily seal your kitchen sink drain and make sure it lasts for years to come.
Understanding the Role of Plumbers Putty in Sealing Kitchen Sink Drains
Having a kitchen sink leak can be a frustrating and expensive problem to fix, so it’s important to ensure your sink is properly sealed. The use of plumbers putty is a popular and effective method of sealing kitchen sink drains. Plumbers putty is a pliable, clay-like compound that is used to create a watertight seal between two surfaces. It is malleable and can be easily manipulated into various shapes, making it perfect for sealing sink drains.
When sealing a kitchen sink drain, plumbers putty should first be applied to the underside of the sink flange. Next, the flange should be inserted into the sink drain hole and secured with bolts. Finally, the plumbers putty should be pressed around the flange with a putty knife to create a watertight seal.
When using plumbers putty, it’s important to ensure it’s applied correctly. It should be applied in a continuous line to ensure there are no gaps in the seal. Additionally, the putty should be pressed firmly around the flange to ensure a tight seal. If the putty is applied incorrectly, it can result in a leaky sink.
It’s also important to note that plumbers putty should not be used on plastic or fiberglass sinks. For these types of sinks, silicone caulk should be used instead as it provides a more reliable seal.
Overall, plumbers putty is a great option for sealing kitchen sink drains. With proper application, it can create a watertight seal that prevents leaks and damage. However, it’s important to ensure the putty is applied correctly and that it’s used on the correct type of sink.
Applying Plumbers Putty to the Kitchen Sink Drain
If you’re looking to seal your kitchen sink drain, you’ll need to use plumbers putty. Plumbers putty is an effective sealant that is inexpensive, easy to use, and can provide a watertight seal. When you’re sealing your kitchen sink drain, you’ll need to ensure that the surface is clean and dry, and that you apply the putty in a thin, even layer.
Before applying the putty, it’s important to read the manufacturer’s instructions and to wear protective gloves. To apply the putty, you can use your fingers to form a snake-like shape. Place the putty around the sink drain and press it firmly against the sink. The putty should form a watertight seal around the sink drain and should prevent water from leaking out.
For best results, it’s important to inspect the seal around the sink drain regularly. If you’re noticing any signs of water damage or any gaps or cracks in the seal, you’ll need to reapply the putty.
Using plumbers putty to seal your kitchen sink drain is an inexpensive and effective way to ensure that your kitchen sink drain is watertight and secure. With the right materials and a few simple steps, you can create a watertight seal around your sink drain.
Sealing the Drain with a Gasket
A kitchen sink drain can often be a source of frustration, as it can be prone to clogs and leaks. Fortunately, sealing the drain with a gasket can help to prevent these issues, and it’s a relatively easy job to complete.
A kitchen sink gasket is an important part of the plumbing system, as it provides a waterproof barrier to keep water from seeping out of the sink. The gasket should be placed between the drain and the sink itself and should be replaced regularly to ensure a tight seal. To seal the drain with a gasket, you’ll need to begin by removing the existing gasket. Then, clean the area around the drain with a damp cloth to ensure the surface is free of any dirt or debris.
Next, measure the drain opening and cut a new gasket to fit the size of the opening. Place the gasket around the opening, then secure it with a nut or bolt. Make sure the gasket is properly secured and there are no gaps between it and the drain opening. Once the gasket is in place, use plumber’s putty or caulk to seal the drain opening and the gasket. Finally, replace the drain cover and you’re all set.
By taking the time to seal your kitchen sink drain with a gasket, you’ll help to prevent future plumbing issues and ensure that your kitchen sink remains leak-free.
Finishing the Process by Installing the Plug
Installing a plug to seal your kitchen sink drain is the final step in the process. It’s essential that you take the necessary precautions to ensure that your plug is installed correctly and is secure. Not only will this keep your sink from leaking, but it will also prevent any foreign objects from entering the drain. To get started, you’ll need to make sure that you have all the necessary tools on hand, such as a wrench, a screwdriver, and a new plug.
Once you have the right tools, you’ll need to unscrew the nut that holds the plug in place. Once the nut is removed, you can then slide the plug into the drain and replace the nut. Ensure that you tighten the nut securely to ensure that the plug is secure and won’t move or come loose. Once the nut is tightened properly, you should be able to test the plug for leaks. If all is good, you’ve successfully completed the process of installing a new plug!
Identifying and Resolving Common Problems with Kitchen Sink Drain Sealing
A kitchen sink drain is a vital part of any kitchen, and it is important to ensure it remains in good condition. A leaking kitchen sink drain can cause headaches, ranging from water damage to a higher water bill. Identifying and resolving common problems with kitchen sink drain sealing can help to prevent any kind of damage.
One of the most common issues with kitchen sink drain sealing is poor installation. It is important to ensure that the sink is installed correctly in order to avoid any water leakage. Additionally, any debris or food particles should be removed from the drain before sealing. If the seal is not properly applied, it can lead to water leakage.
In some cases, the sealing material may be worn or damaged. This can lead to water seepage, which can be a major problem. If the seal is worn or damaged, replacing it is the only option. Additionally, it is important to ensure that the seal is compatible with the sink material.
Finally, the sealing material should be checked periodically. If it is cracked or broken, it should be replaced immediately. It is also important to check the sink for any signs of water damage, and to inspect the seal for any signs of wear and tear. By taking these steps, homeowners can ensure that their kitchen sink drain remains in good condition and is properly sealed.
Maintaining the Sealed Kitchen Sink Drain
Maintaining a properly sealed kitchen sink drain is essential for keeping your kitchen clean and hygienic. But, the process of sealing a kitchen sink drain is often tedious and time consuming. To ensure your kitchen sink drain is properly sealed and stays that way, regular maintenance is a must. This article will provide you with tips on how to maintain a sealed kitchen sink drain, so you can keep your kitchen looking and smelling fresh.
The first step in maintaining a sealed kitchen sink drain is to ensure that any debris or food particles are removed from the drain and disposed of properly. This will help keep the drain clear of any clogs and prevent any nasty smells from developing. Additionally, it is important to regularly check the drain and pipes for any signs of corrosion or wear and tear. If any signs of damage are spotted, it is essential to repair it immediately.
To further protect your kitchen sink drain, it is important to use a drain protector to prevent any buildup of food particles. This will help prevent clogs and also help to keep the drain smelling fresh. Additionally, it is important to regularly clean the kitchen sink drain with a mild detergent and warm water to remove any grease or food residue that has accumulated.
Finally, it is important to check the seals around the pipes and connections leading to the kitchen sink drain. If the seals become loose or worn, it is essential to replace them immediately. Doing this will help to ensure that your kitchen sink drain remains properly sealed and safe from any leaks or odors.
By following these tips, you can maintain a sealed kitchen sink drain and keep your kitchen smelling fresh and clean.
Troubleshooting Tips for Kitchen Sink Drain Sealing
If you’re looking to seal your kitchen sink drain, it’s important to know the right steps to take. Sealing a kitchen sink drain can be a difficult process, but with the right knowledge and troubleshooting tips, you can get the job done without much hassle. Below are some tips to help you seal your kitchen sink drain correctly.
First, make sure the sink is clean and dry before you begin. To do this, use a degreasing solution and a damp cloth to wipe down the sink and drain. This will help to remove any debris and grease that might cause a problem when sealing the drain.
Next, use a sealant that is specifically designed for kitchen sinks. This will ensure a proper seal and prevent any leaks or clogs from occurring. Before applying the sealant, make sure to read the instructions and follow them carefully.
Finally, use a putty knife or other suitable tool to apply the sealant around the drain. Start at the top and work your way down, taking care to completely cover the drain in the sealant. Allow the sealant to dry for the recommended amount of time before using the sink.
By following these tips, you can ensure a successful seal of your kitchen sink drain. With the right knowledge and materials, you can keep your sink functioning properly for years to come.
Alternatives to Sealing the Kitchen Sink Drain
Did you know that sealing your kitchen sink drain is not the only way to prevent clogs and odors? It is true, and there are several alternatives that you can use to keep your kitchen sink drain free from clogs and smells.
One of the most popular alternatives is to use a strainer or a sink stopper. The strainer will catch any debris that may be floating in the water, while the sink stopper will help to keep the water from draining too quickly. This will help to prevent clogs from forming in the drain.
Another alternative is to use a trap. This device is installed under the sink and is designed to capture any debris that may be floating in the water before it can reach the drain. This will help to keep clogs from forming in the drain and will also help to keep odors from escaping.
Finally, you can also use a sink guard. This device is designed to keep larger objects from entering the drain. This will help to reduce the chance of a clog and will also prevent any odors from escaping through the drain.
Sealing your kitchen sink drain is not the only way to prevent clogs and odors. Using a strainer, sink stopper, trap, and a sink guard are all viable alternatives that can help to keep your kitchen sink drain free from clogs and smells.
FAQs About the How To Seal Kitchen Sink Drain
Q1. What kind of sealant should I use to seal my kitchen sink drain?
A1. A silicone-based sealant is typically the best choice for sealing a kitchen sink drain.
Q2. How long does the sealant need to dry before I can use the sink?
A2. Depending on the type of sealant you use, it should take between 24-48 hours for the sealant to fully cure and be ready for use.
Q3. Is there anything I need to do to prepare the sink drain before applying sealant?
A3. Yes, the drain should be clean and dry before applying the sealant. You should also remove any debris or buildup from the drain before sealing it.
Q4. Can I seal my kitchen sink myself?
A4. Yes, sealing a kitchen sink is a fairly simple process. However, if you are not confident in your abilities it is best to consult a professional for assistance.
Q5. How often should I reseal my kitchen sink?
A5. Depending on the amount of use your sink gets, you should reseal it every 6-12 months to ensure it remains sealed and watertight.
Conclusion
Overall, sealing the kitchen sink drain is a relatively simple task that can save you time, money, and energy. By using the right materials and following the necessary steps, you can ensure that your kitchen sink drain is watertight and reliable for years to come. With a little bit of knowledge and the right supplies, you can quickly and easily seal your kitchen sink drain.

