Building a kitchen island is an attractive way to upgrade your kitchen and increase its storage capacity. It is a relatively straightforward DIY project and can be completed in a single weekend if you have the right tools and materials. This guide will provide step-by-step instructions on how to build a kitchen island, including choosing the right materials, preparing the space, constructing the island, and adding the finishing touches. With careful planning and a bit of patience, you’ll be able to create a beautiful and functional kitchen island in no time.
Select an Appropriate Location for the Island
When planning to build a kitchen island, it is important to select the right location. This is the foundation for the entire project, so be sure to choose a spot that will best suit the needs of your kitchen. Think about the current layout and how the island will fit in with the current design. Consider how much space you have and how you want the island to fit in with the existing furniture. If you are tight on space, consider building an L-shaped island that can provide ample counter space while still conserving room. Additionally, make sure to take into account the distance between the island and other appliances such as the sink, stove, and refrigerator. The last thing you want is to build an island that is too close to these appliances and overcrowd the kitchen.
When selecting a location for your kitchen island, also be sure to factor in any plumbing or electrical requirements you might need. If you are planning to have a sink or dishwasher on the island, make sure to include a plumbing hook-up. Similarly, if you are planning to have lighting or other electrical features on the island, you will need to make sure to include an electrical hook-up. Taking these factors into account in the early stages of planning will help ensure that your kitchen island is built in the most efficient and practical way.
Measure the Space and Determine the Size of the Island
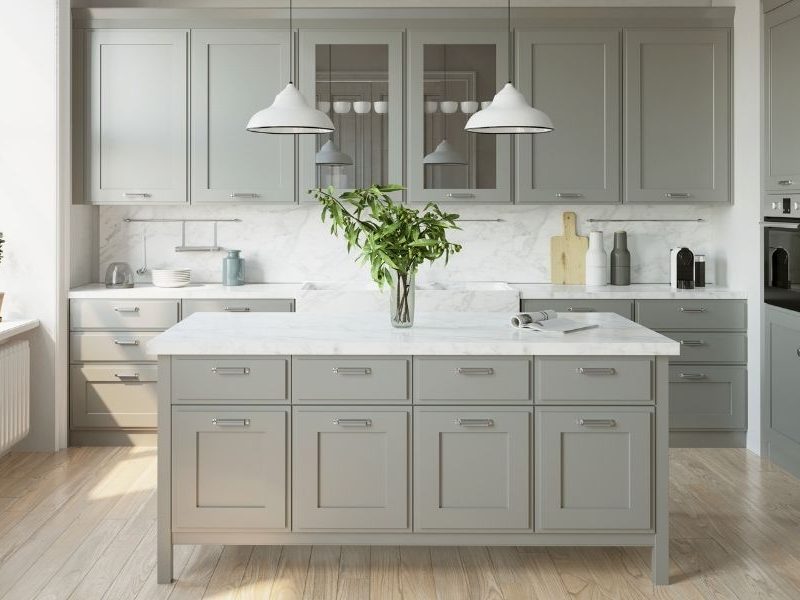
Creating a custom kitchen island can be a daunting task, but with the right knowledge and preparation, it can be achieved with ease. The first step to building the perfect kitchen island is to measure the space it will occupy. This will determine the size of the island and help you plan the design accordingly. Once the measurements have been taken, you can create a design to suit your needs. Consider the size of the island in relation to the other elements of your kitchen and how it will fit into the overall layout. Think about how you will use the island and plan accordingly, such as adding shelves, drawers, and seating. Ensure that it will be able to hold the items you intend to store and that it will function as you need it to. With the measurements and design finalized, you can begin the construction process.
Credit: www.thespruce.com
Choose the Right Materials for the Island
When building a kitchen island, it’s important to pick the right materials for the job. You’ll want materials that are strong and durable enough to withstand the weight of the island, as well as the wear and tear of daily use. Depending on what type of kitchen island you’re building, your materials will differ. For a rustic island, you may want to use reclaimed wood, while a modern island may require sleek countertop materials such as quartz or granite. Additionally, for a more functional island, you may want to consider stainless steel or concrete for a durable, sleek look. Once you’ve selected the materials, you’ll be ready to move on to the next step of building your kitchen island.
Construct the Island Frame
Constructing the frame of your kitchen island is the foundation for the entire project. Before you start, it’s important to measure the size of your kitchen and ensure the island will fit. Then, select the wood for the project. Pine is a great option for kitchen islands as it’s both affordable and durable. Once you’ve chosen the wood, you’ll need to cut it to size and assemble the frame. To ensure your frame is sturdy, use nails and wood glue. Once the frame is assembled, you can finish the island by painting or staining the wood. This step can really bring the island to life and make it look unique. Additionally, you can use a sealant to make the wood more resistant to moisture and staining. Building a kitchen island frame is a great way to take your kitchen space to the next level. With a few simple steps, you can have a beautiful and functional island that adds both style and storage to your kitchen.
Install the Cabinets and Shelving
Installing the cabinets and shelving for your kitchen island is a straightforward but time-consuming process. You will need to make sure that the cabinets are securely fastened to the island frame and that the shelves are properly supported. Start by measuring the length and width of the island frame to ensure that the cabinets and shelves you purchased have the proper fit. Next, use a drill and screws to attach the cabinets to the island frame. Depending on the type of cabinets you purchased, you may need to use a level to ensure that they are level. To install shelving, you will need to use a drill and brackets to mount the shelves to the island frame. If you are using adjustable shelves, you may need to use a tape measure to make sure the shelves are properly aligned. Once you have installed the cabinets and shelves, you can move on to adding the countertop and finishing touches.
Add Finishing Touches to the Island
The finishing touches to your kitchen island are just as important as the previous steps. From adding countertops to adding stylish hardware, these are the elements that will bring the island to life. Countertops are a great way to add a unique touch and can be made of durable materials such as quartz, granite, and marble. For a more modern look, stainless steel countertops are an excellent option. Additionally, you can also select stylish hardware to attach to the island and create a unique look. There are many choices to choose from such as cup pulls, knobs, and bar handles. Finally, be sure to select a paint color that will match the rest of your kitchen, and consider installing task lighting in the island for added convenience. With these finishing touches, your kitchen island will be complete and ready for use.
FAQs About the How To Build A Kitchen Island Step By Step?
1. What type of materials will I need to build a kitchen island?
Answer: You will need wood, nails, screws, screws, drill bits, saw, sandpaper, and wood sealant.
2. How long will it take to build a kitchen island?
Answer: Depending on the size of the project, it can take up to several hours or even days to build a kitchen island.
3. What tools will I need to build a kitchen island?
Answer: You will need a drill, saw, hammer, screwdriver, sandpaper, and wood sealant. You may also need clamps, a jig saw, and a miter saw.
Conclusion
Building a kitchen island is a great way to add extra counter space and storage to your kitchen. With the right tools and materials, you can create a custom kitchen island that will fit perfectly with your kitchen’s design. By following these steps, you can easily create a beautiful and functional kitchen island. With a bit of planning, patience, and creativity, you can create a kitchen island that will be the perfect addition to your home.