When it comes to kitchen maintenance, one of the most important tasks is learning how to disconnect the kitchen faucet. This is necessary if you ever need to replace the faucet, or if you want to perform any type of repair. While disconnecting a kitchen faucet may seem daunting, it is a fairly simple process that can be completed in a few steps. With the right tools and some patience, you can easily disconnect your kitchen faucet in no time.
Tools and Materials Required
Are you planning to disconnect your kitchen faucet? Disconnecting a kitchen faucet is a task that can be done quickly and easily as long as you have the right tools and materials. To successfully disconnect your kitchen faucet, you will need a few tools and materials. These include pliers, a basin wrench, a screwdriver, and a replacement faucet. Before you begin, make sure you have all of the necessary tools and materials on hand.
Pliers are used to disconnect hot and cold water lines. A basin wrench is used to remove the nuts that hold the faucet in place. A screwdriver is needed to remove the screws that hold the faucet in place. Finally, a replacement faucet will be needed if you are replacing the existing one.
Once you have all of the necessary tools and materials, you can start the process of disconnecting the kitchen faucet. Before you start, make sure to turn off the water supply to the faucet and make sure the area around the faucet is clear and free of debris. When you are ready, use the pliers to disconnect the hot and cold water lines from the faucet. Then use the basin wrench to remove the nuts that hold the faucet in place. Finally, use the screwdriver to remove the screws that hold the faucet in place. Once the faucet has been disconnected, you can then install the replacement faucet.
Turning off the Water Supply
One of the most important steps when it comes to disconnecting a kitchen faucet is to turn off the water supply. This is a crucial step for any repair job and should not be overlooked. To turn off the water supply, you must locate the shut-off valve. This is usually located underneath the sink, but it may also be located behind a wall. Once you have located the shut-off valve, turn it clockwise to shut off the water supply. After the water is completely shut off, you can proceed to disconnect the faucet from the water supply.
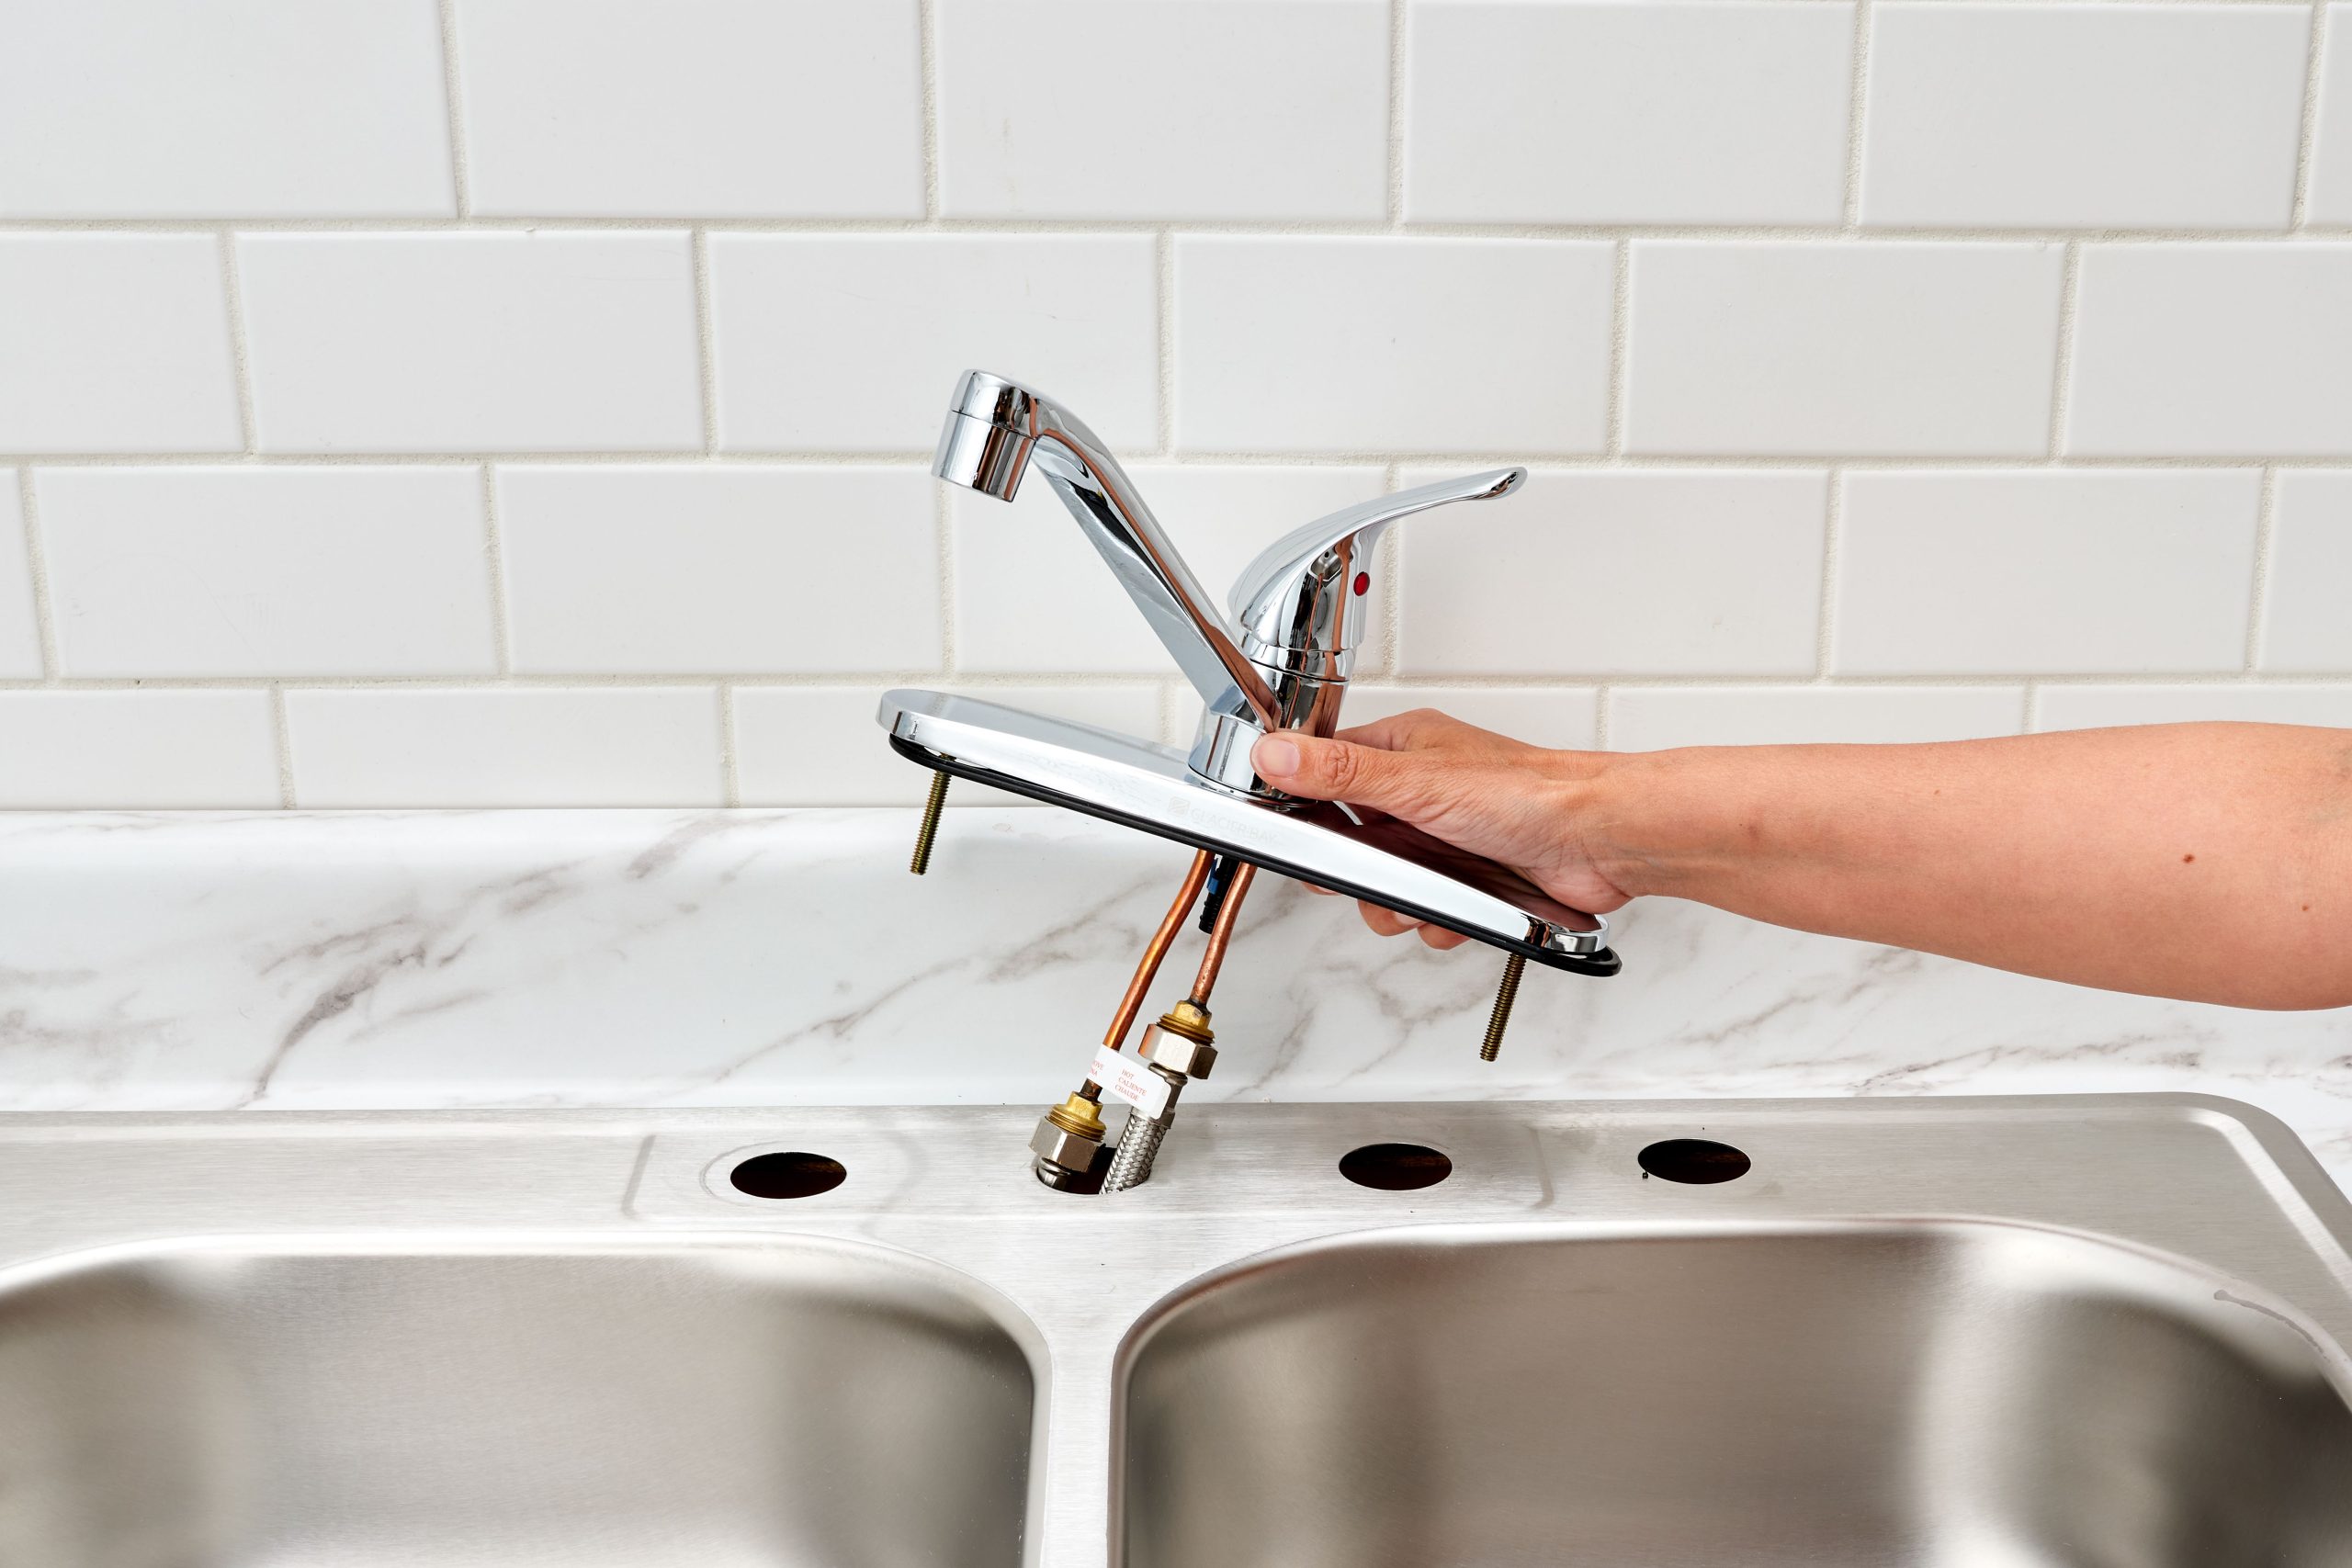
Removing the Old Faucet
The process of replacing a kitchen faucet can seem daunting, but it doesn’t have to be. Before starting, make sure you have all the necessary tools and supplies. To begin, you’ll need to disconnect the old faucet. This includes turning off the water supply, removing the faucet handles, and disconnecting the hoses and pipes. For a detailed overview of the steps you’ll need to take, read on.
First, turn off the water supply. You can do this by turning the shut-off valves located beneath the sink. If these valves are not accessible, locate the main water supply valve and turn it off. Next, unscrew the handles of the faucet. They should come off easily with a screwdriver or wrench. Once the handles are off, you can remove the nuts that secure the faucet to the sink.
Once the nuts are off, you can disconnect the hoses and pipes. These will be connected to the hot and cold water supply lines. For standard compression fittings, you’ll need to unscrew these with a wrench. If the fittings are of a different type, refer to the manufacturer’s instructions for how to disconnect them. Finally, you can lift the faucet off the sink and set it aside.
Now your old faucet is disconnected and ready to be replaced. Be sure to save all the nuts, bolts, and other parts you removed in a secure place so you can use them when you install the new faucet.
Preparing the New Faucet
Preparing a new kitchen faucet is a critical step in replacing your old one. To ensure you have the best experience, it is essential to take the necessary precautions to ensure the new faucet fits securely and correctly. First, you must identify the type of faucet you have and purchase a compatible replacement. This is typically done by matching the size and number of holes in the sink to the new faucet. If you are unsure about what type of faucet you have, consult an expert or take a photo and bring it to a hardware store for assistance.
Next, you should gather the tools you need for the job. This includes a basin wrench, adjustable wrench, screwdriver, plumber’s putty, and a towel. Once you have all the tools you need, you can begin to disconnect the old faucet. Make sure to turn off the water supply to the sink, then remove the nuts and bolts from the faucet. Carefully lift the faucet from the sink, being careful not to damage the sink or the faucet. Finally, use a towel to wipe down the sink and remove any residue from the old faucet. Now you are ready to install the new faucet.

Connecting the Water Supply Lines
Having a functional kitchen faucet is a necessity in any household. But when it comes to disconnecting a kitchen faucet, it’s not always an easy task. Knowing the right steps to take when disconnecting a kitchen faucet will help you complete this job and avoid any unnecessary damage. The most important step is to disconnect the water supply lines.
To begin, locate the shutoff valves that control the water supply to the faucet. If you have a single-handle faucet, the lines will be behind the faucet, either in the wall or underneath the sink. If you have a two-handle faucet, the lines will be located in the wall or under the sink. Once you have identified the valves, turn them off and label them.
Next, use a pair of adjustable pliers to loosen the nuts that secure the water lines to the faucet. Once these are loose, you can move the lines away from the faucet. Then, use a pair of channel-type pliers to loosen the supply lines from the valves.
Now, you can remove the faucet from the sink. There may be a mounting nut that needs to be removed with an adjustable wrench. Once the mounting nut is removed, you can pull the faucet from the sink.
These simple steps will help you successfully disconnect a kitchen faucet. Knowing the right procedure for disconnecting a kitchen faucet can save you time and frustration, and ensure that you complete the job.
Final Touches and Testing
The last step in successfully disconnecting a kitchen faucet is to make sure everything is properly tightened. This includes the mounting nut, the supply lines, and the drain connections. Once everything is firmly secured, turn on the faucet and check for any leaks. If all is good, then it’s time to turn on the water supply to the kitchen faucet and give it a test run. Make sure to check for any further leaks and ensure the water pressure is adequate to provide a good flow. Once you’re satisfied that all is in order, you can turn off the water supply and your kitchen faucet should be fully disconnected.
Troubleshooting Common Issues
Having a faulty kitchen faucet can be a real nuisance. It may be leaking, dripping, or not working properly. But, don’t worry, there are simple solutions that can help you disconnect your kitchen faucets quickly and easily. Here are some tips on how to troubleshoot common issues to get your faucet back up and running without a hitch.
First, it is important to identify the model and type of your faucet. Different faucets have different designs and require different steps to be disconnected. If you don’t know the model, you can search for the manufacturer’s website and look up the model number. Once you know the model, you can follow the instructions provided for the specific type of faucet.
Second, you should make sure that the water is turned off. You can do this by shutting off the main water supply valve or turning off the valves underneath the sink. This step is critical to avoid any water damage or injury during the disconnection process.
Third, you should locate the sink nuts and unscrew them using a pair of adjustable pliers. Once the nuts are removed, you can gently pull the faucet away from the sink. If the faucet is connected to a hose, you can disconnect it with a wrench.
Finally, you should be sure to clean up any debris that may have fallen into the sink and replace the nuts. This will ensure a secure connection when you connect the new faucet.
By following these steps, you should be able to quickly and easily disconnect your kitchen faucet. However, you can always contact a professional plumber for assistance if you are still having trouble.
FAQs About the How To Disconnect Kitchen Faucet
Q1. How do I disconnect a kitchen faucet?
A1. To disconnect a kitchen faucet, first turn off the water supply to the faucet. Then, remove the retaining nut or screws that secure the faucet to the sink. Next, pull the faucet away from the sink and disconnect the supply lines from the faucet. Finally, remove any remaining mounting hardware from the sink.
Q2. Can I disconnect a kitchen faucet without turning off the water supply?
A2. No, it is not safe to disconnect a kitchen faucet without first turning off the water supply. Doing so could result in a serious water leak.
Q3. What tools do I need to disconnect a kitchen faucet?
A3. To disconnect a kitchen faucet, you will need a wrench or pliers to remove the retaining nut or screws that secure the faucet to the sink. You may also need an adjustable wrench to disconnect the supply lines.
Conclusion
Disconnecting your kitchen faucet is a relatively quick and simple process. You’ll need to turn off the water supply to the faucet, remove the handle, unscrew the nuts that secure the faucet to the sink, disconnect the water supply lines, and remove the faucet from the sink. Once the faucet is disconnected, you can replace it with a new one or take it apart for repairs. Following this guide will ensure you disconnect your kitchen faucet safely and correctly.

