A kitchen drawer that won’t open or close properly can be an annoying problem. Fortunately, it is often a relatively easy fix and can be done with minimal tools. In this guide, we will discuss how to fix a kitchen drawer that won’t open or close properly. We will cover how to assess the issue, the tools you will need, and a step-by-step process on how to fix the drawer. Once you have completed these steps, you should have a fully functioning kitchen drawer and enjoy the convenience it provides.
Identifying the Problem
When attempting to fix a kitchen drawer, the first step is to accurately identify the problem. Understanding the exact problem is key to successfully solving it.
If the drawer slides are worn out or not properly fitted, the drawer may not open or close properly. If the hardware, such as the drawer slides and screws, is loose, the drawer may not stay in place. Additionally, if the drawer is sagging or not properly aligned, it may not open or close properly.
To accurately identify the problem, take a close look at the drawer and the hardware. It is important to check for any signs of wear and tear, loose screws, and misalignment. Once the problem is identified, it will be much easier to fix the drawer.
Gathering the Required Supplies
Fixing a kitchen drawer does not have to be a daunting task. To ensure that the job is done right, you need to start by gathering all the required supplies. This includes a screwdriver, a new set of screws, a level, a putty knife, sandpaper, and a drill bit. You may also need some wood glue, depending on the type of drawer you are fixing. Once you have all the necessary tools and materials, you can begin the repair process.
One of the most important steps in fixing a kitchen drawer is to make sure you have the right screws. If the screws are too long, they can cause structural damage to the drawer and its components. You should measure the depth of the drawer to determine how many screws you need and then select the appropriate size.
Once you have the right screws, you need to make sure that the drawer is level by using the level. If the drawer is not level, you may need to make some adjustments to ensure it is even before you begin the repair process.
The next step is to sand down the drawer frame and the drawer glides to ensure they are smooth and even. You may also need to apply wood glue to the drawer glides to ensure they are securely attached.
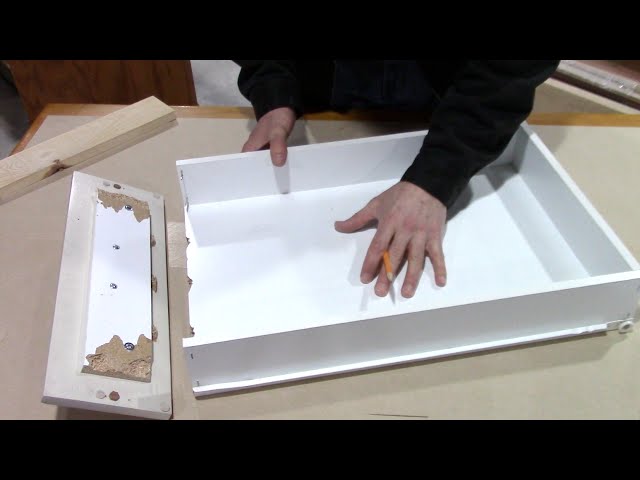
Removing the Drawer
Removing the drawer from the cabinet can be a frustrating task. Many kitchen drawers are held in place with screws, nails, or pegs that can be difficult to access. To make the process easier, start by removing the drawer glides or slides. These can usually be unscrewed or unclipped without any tools. Once the slides are removed, the drawer should slide out fairly easily. If the drawer is still stuck, you may need to use a putty knife or screwdriver to pry the drawer open. Make sure to check for any obstructions that may be preventing the drawer from moving. Once the drawer is removed, you can assess the problem and begin repairs.
Reassembling the Drawer
Having a kitchen drawer that’s fallen apart is one of the most common household frustrations. Luckily, it’s usually not a difficult problem to solve. To reassemble the drawer, you’ll need a few basic tools and a few minutes. Here’s a step-by-step guide to help you get your drawers back in working order in no time.
First, put all the pieces of the drawer together in the way you think they should fit. If you can’t remember how it was originally assembled, you’ll need to look at an exploded diagram or photograph of the drawer in its original state.
Once you have all the pieces in the correct order, you’ll need to secure them together. If you’re using screws, make sure to use a screwdriver that fits the screws correctly, and if you’re using nails, use a hammer that’s the correct size. Be careful not to over-tighten the screws, as this may cause the drawer to become structurally unsound.
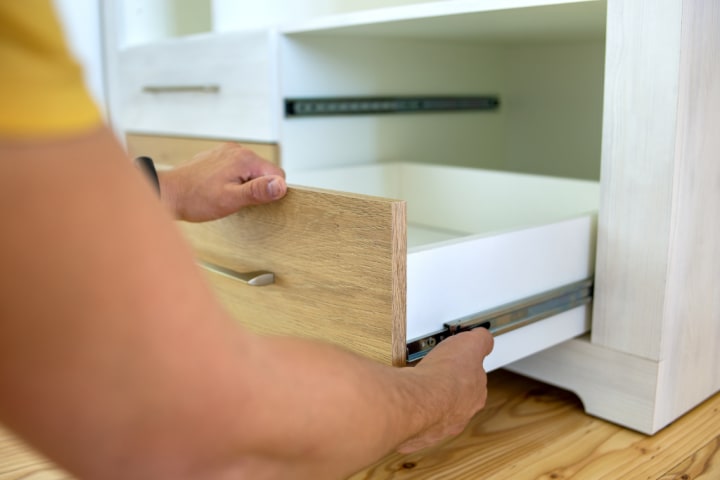
Once the drawer is put together, you’ll need to attach the drawer to its frame. This can be done using screws, nails, or adhesive tape. Again, make sure you’re using the correct tools and materials for the job.
Finally, the drawer should be level and able to slide smoothly. If it’s not, you may need to adjust the screws, nails, or adhesive tape. Once the drawer is level and slides properly, you can enjoy the satisfaction of having fixed your kitchen drawer!
Preventative Maintenance
Preventative maintenance is essential for keeping your kitchen drawers in good condition. To ensure your kitchen drawers have longevity, perform regular checks for signs of wear and tear. Look for loose screws, dents and scratches, and weak parts that need to be replaced. Additionally, check the alignment of the drawer to make sure it’s not too tight or too loose. If the drawer is too tight, it can cause the wood to become warped over time. Cleaning your kitchen drawers regularly with a damp cloth will help to prevent dust and dirt from building up. Any stuck-on residue can be removed with a mild detergent. If your drawer includes a track, lubricate it with a silicone spray to keep it running smoothly. Following these simple steps will help to keep your kitchen drawers in top condition.
Troubleshooting Common Issues
When it comes to fixing a kitchen drawer, it’s important to first identify and troubleshoot the issue. In this blog, we’ll explore common issues that arise with kitchen drawers, such as broken or loose drawers, sticking drawers, and misaligned drawers, and provide tips and tricks on how to fix them.
A broken or loose drawer can be one of the most frustrating problems to deal with. To fix it, it’s important to assess the damage and determine if the drawer can be repaired or if it needs to be replaced. If the drawer can be salvaged, replacing the hardware and reinforcing the joints can help to stabilize it. If the drawer is beyond repair, installation of a new one may be the best option.
Sticking drawers can be caused by several issues, including worn-out hardware, dirt, and debris buildup, or warped wood. To fix it, try cleaning or replacing the hardware, lubricating the moving parts, or adding a few drops of furniture wax to the drawer slides. If the drawer still won’t budge, sanding or planing the wood may be necessary.
Misaligned drawers can be tricky to repair, but it can be done. Check the drawer’s alignment and adjust the screws on the drawer’s glides to correct it. If the alignment is still off, you may need to reposition the drawer’s support brackets or replace the glides.
With the right tools and a bit of patience, you can fix most kitchen drawer issues without the help of a professional. Hopefully, these tips and tricks will help you get your drawers back on track.
Conclusion
Fixing a kitchen drawer is not a difficult task. You just need the right tools, hardware, and a few simple steps. With just a few simple steps, you can easily repair a broken drawer and get it back in working order. With the right tools and hardware, you can repair damaged drawers and make them look like new.

