Fixing a leaky kitchen faucet Delta is a relatively easy task that most homeowners can do themselves without the help of a professional plumber. Delta faucets are known for their quality and dependability, and with simple maintenance and occasional repairs, your Delta faucet should provide many years of service. The first step to fixing a leaky Delta kitchen faucet is to identify the source of the leak. In most cases, the leak is coming from the handle or cartridge assembly. Once the source is identified, the necessary parts must be purchased and the faucet can be disassembled and repaired. Depending on the model of the faucet, the repair may involve replacing the stem, the O-ring, the packing nut, or the entire cartridge assembly. With the right tools and some patience, you can easily fix a leaky Delta kitchen faucet.
Identifying the Problem
Do you have a pesky kitchen faucet that’s been leaking non-stop? You’re not alone! Leaky kitchen faucets are common occurrences and can be a frustrating problem to have, but luckily, it’s an issue that can be resolved with just a few simple steps. The first step to fixing a leaking kitchen faucet Delta is to identify the problem.
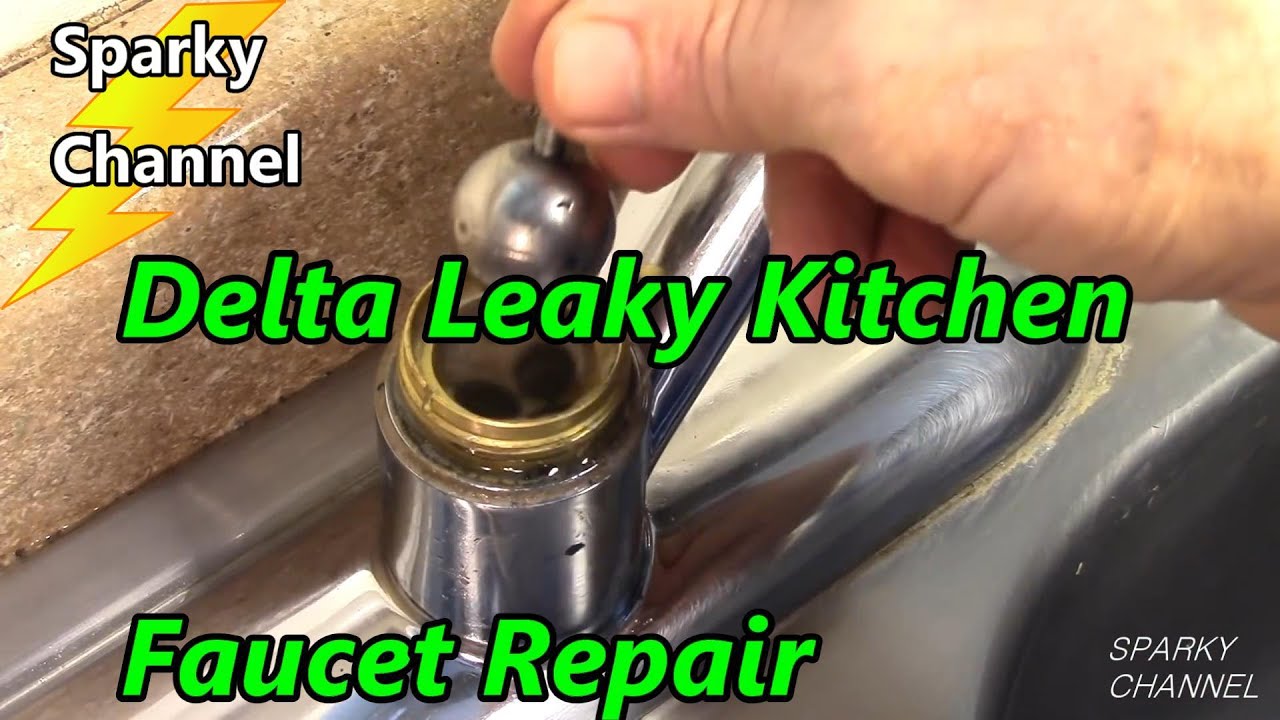
When diagnosing a leaky kitchen faucet Delta, the most common problems are a worn-out O-ring, a loose handle, or a worn-out valve seat. To determine where the leak is coming from, you’ll need to check the O-ring, handle, and valve seat. To check the O-ring, remove the handle from the faucet, then unscrew the packing nut. If the O-ring is worn out or cracked, you’ll need to replace it with a new one. To check the handle, remove the handle from the faucet, then unscrew the screw on the bottom of the handle. If the handle is loose, tighten the screw. To check the valve seat, remove the handle, then unscrew the packing nut, and remove the valve seat. If the valve seat is worn out or cracked, you’ll need to replace it.
Once you’ve identified the source of the leak, you’ll be able to fix the leaky kitchen faucet Delta and get your kitchen back to its normal functioning state.
Gather the Necessary Tools and Materials
A leaky kitchen faucet can be a nuisance, but luckily the fix is often relatively simple. Before getting started, it’s important to have all the necessary tools and materials on hand. Depending on the type of faucet, the tools and materials may vary, but they usually include an adjustable wrench, a screwdriver, a sink basin wrench, a plumber’s putty, and new gaskets and washers. If the faucet is a Delta, it will likely also require a repair kit.
Once you have the necessary tools and materials, you’ll be ready to begin the repair process. Before taking apart the faucet, make sure to shut off the water supply. Then, carefully remove the handle and the spout housing. Be careful not to lose any of the small parts, as they are necessary for the repair. After the parts are removed, use an adjustable wrench to unscrew the mounting nut and remove the valve body.
Overall, fixing a leaky kitchen faucet is a relatively simple task as long as you have the necessary tools and materials. Knowing which tools and materials are required will make the process easier and save you time and money. With the right supplies and a bit of patience, you can get your faucet fixed in no time.
Shutting Off the Water Supply
The first step to fixing a leaky kitchen faucet Delta is to shut off the water supply. To do this, locate the shut-off valves under the sink and turn them clockwise until you can no longer turn them. After the water supply is shut off, open the faucet to let the remaining water out, and then unscrew the handle of the faucet. With the handle removed, you can assess the problem and decide the best course of action.
If there is a lot of corrosion or rust on the faucet parts, it may be best to replace the entire faucet. If the problem is more minor, such as a worn-out washer or O-ring, you may be able to repair it yourself. If you decide to repair it yourself, you will need to find the right replacement parts for the faucet. Depending on the model, you may be able to find parts online or at a hardware store.
Removing the Old Faucet
Leaky kitchen faucets are a nuisance, but with the right tools and some patience, you can fix a leaky kitchen faucet in Delta. The process starts with removing the old faucet. Before you start, make sure you have the right tools. You’ll need a wrench, a screwdriver, and a bucket to catch any water that might come out.
Start by shutting off the water supply to the faucet. This is usually done by turning the valves underneath the sink. Then, use the wrench to loosen the bolts that are holding the faucet in place. Once the bolts are removed, use the screwdriver to carefully take out any screws that are holding the faucet in place. Now, you should be able to lift the faucet out of the sink.
It’s important to be careful when removing the old faucet since any damage to the sink or the faucet could make it difficult to install the new one. Once the old faucet is removed, you can move on to the next step in fixing your leaky kitchen faucet Delta.
Installing the New Faucet
Installing a new faucet can be a daunting task, but with the right tools and a little know-how, it can be a relatively easy home improvement project. For this article, we will be focusing on a Delta kitchen faucet. Delta is a well-known and trusted name in kitchen fixtures, and it makes installation of a new faucet a simple process. Before beginning, make sure you have all the necessary tools and materials. These include a screwdriver, an adjustable wrench, a sink basin wrench, a plumber’s putty, and Teflon tape. Once you have these items, follow the steps below to successfully install a Delta kitchen faucet.
First, turn off the water supply and remove the old faucet. Then, clean the area around the faucet and apply the plumber’s putty or silicone caulk to the base of the new faucet. Next, attach the supply lines to the faucet and connect them to the water supply lines. Once the supply lines are secure, place the faucet onto the sink and secure it with mounting nuts. Finally, turn on the water supply and test the faucet to make sure it is working correctly.
By following these easy steps, you can successfully install a Delta kitchen faucet and start enjoying the convenience of a modern kitchen fixture. With the right tools and a little bit of know-how, you can give your kitchen a fresh, new look without having to hire a professional.
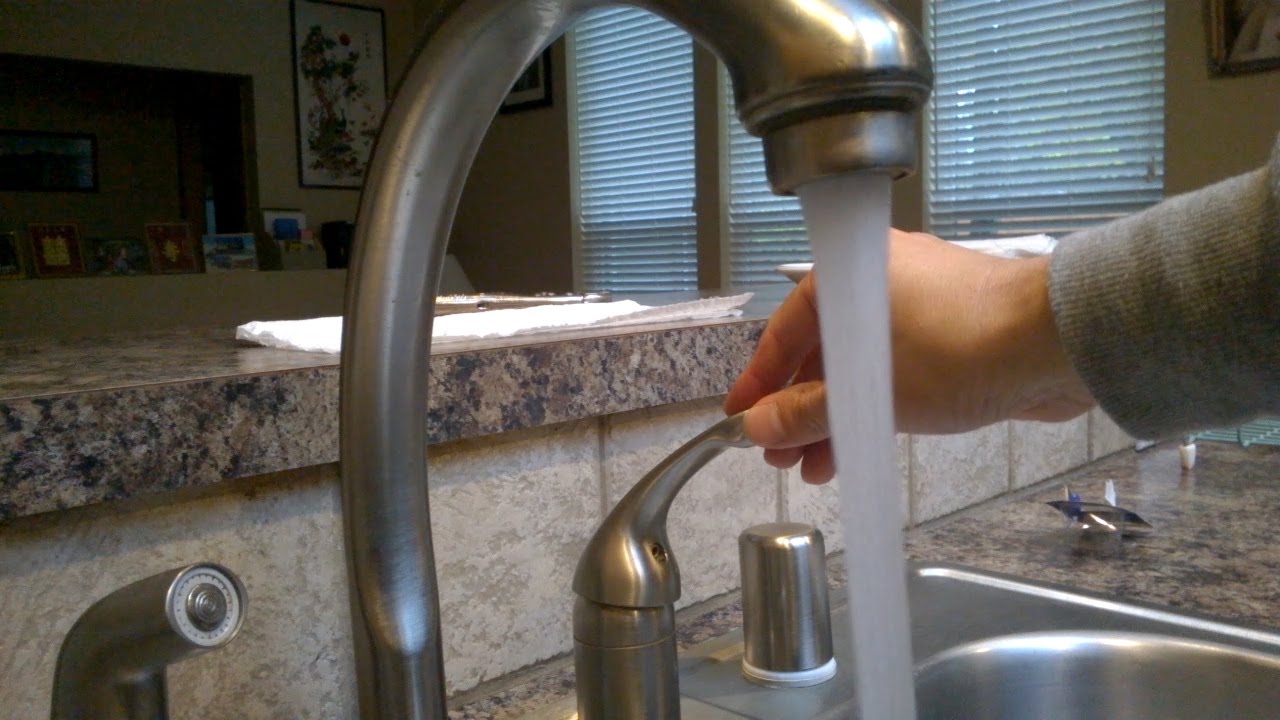
Testing the Faucet
Tackling a faucet leak is a job many homeowners can do themselves, but it does require some additional knowledge and the right tools. Before you can start to fix a leaky kitchen faucet Delta, it’s important to test it to determine the source of the leak. This will allow you to make sure you’re addressing the right issue.
Testing your Delta kitchen faucet starts by turning the water off. You’ll then need to remove the handle and any other components that are blocking access to the faucet. If the faucet is leaking from the handle, the O-ring is likely the culprit. Replace the O-ring and tighten the nut to ensure a proper seal.
If the faucet is leaking from the spout, it may be the valve seat. The valve seat is responsible for controlling the water flow and can wear down over time. Replacing the valve seat should solve the problem.
Finally, if the faucet is leaking from the base, the issue may be more complicated. You may need to remove the entire faucet and replace the seals and gaskets.
Testing and troubleshooting your Delta kitchen faucet can be a daunting task, but it’s an important step in trying to fix a leaky kitchen faucet. Taking the time to properly test your faucet will help you identify the source of the leak and ensure the repair job is done correctly.
Clean Up and Final Inspections
When it comes to repairing a leaking kitchen faucet Delta, cleanup and final inspections are the last step. Once the faucet is re-installed, be sure to check for any leaks that may have been missed. Clean the faucet and sink area thoroughly, removing any dirt, debris, or mineral deposits. This will help ensure that the faucet is in the best condition and that it is free of corrosion or any other problems. Once you are satisfied that the faucet is working properly, you can now enjoy the results of your efforts.
It is important to remember that a leaking kitchen faucet in Delta is not something to be taken lightly. If you are unable to fix it yourself, seek the help of a professional plumber. They can offer detailed advice on how to repair the problem as well as any preventative maintenance tips. Additionally, they can provide the necessary tools and supplies to make sure the repair job is done right. Taking the time to properly fix the problem will prevent further damage to your faucet and keep your kitchen looking great.
Troubleshooting Common Issues
Troubleshooting your Delta kitchen faucet is a straightforward process. Several common issues can be fixed quickly and easily without the need to call a plumber. With a few simple steps and the right tools, you can often fix most minor kitchen faucet problems.
The first step in troubleshooting a leaking kitchen faucet is to identify the source of the leak. In most cases, a Delta kitchen faucet leak is caused by a worn or loose washer or a faulty O-ring. If the leak is coming from the handle, check the valve stem for damage or wear.
Once you have identified the source of the leak, it’s time to start repairs. If the source of the leak is a worn washer, simply replace it. To replace the O-ring, you will need to dismantle the faucet and remove the old O-ring. If the valve stem is worn or damaged, it will need to be replaced.
Be sure to turn off the water supply before beginning any repairs. It’s also important to make sure you have the right tools and replacement parts for the job. Make sure the replacement parts are designed for your specific Delta kitchen faucet model.
Once the repairs are complete, turn on the water and test your faucet. If the leak persists, it may be time to call a professional plumber. With the right tools and know-how, troubleshooting a Delta kitchen faucet leak is a simple process. With a few simple steps, you can often fix the problem quickly and easily.
Conclusion
Fixing a leaky kitchen faucet Delta is a straightforward process. It requires the right tools and a bit of patience. With the right instructions, it is easy to do the job yourself. Make sure to shut off the water supply to the faucet before doing any work. Then, you will need to remove the handle and the retainer nut before pulling out the cartridge. Before replacing the cartridge, you may need to clean the faucet body and the valve seat before installing the new cartridge. Once the cartridge is in place and the handle and retainer nut are back in place, you can turn the water back on and test the faucet to ensure it is completely leak-free.

