A broken handle on a kitchen faucet can be a nuisance, but it doesn’t have to be a major problem. With the right tools and materials, you can easily fix your handle yourself. Before you start, make sure the water supply is shut off and the faucet is dry. Then, use a screwdriver to remove the screws holding the handle in place. Next, remove any nuts, washers, and other parts that may be attached to the handle. Once all the pieces are removed, you can replace the broken handle with a new one. After the new handle is in place, reattach any nuts, washers, and other parts and tighten the screws to secure the handle. You can then turn the water supply back on and enjoy your newly repaired kitchen faucet.
Identifying the Problem
Kitchen faucets are an essential part of every kitchen, and a faulty handle can be a major inconvenience. While it may be tempting to call a plumber for help, fixing a handle on a kitchen faucet is often a simple and cost-effective DIY job. Before you begin, it’s important to identify the cause of the problem.
Common causes of a faulty handle on a kitchen faucet include a broken handle, a cracked base, a loose screw, or a faulty valve. To determine the cause of the issue, first turn off the water supply and remove the handle. Inspect the handle, base, and valve to identify any visible signs of damage or wear and tear.
Once the cause of the problem has been identified, the repair process can begin. With the right tools and knowledge, most kitchen faucet handle issues can be quickly and easily fixed.
Gather Tools and Supplies
When it comes to fixing a handle on a kitchen faucet, it is important to ensure that you have all the necessary tools and supplies ready before you start the job. This will help you make sure that you can complete the task in a timely and efficient manner. Having the right tools and supplies can also save you from having to make multiple trips to the hardware store if you find out that you are missing something.
Essential tools and supplies for this job include a screwdriver, a basin wrench, pliers, plumbing tape, a new handle, and a handle adapter. You may also need a wrench set, an adjustable wrench, and a basin wrench extension if you need to access hard-to-reach areas. Other items you may need include a flashlight, a drop cloth, and a rag.
Making sure you have the right tools and supplies before taking on a kitchen faucet repair job can save you from a lot of frustration. Taking the time to gather the necessary items will help make the process easier and ensure that the job is done correctly.
Shut Off the Water Supply
A leaking faucet is a common problem in most kitchens. A broken handle can be the cause of a leaking faucet. Fortunately, fixing a handle on a kitchen faucet is a relatively simple task that can be done in a few easy steps. Before starting, it is important to shut off the water supply to the faucet. This can be done by turning off the shutoff valves located underneath the sink. Once the water supply is shut off, you can begin the process of replacing the handle.
The first step is to remove the old handle. This can be done by unscrewing the screws located at the base of the handle. Once the screws have been removed, the handle should be able to be pulled off. If the handle is stuck, use a flathead screwdriver to gently pry it off. After the old handle has been removed, you can begin to install the new handle. Start by lining up the screw holes on the handle with those on the faucet base. Once the handle is secured, turn the water supply back on and test the faucet to make sure it works properly.
Following these simple steps will help you easily fix a handle on your kitchen faucet. Once the handle is replaced, you should no longer have to worry about a leaking faucet.
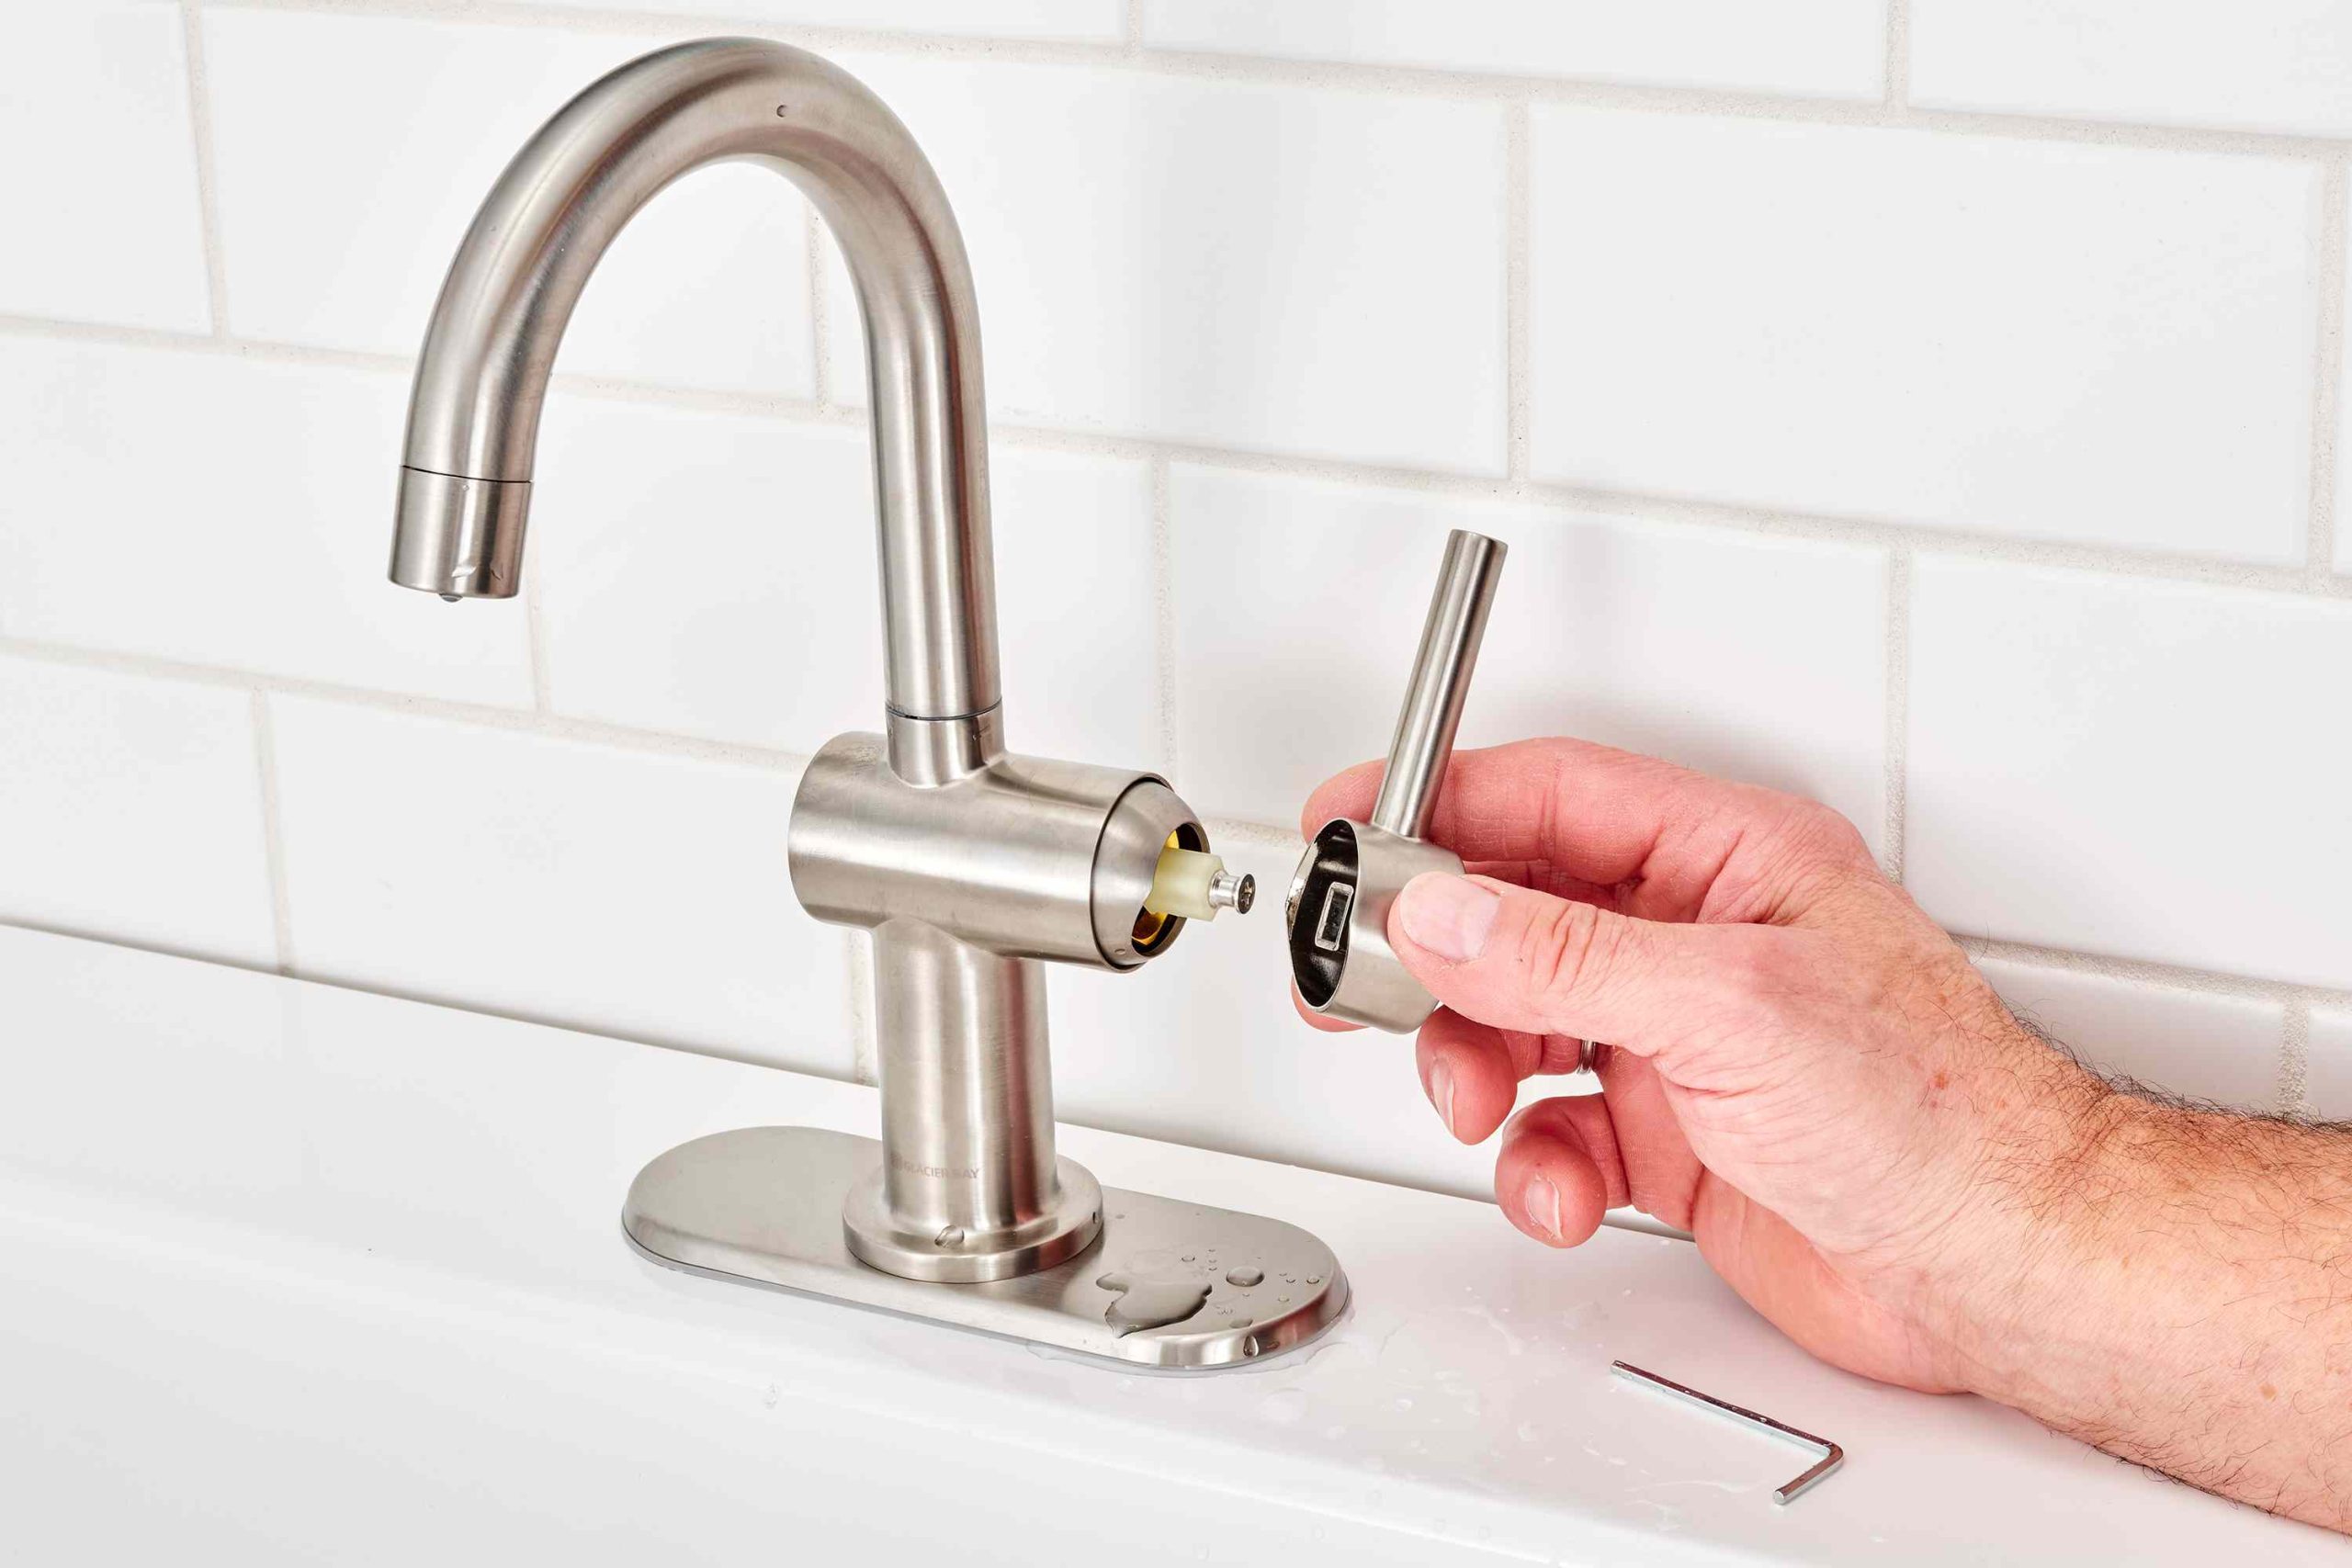
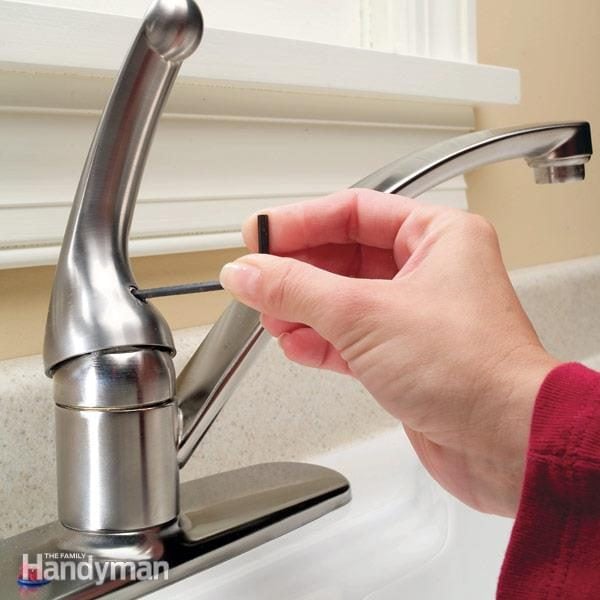
Pull Out the Old Handle
When it comes to fixing kitchen faucets, the first step is to remove the old handle. This may seem intimidating, but it’s simpler than it looks. Start by turning off the water supply to the faucet. Once the water is off, use a screwdriver to remove the screw from the handle. Pull the handle off the faucet and make sure to save the screw and the handle for later. If the handle is stuck, you may need to use a pair of pliers to help loosen it. After the old handle is removed, you’re ready to begin installing the new one.
Install the New Handle
When it comes to fixing a kitchen faucet handle, the first step is to install the new handle. Depending on the type of faucet you have, the steps may vary. For instance, if you have a two-handle faucet, you will need to make sure that the handles are matched with the appropriate holes in the faucet body. The handle should also be positioned correctly so that the handle is parallel to the faucet body.
For single-handle faucets, it is important to first identify the type of handle that is needed. You will need to measure the distance between the center of the handle and the hole in the faucet body. This will ensure that the handle is properly installed. You may also need to determine if the handle is left-handed or right-handed.
Once the correct handle is identified, the handle can be installed. It is important to ensure that the handle is tightened securely so that it does not become loose over time. Additionally, the handle should be aligned correctly so that it does not become a tripping hazard.
Finally, the faucet handle should be tested to make sure that the handle operates properly. If the handle fails to turn on or off the water, additional adjustments may be needed to ensure that the handle works correctly.
Installing a new handle on a kitchen faucet is a relatively easy task. By following the necessary steps, it is possible to quickly and easily fix a kitchen faucet handle.
Reattach the Faucet Supply Lines
Reattaching the supply lines to the kitchen faucet is a relatively easy task that requires a few simple tools. To begin, shut off the water supply to the faucet. Next, unscrew the nut from the supply line and remove the old supply line. Once the old supply line has been removed, grab the new supply line and attach it to the faucet. Be sure to use a wrench to tighten the nut and secure the supply line. Finally, turn the water back on and check to make sure the connection is tight and there are no leaks. With these simple steps, you can easily fix the handle on your kitchen faucet.
Turn the Water Supply Back On
Once you’ve completed your repairs on your kitchen faucet handle, the next step is to turn the water supply back on. Doing this properly is essential to ensure that your faucet is functioning correctly and that no water damage occurs. To start, locate the water shutoff valve and turn it on. Check the valve and the faucet for any leaks and if there are none, turn the faucet on to full force and let the water run for a minute. This will help flush out any debris or dirt that may have gotten into the pipes and will help ensure your faucet is working properly. After this, you’re all done and can enjoy a fully functioning kitchen faucet handle.
Test for Leaks and Final Adjustments
After carefully installing the new handle, it is important to ensure that the faucet is functioning properly and without leaks. To do this, turn on the water and check the connection points for any leaks. If any are found, tighten the connections using an adjustable wrench. Additionally, if the handle does not turn on and off properly, it may be necessary to adjust the valve stem. This can be done by using a flathead screwdriver to turn the stem counterclockwise until the handle turns on and off properly. Lastly, if the handle is too stiff or loose, try adjusting the compression nut located behind the handle. This can often be done by hand, but if the nut is too tight, use a wrench to turn it clockwise.
Once all adjustments are complete, the handle should be functioning properly. To ensure the longevity of the faucet, remember to check the connection points for leaks every few months. Doing this will help prevent any potential damage and ensure that the handle continues to work properly.
FAQs About the How To Fix Handle On Kitchen Faucet
1. How can I fix a loose handle on my kitchen faucet?
Answer: You will need to tighten the handle using a flathead screwdriver. Start by removing the decorative cap and loosening the set screw. Then, tighten the screw underneath the handle to secure the handle back in place.
2. How can I fix a broken handle on my kitchen faucet?
Answer: You may need to replace the handle if it is broken. Start by unscrewing the handle and then removing the retaining nut behind it. You can then replace the handle with a new one.
3. How can I fix a leaky handle on my kitchen faucet?
Answer: You may need to replace the O-ring seal, which is located behind the handle. To do this, you’ll need to remove the handle and unscrew the retaining nut. You can then replace the O-ring and reassemble the handle.
Conclusion
To fix a handle on a kitchen faucet, you will need to first identify the problem. If the handle is loose, you can tighten the nut or screw that holds it in place. You may also need to replace the handle or the entire faucet depending on the extent of the damage. If the handle is leaking, you can try replacing the O-ring or stem washer. Ultimately, to fix a handle on a kitchen faucet, you will need to identify the source of the problem and either tighten or replace the parts as needed.

