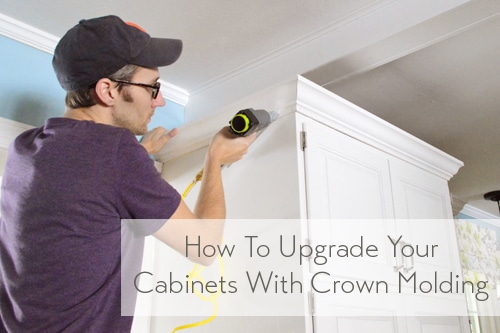
Installing crown molding to your kitchen cabinets is an easy way to improve the look of your kitchen. Crown molding adds a touch of class and sophistication to any kitchen, and it can make cabinets look more expensive and attractive. Installing crown molding is an easy process that requires only a few tools and a bit of patience. With a few simple steps, you can have beautiful crown molding installed on your kitchen cabinets in no time.
Preparing for Installation
If you’re ready to give your kitchen cabinets a more polished and elegant look, installing crown molding is a great way to go. But before you start the installation process, there are a few steps you need to take to make sure the job goes smoothly. Preparing for the installation of crown molding kitchen cabinets requires some basic knowledge of tools, supplies, and techniques.
To begin, you’ll need to measure the gap between the top of the cabinets and the ceiling. This will tell you the exact length of molding you’ll need for the job. You’ll also need to get the right tools for the job. A miter saw, measuring tape, nail gun, and level are all necessities. Furthermore, you will need to choose the type of crown molding you want to install. Flat or curved styles are both popular options.
Once you have all the required materials, you can start removing the old molding, if necessary, and clean the surfaces. To ensure a secure fit, use caulk or wood glue to attach the molding to the cabinet and ceiling. Finally, use nails or screws to attach the molding to the walls.
With the right preparation and tools, you can easily install crown molding kitchen cabinets. It’s a great way to give your kitchen a more sophisticated and stylish look.
Choosing the Right Crown Molding
Installing crown molding on your kitchen cabinets can be a great way to give them a finished look and complete your kitchen décor. But before you begin the installation process, you need to make sure you have the right type of crown molding. Different types of crown molding can provide different looks and styles, so it’s important to choose one that will work well with the design of your kitchen.
When selecting crown molding, consider the style of your cabinet doors, the size of the room, and the overall look you are trying to achieve. If you have smaller cabinets, opt for a thinner crown molding that won’t overwhelm the space. Likewise, if you have larger cabinets, a thicker crown molding might be better suited for the design. Consider the color of your cabinets as well; lighter-colored cabinets can benefit from dark crown molding, while darker cabinets may look better with lighter-colored crown molding.
You should also take into account the type of material you want to use for the crown molding. There are a variety of materials available, including wood, vinyl, and metal. Wood is the most traditional option, and it can be stained to match the cabinets. Vinyl is a more affordable option, and it is relatively easy to install. Metal is also a popular choice, although it may require more effort to install.
Finally, consider the type of finish you would like to have on the crown molding. A glossy finish will provide a more polished look, while a matte finish will provide a more subtle effect. Whichever option you choose, make sure it complements the overall design of your kitchen.
Choosing the right crown molding for your kitchen cabinets is an important part of the installation process. Consider the style, size, color, material, and finish of the molding to ensure you get the look you desire. With the right selection, you can create a beautiful and finished look in your kitchen.
Measuring and Cutting the Crown Molding
Installing crown molding on kitchen cabinets is a great way to make a statement and add a touch of elegance to the room. It can be a bit tricky to get the measurements right, but with some careful measuring and cutting, you can achieve a professional look. To begin, you’ll need to measure the length and height of the cabinet opening. This is to ensure the crown molding fits properly.
Next, you’ll need to measure and mark the crown molding for cutting. You’ll want to make sure the angles are correct, as this will determine how the crown molding fits against the cabinet. To do this, use a miter saw to make the cuts. You’ll need to make multiple cuts, depending on the shape of the cabinet opening, so be prepared to spend some time measuring and cutting.
Once the crown molding is cut to size, you can attach it to the cabinet. Use a level to make sure the crown molding is correctly aligned, and then use a nail gun to secure it in place.
Following these steps will help you to achieve a professional look when installing crown molding on kitchen cabinets. With careful measuring and cutting, you can have the perfect crown molding installation.
Installing the Crown Molding
When it comes to upgrading the look of your kitchen, there’s no better way than adding crown molding to your cabinets. Crown molding is a decorative trim that is installed along the top of the cabinets, giving them a stylish, finished look. Installing the crown molding is a relatively simple process, but there are a few tips and tricks you should keep in mind to make sure it’s done properly.
First, it’s important to measure the height of the cabinets accurately. Measure from the top of the cabinet to the ceiling and then subtract 1/4 inch to create a gap between the top of the cabinet and the ceiling. This will ensure that the crown molding sits flush against the ceiling.
Second, mark the wall with a level and a pencil at the height you want to install the crown molding. This will serve as a guide when you’re ready to install the molding.
Third, cut the crown molding to the correct length using a miter saw. Measure twice and cut once to ensure a perfect fit.
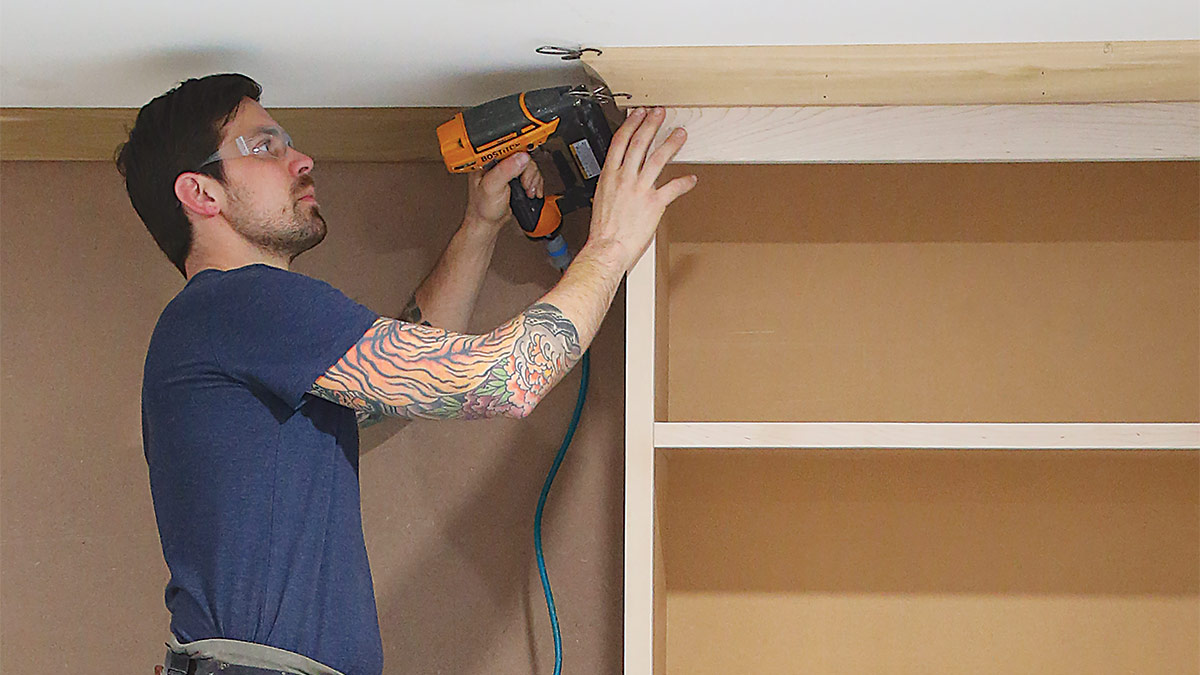
Fourth, attach the crown molding to the cabinets using a pneumatic nailer. Make sure to use long enough nails that will penetrate through the cabinet and into the wall studs for a secure fit.
Finally, once the crown molding is installed, use a caulk gun to fill in any gaps between the molding and the ceiling. This will give the finished look a professional, polished appearance.
Installing crown molding to your kitchen cabinets is a great way to add a touch of elegance to your kitchen. Follow these simple tips to ensure that your crown molding is installed correctly and give your kitchen the perfect finishing touch.
Finishing the Installation
Installing crown molding kitchen cabinets is a great way to add a touch of luxury to your kitchen. With the right knowledge and tools, you can get the job done with ease. Finishing the installation is the last step, and it requires a few more steps before you can proudly show off your new crown molding cabinets.
The first step is to attach the crown molding to the cabinet frames. To do this, you’ll need to use a miter saw to cut the molding at a 45-degree angle. This will ensure that the molding is flush against the cabinet frame. Next, use a wood glue or construction adhesive to attach the molding to the cabinet frames. Make sure to wipe away any excess glue or adhesive after the molding is securely in place.
The next step is to sand the entire surface of the crown molding. Use fine-grit sandpaper to remove any rough edges. Once the surface is smooth, you can apply a coat of paint or stain to the molding. When the paint or stain has dried, you’re ready to install the crown molding onto the cabinet frames.
To do this, you’ll need to use screws and nails. Place the molding on the cabinet frames and attach it with screws and nails. Make sure that the screws and nails are flush with the cabinet frames. Finally, add any decorative details, such as molding corner blocks or rosettes. These details will give your crown molding kitchen cabinets a sophisticated look.
By following these steps, you can easily install crown molding kitchen cabinets and create a stunning look for your kitchen. With the right tools and materials, you can finish the job with ease.
Troubleshooting Common Problems
Crown molding is a great way to add an elegant touch to your kitchen cabinets. However, installing it can be challenging and, if not done properly, can lead to problems. Troubleshooting common issues that can arise during the installation process is key to ensuring your crown molding kitchen cabinets look perfect.
One of the most common problems is gaps between the molding and the cabinet. This is usually caused by inadequate measuring, so make sure to take precise measurements before beginning the installation process. If the gaps are too small, you can fill them in with caulk or wood putty.
Another potential issue is the molding not fitting flush against the wall. This is usually due to the wall not being straight. Use a level to make sure the wall is even before attaching the crown molding. If it is uneven, you may need to use shims to even out the wall before attaching the molding.
Finally, crown molding may also pull away from the wall or sag over time due to improper nailing. When attaching the molding, make sure to use nails that are the appropriate size and type for the molding material. It’s also important to make sure the nails are deep enough to hold the molding securely in place.
By troubleshooting common problems, you’ll be able to ensure your crown molding kitchen cabinets look perfect and add a touch of elegance to your kitchen.
Maximizing the Aesthetic Appeal
Kitchen cabinets are a great way to add a touch of style to your home. However, if you want to take the look of your kitchen to the next level, you should consider installing crown molding kitchen cabinets. Not only will crown molding cabinets help to create a more elegant and sophisticated look, they can also help to maximize the aesthetic appeal of your kitchen. Crown molding cabinets are available in a variety of styles and finishes, so they can easily be customized to match your existing décor. In addition, crown molding cabinets are also relatively easy to install, so you can easily transform your kitchen without having to hire a professional. With the right tools and materials, you can install crown molding cabinets yourself and enjoy the beauty they bring to your kitchen.
Maintenance and Upkeep
Maintaining and upkeeping the crown molding on your kitchen cabinets is essential to keeping them looking great. It’s important to clean and inspect the molding regularly, as any buildup of dust or dirt can lead to discoloration and damage. Additionally, it’s important to check that the molding is securely attached to the cabinets and that all parts are in good condition.
To keep the crown molding looking its best, it’s important to clean it regularly. A mild detergent and warm water is all that’s needed to keep it looking great. It’s also important to inspect the molding regularly for any signs of damage or discoloration. If any is found, it’s important to repair or replace the parts as soon as possible.
Finally, it’s important to ensure that the crown molding is securely attached to the cabinets. This can be done by using a screwdriver to tighten any loose screws. Additionally, it’s a good idea to apply a small amount of wood glue or caulk to the back of the molding to ensure that it won’t come loose over time. By following these simple steps, your kitchen cabinets will look beautiful and stay in great condition for years to come.
Conclusion
Installing crown molding kitchen cabinets is an easy and effective way to add a touch of elegance and sophistication to any kitchen. With a few simple tools and some basic instructions, anyone can install crown molding kitchen cabinets in just a few hours. The result will be beautiful, custom cabinets that will add a unique and stylish touch to your kitchen.

