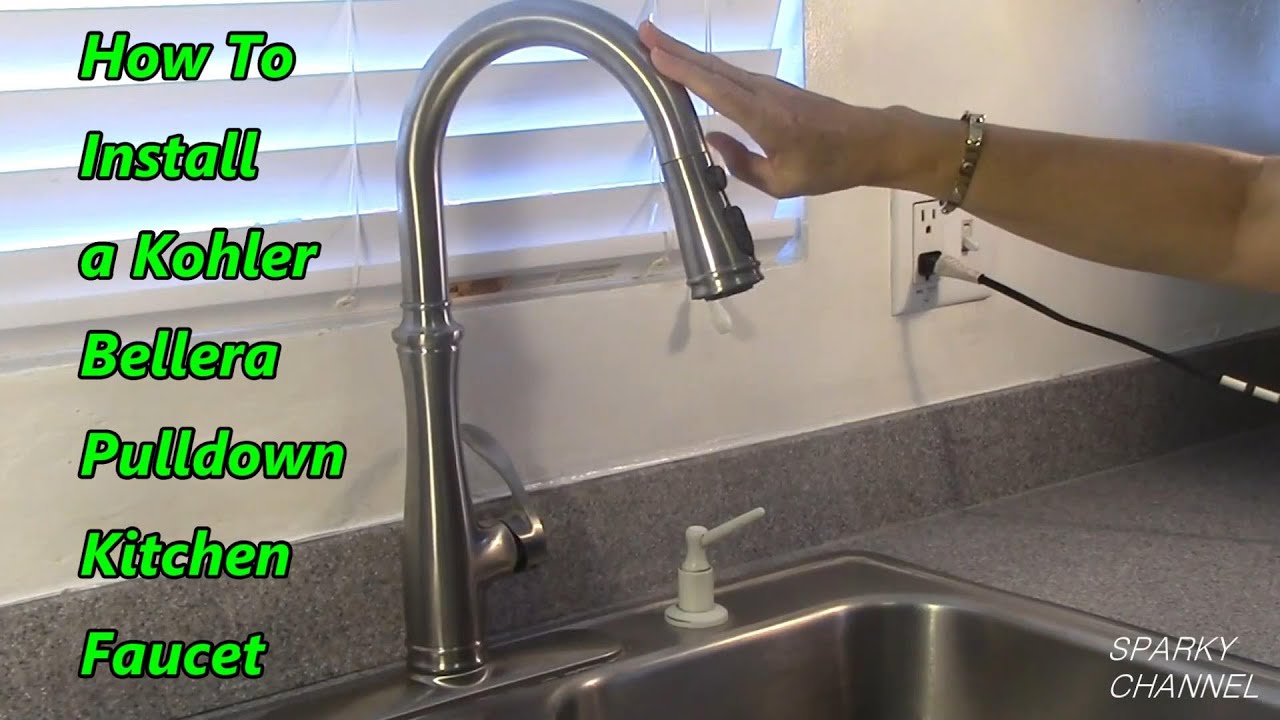
Installing a Kohler kitchen faucet is a relatively straightforward process. With some basic tools, you can quickly and easily install your new faucet. Once installed, you will have a beautiful, functional addition to your kitchen that will be sure to last for years to come. This guide will provide you with the steps necessary to install your new Kohler kitchen faucet. By following these steps, you will be able to enjoy your new faucet in no time.
Choosing the Right Kitchen Faucet
Choosing the right kitchen faucet for your home can be a daunting task. With so many different options available, it’s important to understand the features and benefits of each to ensure you select the perfect faucet for your needs. Kohler kitchen faucets offer a variety of features that make them an ideal choice for any kitchen. From style to functionality, Kohler kitchen faucets have a lot to offer. When selecting the right Kohler kitchen faucet, there are several things to consider, such as water pressure, spray mode, and installation requirements. Here are some tips to help you choose the perfect Kohler kitchen faucet for your home.
First, it’s important to understand your water pressure. High water pressure can cause the faucet to spray water too forcefully, while low water pressure can lead to weak or intermittent water flow. Make sure to check your water pressure before purchasing a Kohler kitchen faucet, as it will impact the performance of the faucet.
Second, consider the type of spray mode you need. Many Kohler kitchen faucets come with a variety of spray modes, including stream, mist, and pause. Depending on the tasks you’re performing in your kitchen, you may need a specific spray mode. For example, if you’re washing dishes, you may need a powerful stream, while if you’re rinsing vegetables, a gentle mist may be more appropriate.
Finally, make sure you’re aware of the installation requirements as well as any additional tools or accessories you may need. Kohler kitchen faucets are fairly easy to install, but you may need to purchase additional mounting hardware or adapters to ensure the faucet fits correctly. Understanding the installation requirements and having the correct tools on hand will make the process much easier.
By understanding the features and benefits of Kohler kitchen faucets and following the tips above, you can easily find the perfect kitchen faucet for your needs.
Preparing the Area for Installation
When it comes to installing a Kohler kitchen faucet, preparation is key. The first step before beginning installation is to ensure that the area is clean and clear of any debris that could get in the way of the installation process. It is important to make sure all countertops and cabinets are free of dust and other particles. Additionally, any existing faucet should be removed to facilitate the installation of the new Kohler faucet. Once the area is clean, it’s time to begin the installation process.
Preparing the area for installation is an important step when it comes to installing a Kohler kitchen faucet. It is important to remove any existing faucet and to make sure that all surfaces are clean and free of dust and debris. By taking the time to properly prepare the area, you can ensure that the installation process will be quick and efficient. With the right preparation, you can make sure that your Kohler kitchen faucet is installed correctly and will last for years to come.
Gather Necessary Installation Tools
Installing a Kohler kitchen faucet requires more than just a simple wrench. To ensure a successful installation, you’ll need a few additional tools on hand. Before you begin the installation process, make sure you have the following tools: a basin wrench, a Phillips head screwdriver, a flathead screwdriver, adjustable pliers, a towel, and a rag.
Basin wrenches are essential for a Kohler kitchen faucet installation. Designed to fit in tight spaces, basin wrenches can help you easily access and remove certain nuts and bolts. Most basin wrenches are adjustable, making them perfect for fast and effective adjustments.
A Phillips head screwdriver is needed to secure the faucet onto the sink or countertop. The flathead screwdriver is needed to tighten or loosen any screws that may be present on the faucet.
To protect your sink or countertop from scratches or damage, have a towel or rag on hand. This will help to maintain the pristine condition of your sink or countertop while the faucet is being installed.
Adjustable pliers are also necessary to properly install a Kohler kitchen faucet. These pliers will help you to tighten or loosen nuts and bolts that may be present on the faucet.
Gathering all of these necessary installation tools is the first step in successfully installing a Kohler kitchen faucet. Make sure you have all of the necessary tools before beginning the installation process.
Shutting off the Water Supply
If you are planning to install a Kohler kitchen faucet, the first step is to shut off the water supply. To do this, locate the shut-off valves on the wall behind the sink. These valves will typically be located on the left and right sides of the sink. Turn the valves clockwise to shut off the water supply. Make sure that the water has been fully shut off before proceeding with the installation.
Once the water supply has been shut off, you can begin the installation process. To ensure that the installation is successful, it is important to follow the instructions that come with the faucet. Make sure to pay attention to the details, as small mistakes can lead to big problems. It is also a good idea to have all of the necessary tools and supplies on hand before beginning the installation. With the right preparation and attention to detail, you can ensure that the installation of your new Kohler kitchen faucet will go smoothly.
Removing the Existing Faucet
Removing the existing kitchen faucet is a crucial step in the installation of a Kohler kitchen faucet. To do this, you will need a wrench and a basin wrench. Begin by shutting off the water supply to the kitchen faucet. Next, remove the faucet handle and the trim ring. After that, disconnect the supply lines and unscrew the faucet. Finally, use the basin wrench to remove the mounting nuts and remove the faucet. With the old faucet out of the way, you are now ready to install your Kohler kitchen faucet.
Installing the New Faucet
Installing a new Kohler kitchen faucet can be a daunting task, but with the right steps and tools, you can have a professional-looking and reliable fixture in your kitchen in no time. To get started, you’ll need basic plumbing skills, the right tools, and the right parts. After gathering the necessary materials, you can begin the installation process.
First, shut off the water supply to the kitchen and disconnect the old faucet. Once the old faucet is removed, you can begin to install the new Kohler faucet. Install the mounting plate, followed by the handle assembly. Make sure everything is properly secured and aligned. Then connect the hot and cold water lines to the faucet’s supply tubes. Tighten all the connections with an adjustable wrench.
Finally, turn on the water supply and check for any leaks. If everything is secure, replace the escutcheon and any other decorative accessories to complete the installation. With just a few basic steps, you’ll be able to enjoy the look and functionality of your new Kohler kitchen faucet.
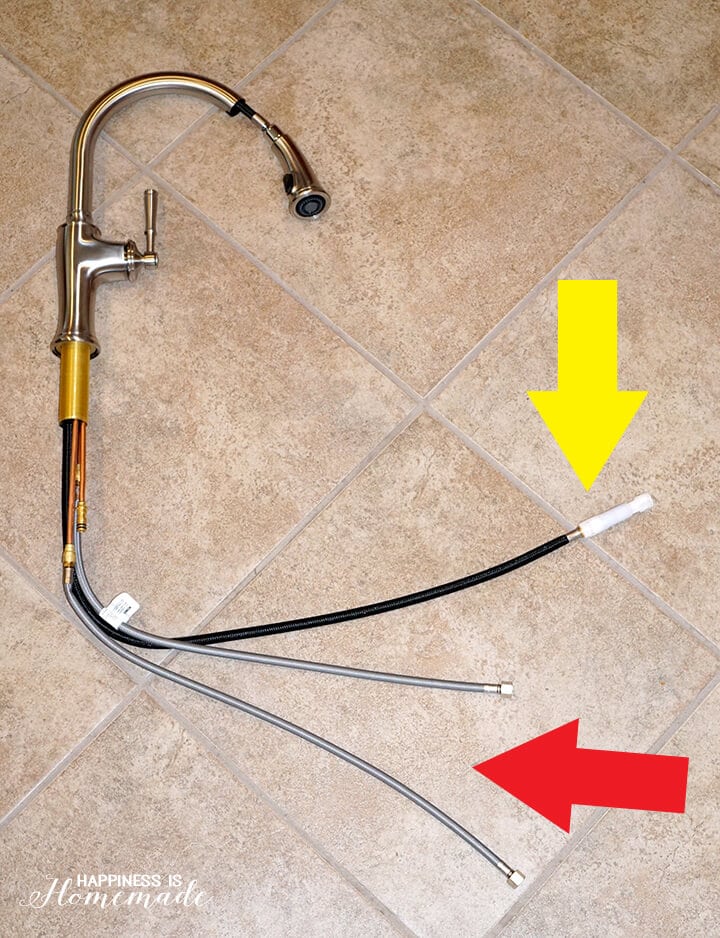
Connecting the Water Supply Lines
Installing a Kohler kitchen faucet is a relatively straightforward process, but it’s important to take the necessary steps to ensure that the faucet is properly connected to your water supply lines. Before you begin, make sure that you have the necessary tools and supplies, such as the faucet, the water supply lines, and a wrench.
Once you have the materials, it’s time to install the Kohler kitchen faucet. Start by attaching the water supply lines to the faucet. To do this, you’ll need to connect the hot and cold water supply lines to the appropriate fittings on the faucet. Once the lines are connected, use the wrench to tighten them, ensuring that they are secure and won’t leak.
Next, you’ll need to connect the water supply lines to the shut-off valves. This is an important step, as it will ensure that the water is properly shut off if you ever need to work on the faucet. Make sure that the valves are securely tightened, then turn the water back on. Finally, test the faucet to make sure that it is operating correctly.
Installing a Kohler kitchen faucet can be a relatively simple task, but it’s important to make sure that all of the necessary connections are made and that the faucet is securely installed. By following the steps outlined here, you can ensure that your new kitchen faucet is properly connected and ready to use.
Securing the Faucet to the Countertop
Installing a Kohler kitchen faucet can be a straightforward process, but it’s essential to secure the faucet to the countertop properly to ensure that it works correctly. After properly connecting the water lines to the faucet, you’ll need to secure the faucet to the countertop. Before you begin, make sure that you have the correct mounting hardware for the faucet.
Start by positioning the faucet on the countertop. Make sure that the faucet is centered and aligned correctly with the countertop. Once you’re satisfied with the position, use the mounting hardware to secure the faucet to the countertop. Depending on the type of faucet, the mounting hardware may include screws, nuts, and washers. After the mounting hardware is attached, use a wrench to tighten the screws. When you’re finished, double-check that the faucet is secure and that the nuts and washers are tight.
Installing a Kohler kitchen faucet can be a relatively easy process, but proper securing of the faucet to the countertop is essential for a successful installation. Proper alignment and use of the correct mounting hardware will ensure that your faucet will provide years of reliable service.
Testing the Faucet
The installation of a Kohler kitchen faucet is not complete until you have tested it for proper functioning. Testing your new faucet ensures that it is working correctly and that there are no leaks that could result in water damage to your kitchen. To test your Kohler kitchen faucet, turn it on and fill a pot or bowl with water. Place the pot or bowl beneath the faucet and shut off the faucet. Allow the water to sit in the pot or bowl for a few minutes and then inspect the sink and surrounding area for any water leakage. If there is no leakage, your Kohler kitchen faucet has been installed properly and is working correctly.
Troubleshooting Common Issues
Troubleshooting common issues with a Kohler kitchen faucet is a crucial part of the installation process. The installation process itself is fairly straightforward, but any potential problems that arise should be addressed immediately. Thankfully, Kohler kitchen faucets are designed with troubleshooting in mind. There are a few common issues that may arise during installation that can be easily resolved with the help of a few simple steps.
First, check the water pressure. A low water pressure may cause the faucet to not function properly. If the water pressure is too low, it could cause the faucet to not give off enough water or the water flow will be inconsistent. Increasing the water pressure should solve this issue.
Second, check the temperature settings on the faucet. A Kohler kitchen faucet has a temperature adjustment dial that allows you to adjust the temperature of the water coming out of the faucet. If the temperature is too low or too high, it could cause the faucet to not function properly. Adjusting the temperature should solve the issue.
Third, make sure the faucet is properly connected to the water supply. If the connections are loose or not properly secured, it could cause the faucet to not function properly. Make sure all connections are secure and that the water supply is turned on.
Finally, if all else fails, contact a Kohler customer service representative. They will be able to provide assistance and troubleshoot any potential issues with the faucet. With a little patience and the help of a Kohler customer service representative, you should be able to troubleshoot any issues that arise during installation and get your faucet up and running.
Maintenance and Upkeep
Maintaining and keeping up with your Kohler kitchen faucet is essential to ensure it continues to provide reliable performance. Regularly cleaning and lubricating the faucet will keep it in top shape and prevent any potential issues. Additionally, several preventative measures can be taken to prolong the life of your Kohler kitchen faucet.
To begin, remove any debris or dirt from the faucet spout and handle. Next, use a damp cloth to wipe down the faucet and remove any build-up of dirt or grime. It is also important to regularly check for any signs of corrosion or wear and tear. If necessary, use a soft-bristled brush to clean the faucet and remove any hard-to-reach dirt or grime.
Finally, lubricate the faucet’s moving parts, such as the handle, with a light oil or lubricant. This will help to keep these parts in optimal condition and prevent any potential sticking or jamming. Additionally, it is important to check for any water leaks and repair them immediately. A leaky faucet can be costly and will lead to higher water bills.
By following these simple steps, you can ensure that your Kohler kitchen faucet will continue to provide reliable performance and a long-lasting lifespan. Taking the time to properly maintain and care for your faucet can help to avoid costly repairs and replacements in the future.
FAQs About the How To Install Kohler Kitchen Faucet
1. What tools do I need to install a Kohler kitchen faucet?
A. To install a Kohler kitchen faucet, you will need a screwdriver, adjustable wrench, and a basin wrench.
2. How do I connect the water lines to the faucet?
A. Connect the water lines to the faucet using the included supply lines. If you are replacing an existing faucet, you may be able to reuse the existing supply lines.
3. How do I attach the faucet to the sink?
A. To attach the faucet to the sink, you will need to thread the mounting nuts onto the faucet shanks and then tighten them with an adjustable wrench.
Conclusion
Installing a Kohler kitchen faucet is relatively simple. It requires only basic plumbing tools and can be done in a few short steps. With the right tools, some patience, and a few helpful tips, you can easily install a Kohler kitchen faucet in your home. With a few simple steps, you can have a beautiful and functional kitchen faucet in no time.

