Installing a tile backsplash in your kitchen is a great way to add style and color to your home. It can also be an affordable way to protect your walls from splatters and spills. Installing a tile backsplash can be a DIY project for anyone with basic carpentry and tiling skills. This guide will walk you through the steps of how to install a tile backsplash in your kitchen. You’ll learn how to measure and prepare the space, how to cut and lay the tiles, and how to grout and seal the tile. With the right materials and a little bit of patience, you can have a beautiful tile backsplash in no time!
Tools and Materials Needed
Installing a tile backsplash in your kitchen can make a big impact and add a unique touch to your space. To get started, you’ll need to gather the right tools and materials. While the specific tools and materials you’ll need will vary depending on the size and scope of your project, these are the basic items you’ll need to get the job done.
Tools: measuring tape, level, grout float, utility knife, wet saw, drill, and grout sponge.
Materials: tile, thinset, grout, tile spacers, backer board.
These are the essentials you’ll need to install a tile backsplash in your kitchen. Make sure to measure and plan your project before you start, and always wear protective eyewear and gloves when working with tools and materials. With the right tools and materials, you’ll be able to create a beautiful backsplash that will last for years to come.
Preparation of the Area
Installing a tile backsplash in a kitchen is an easy and cost-effective way to spruce up the look of your cooking space. However, before you start the project, it’s important to properly prepare the area. Proper preparation will ensure that the tile looks great and will last for years to come.
To begin, make sure the surface is clean and dry. Remove any debris, dirt, or grease from the wall. Also, inspect the wall for any damage, such as holes or cracks. If any are found, repair them with spackle or caulk. Additionally, if you are tiling over an existing backsplash, you may need to use a scoring tool to remove any adhesive or caulk. Once the area is prepped, use a level to ensure the wall is even.
Next, measure the area where you want to place the tile backsplash. This will help you calculate how much tile and adhesive you will need. Additionally, consider where you want to place outlets and switches. You may need to cut the tile around these areas. Finally, lay out the tiles on the floor to ensure that you like the pattern.
By properly preparing the area, you can ensure that your tile backsplash will look great and last for years to come. With the right preparation, you can easily install a tile backsplash in your kitchen.
Measuring and Marking
Measuring and marking are the first steps when it comes to installing a tile backsplash in your kitchen. It is important to take the time to measure and mark the area accurately before beginning to install the tiles. Check the walls for any irregularities or bumps and make adjustments accordingly. Measure the length, width, and height of the area that you plan to tile and mark it off with a pencil. If you are installing an intricate design, it is important to draw out a template of the design beforehand. Before you begin securing the tiles, make sure to double-check your measurements to ensure an accurate fit. When you are satisfied with the measurements, you are ready to start installing the tiles.
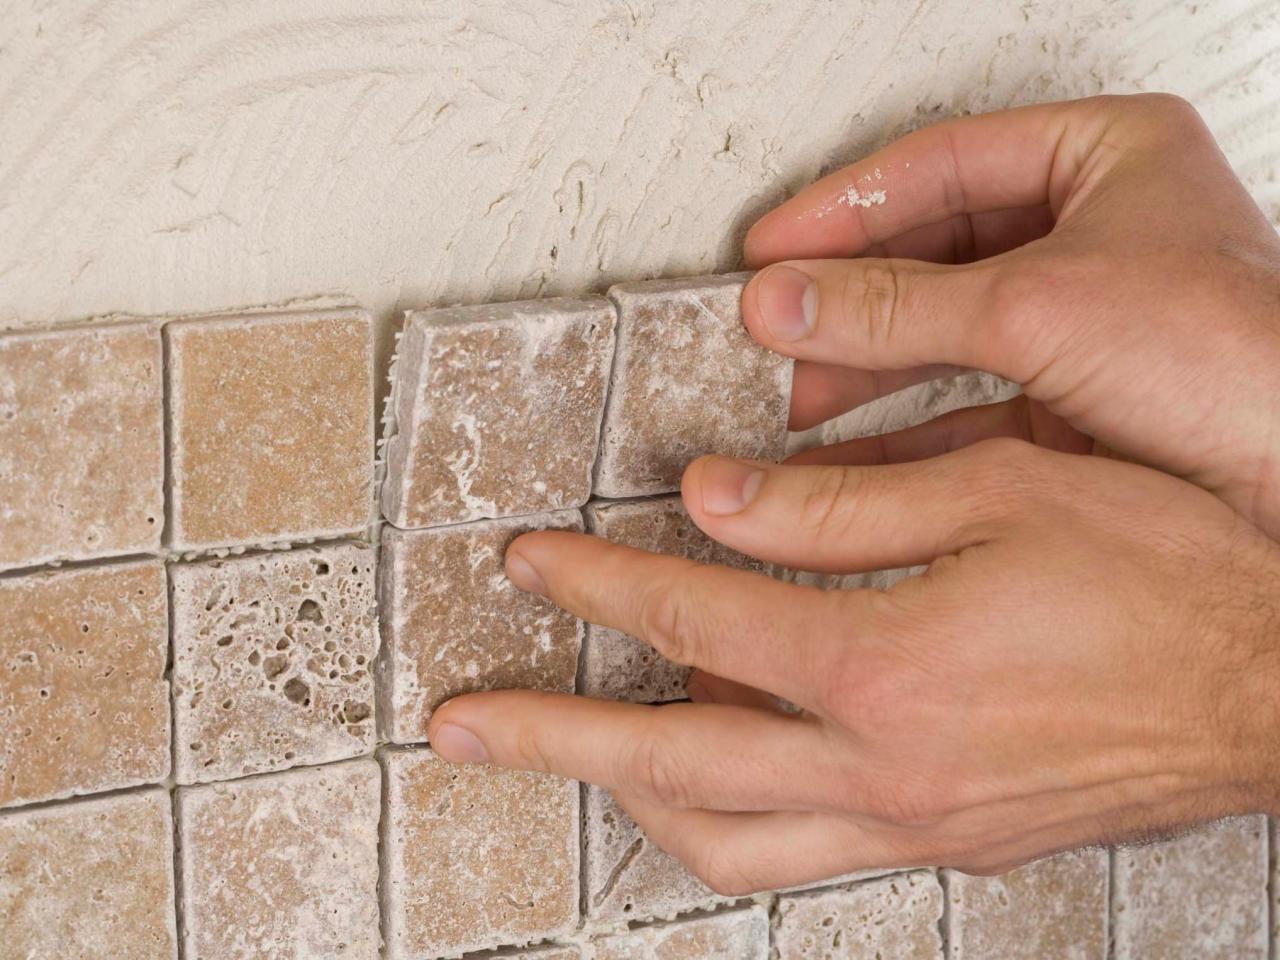
Installing the Tiles
Installing the tiles is the most important step in creating a beautiful tile backsplash in a kitchen. Tiles come in all shapes and sizes, and the first step is to determine which type of tile is best for the job. Different types of tiles require different installation techniques, so it is important to know the specific installation process for the chosen tile. Once the tile is selected, the next step is to measure and cut the tiles for the backsplash. This can be done using a wet saw, tile cutter, or manual tile nipper. After the tiles are cut, they should be laid out to ensure that the pattern is correct before installation. Once the tiles are laid out, they can be installed using a thin-set mortar or mastic adhesive. After the tiles are installed, they should be grouted with a grout sealer to ensure a long-lasting finish. Following these steps will ensure that the tile backsplash is correctly installed and will stand the test of time.
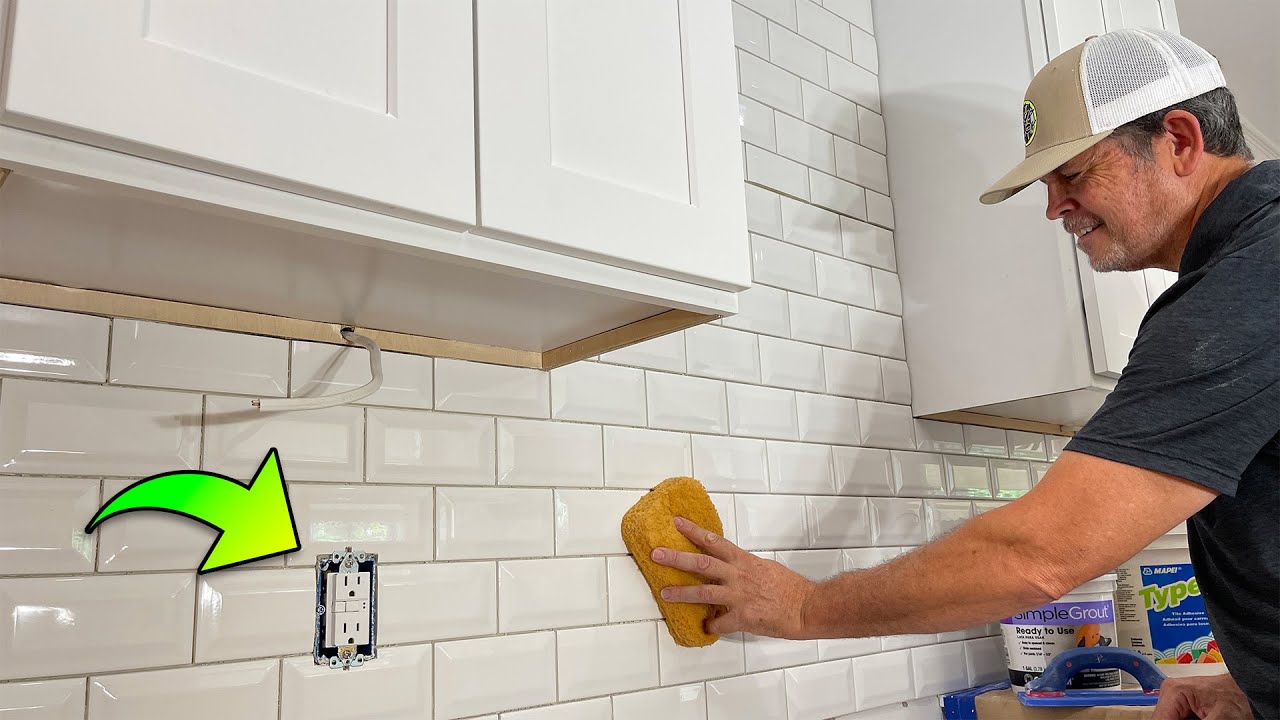
Grouting the Tiles
Installing a tile backsplash in your kitchen is a great way to spruce up the room and add some personality to it. Once the tiles have been cut and placed, it’s time to grout them. Grouting is a simple process that requires a few supplies and tools, but it’s essential to ensure that the backsplash is properly sealed and looks great. In this article, we’ll explain how to grout your kitchen backsplash tiles and provide tips on how to do it right.
Before grouting the tiles, you’ll need to make sure that all the tiles are firmly in place and that no gaps exist between them. The grout should be mixed according to the manufacturer’s instructions and not too thick or too thin. When applying the grout, use a rubber float or a grout spreader to ensure even coverage. Once the grout has been spread, use a damp sponge to wipe off any excess. Allow the grout to set for at least a few hours before continuing.
After the grout has had time to set, you’ll need to seal it. Sealing the grout will help protect it from water damage and staining, and it’s highly recommended for kitchens. The sealant should be applied according to the manufacturer’s instructions, and it should be given at least 24 hours to dry before you begin to use the backsplash.
Installing a tile backsplash in your kitchen is an easy way to give the room a stylish and unique look. Grouting the tiles is a simple process that requires a few supplies and tools, but it’s essential to ensure that the backsplash is properly sealed and looks great. With these tips, you’ll be able to install your tile backsplash with ease and confidence.
Sealing the Grout
Installing a tile backsplash is a great way to give your kitchen an updated look. But once you’ve finished, it’s important to protect your tile with a quality sealant. Sealing the grout on your tile backsplash will not only help keep it looking great, but it will also protect it from dirt, moisture, and other contaminants. In this article, we’ll discuss the steps you should take to properly seal the grout on your tile backsplash.
First, make sure that the grout has been given enough time to dry and cure. If you’ve recently installed the tile, allow at least 24 hours for the grout to dry. Once the grout is dry, you’ll need to apply a sealant. Make sure to read the instructions on the sealant to ensure that it’s compatible with your grout and tile. It’s also important to use a sealant that’s appropriate for the type of grout you’re using. If you’re not sure which type of sealant to use, consult a professional.
Once you’ve chosen the right sealant, you’ll need to apply it to the grout. Start by using a small paintbrush to apply the sealant to the grout lines. Make sure to get into all the nooks and crannies between the tiles. Once you’ve covered all the grout lines, use a damp sponge to wipe away any excess sealant. Allow the sealant to dry completely before walking on the tile.
By following these steps, you can properly seal your tile backsplash and ensure it looks great for many years to come. Regularly sealing your grout is an important part of maintaining your tile backsplash, and it’s an easy step that you can do yourself.
Finishing Touches
The finishing touches are what really make a kitchen stand out. Tile backsplash is one of the most popular ways to add a unique and eye-catching touch to any kitchen. Installing a tile backsplash is a great way to add texture, color, and character to your kitchen. It can also protect your walls from splashes, smudges, and other messes. While installing a tile backsplash can be intimidating, it doesn’t have to be complicated. With the right tools and materials, you can easily install your own tile backsplash. Here are the steps you need to take to install a tile backsplash in your kitchen:
1. Measure the area where you want to install the tile backsplash and purchase the right amount of tile.
2. Prepare the surface by removing any existing wall covering and make sure the wall is clean and dry.
3. Apply adhesive and grout to the area. Spread the adhesive with a notched trowel.
4. Affix the tile to the wall and press firmly.
5. Apply grout over the tiles.
6. Allow the grout to dry.
7. Seal the grout to protect it from moisture.
With these steps, you can easily install a tile backsplash in your kitchen. Not only will it add a beautiful touch to your kitchen, but it will also protect your walls from splatters and messes. When you’re finished, you’ll have a unique and eye-catching kitchen upgrade that will last for years to come.
Maintenance and Cleaning Tips
Installing a tile backsplash in a kitchen is a great way to add style and character to the area. However, once the installation is complete, it is important to maintain and clean the tile to keep it looking its best. Regular maintenance is essential for keeping the tile looking like new and preventing any damage from occurring. Here are some tips to help you properly care for your tile backsplash in the kitchen.
Start by cleaning the tile backsplash with a mild detergent and warm water. Make sure to clean the grout lines as well as the tile itself. To ensure the grout lines are well maintained, use a brush with soft bristles and a mixture of baking soda and water. Rinse afterwards with clean water and dry thoroughly.
It is also important to regularly seal the tile and grout. This will help keep moisture out and prevent the buildup of dirt and grime. For best results, use a sealant specifically formulated for tile surfaces. Apply the sealant in thin layers and allow it to dry fully between coats.
Finally, to keep the tile backsplash looking its best, take the time to clean up any spills or splatters as soon as they occur. This will help prevent the buildup of bacteria and keep the tile clean and sanitary.
By following these simple tips, you can keep your tile backsplash looking like new for years to come. With regular cleaning and maintenance, you can enjoy your tile backsplash for years to come.
Conclusion
Installing a tile backsplash in your kitchen is a great way to add a touch of style and elegance to your space. It is important to follow the instructions provided by the manufacturer carefully, but with the right tools and materials, anyone can complete this project. With a little patience and preparation, you can have a beautiful tile backsplash in your kitchen in no time.

