Making your own kitchen cabinets is a great way to save money and customize your kitchen. With the right tools and materials, you can build cabinets that will fit perfectly in your kitchen and look great. You can choose the type of wood, the stain, the hardware, and the style of the cabinets to make them your own. With careful planning, you can have a beautiful set of cabinets that will be the envy of your friends and family. This guide will provide you with the steps and materials you need to make your own kitchen cabinets.
Supplies and Tools Needed
If you’re looking to give your kitchen a makeover, one of the best ways to make a big impact is by building your own kitchen cabinets. Doing it yourself may seem daunting, but with the right supplies and tools, it’s a surprisingly straightforward process.
From wood and screws to saws and drills, there are a few essential ingredients you’ll need to get started. Of course, the specifics of your project will vary depending on the design of your cabinets and the materials you choose, but here are some of the basics you may need:
Wood: Depending on the style of your cabinets, you’ll want to select the appropriate wood for the project. Hardwoods like oak, maple, and cherry are often favored for kitchen cabinets, but you could also opt for plywood, particle board, or MDF.
Screws: You’ll need a range of screws in various sizes to build and secure your cabinets. Self-tapping screws are a good choice for this project, as they don’t require pre-drilling.
Saws: You’ll likely need two types of saws for your project: a circular saw for cutting the wood to size, and a miter saw for creating the angled cuts.
Drills and Bits: A drill will be necessary for making the screw holes in your wood, and you’ll also need a range of drill bits for countersinking the screws.
You may also need a router, clamps, a drill press, and other tools and supplies. With the right materials and tools in hand, you can begin your kitchen cabinet project and transform your space!
Planning and Measuring
Creating your own kitchen cabinets is an exciting and rewarding process, but it requires careful planning and measurement. Before designing and building your cabinets, it is important to take accurate measurements of your kitchen space to ensure that your cabinets fit correctly and are able to hold the necessary items. When measuring, be sure to consider the height of the countertop, the width of the walls, the depth of the shelves, and the distance between the wall and the countertop. Additionally, consider any obstacles, such as electrical outlets, that may interfere with the installation of the cabinets.
Once you have taken accurate measurements of your kitchen, you can begin designing your cabinets. Use the measurements to determine the size and dimensions of your cabinets, as well as how much material you will need to construct them. Consider the type of material you would like to use for the cabinets and the look you are trying to achieve. You may want to use wood, metal, or a combination of both. Additionally, think about the hardware you may need to install and the type of finish you would like for your cabinets. Taking the time to plan and measure carefully will help you create kitchen cabinets that fit perfectly and are built to last.
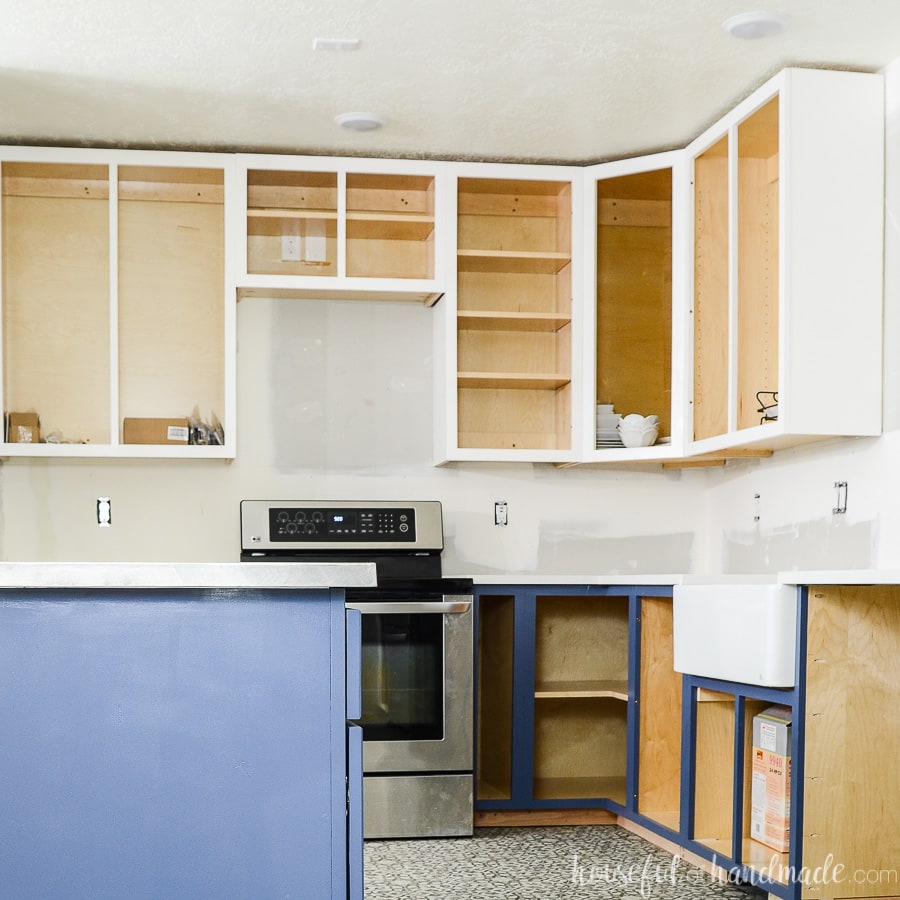
Building the Cabinet Boxes
Do-it-yourselfers rejoice – constructing your own kitchen cabinets is easier than it looks! With the right tools, knowledge, and tips, you can build beautiful, durable cabinets in no time. The most important part of the cabinet construction process is constructing the cabinet boxes. To build the cabinet boxes, all you need is some basic woodworking skills and a few tools.
Start by measuring the space in your kitchen where the cabinets will be installed. Cut plywood or particle board to the required size, and then use a saw to cut it into the desired shape. Next, construct the sides of the cabinet box. This can be done by attaching two side panels to the top and bottom of the cabinet box. Then, attach the back panel to the sides and the top and bottom. Use a drill and screws to secure the panels together.
Finally, add the hardware. This includes the hinges, knobs, and handles. Make sure to use the correct screws and drill holes that are the right size. Once the hardware is attached, your cabinet boxes are ready to be installed.
With some skill and patience, you can design and build your own custom kitchen cabinets. The process is simple and rewarding when you see the end result. Start by constructing the cabinet boxes and then add the hardware, and you’re on your way to building beautiful cabinets for your kitchen.
Attaching the Doors and Drawers
Installing the doors and drawers is the final step in creating your own kitchen cabinets. This is the time when you get to enjoy the fruits of your labor, as the cabinets begin to take shape and give your kitchen the look you have envisioned. But attaching the doors and drawers can be tricky if you don’t know the right technique.
Start by measuring the cabinet for the correct size of the door or drawer. Make sure that the measurements are exact, as it will be difficult to adjust the door or drawer once it is in place. Once the measurements are confirmed, use a drill to attach the hinges to the door and the cabinet. Make sure to use the correct drill bit for the type of hinge and cabinet you are using. This will ensure a secure fit.
Next, attach the drawer slides to the bottom of the drawer box and to the cabinet. Slides can come in several different sizes, so be sure to select the correct size for your cabinet. Then, slide the drawer onto the slides and secure it in place with screws.
Finally, attach the door or drawer to the cabinet. Make sure to use a level to ensure that it is installed straight. Once the door or drawer is in place, use a drill to attach the handle or knob.
By following these simple steps, you can easily attach the doors and drawers to your homemade kitchen cabinets with confidence and pride. With a little practice and patience, you can create a beautiful kitchen that will last for years.

Finishing and Painting
When it comes to finishing and painting your custom kitchen cabinets, the possibilities are endless. There are many different materials, colors, and finishes available to choose from. Before you begin the painting process, you will need to prepare the cabinets. This includes sanding the surfaces, filling any imperfections with wood filler, and priming the cabinets to ensure a smooth and even finish. Once the cabinets have been prepped, you can apply the paint of your choice. To ensure your paint job looks its best, you should use a high-quality paint that is specifically designed for wood surfaces and use a brush or roller to apply it. You can also use a spray gun for a more professional finish. After the paint has dried, you can add a sealant for extra protection. With a few simple steps and some patience, you can have beautiful custom cabinets in your kitchen that will last for years to come.
Installing the Cabinets
Installing kitchen cabinets in your home can be a daunting task. Whether you are designing a new kitchen or remodeling an existing one, it is important to understand the basics of cabinet installation. By taking the time to learn the fundamentals of cabinet installation, you can ensure that your cabinets will be securely mounted, and will look great for years to come.
When installing kitchen cabinets, the first step is measuring the space. Measure the width, length, and height of the space, allowing for any obstructions such as plumbing or electrical outlets. Make sure to check the manufacturer’s specifications for the cabinets you are purchasing, as they will provide the exact measurements for the cabinets.
Next, you’ll need to install the cabinet frames. Using a level, mark the wall where the cabinets will be mounted. Make sure to use screws that are appropriate for the material of your wall. If you are mounting the cabinets on drywall, you’ll need to use drywall anchors to ensure that the cabinets are securely mounted.
Finally, attach the cabinet doors. Make sure to take into account the size of the hinges when measuring for the placement of the doors. Once the doors are in place, you’ll need to attach the handles. Make sure to use screws that are appropriate for the material of the cabinet doors.
Installing kitchen cabinets is a complex task, but by following the steps outlined above, you can ensure that your cabinets will be securely mounted, and will look great for years to come. With a bit of patience and planning, you can turn your kitchen into a beautiful, functional space.
Troubleshooting Common Issues
Are you in the process of making your own kitchen cabinets but having trouble finding solutions to common issues? Don’t worry. You’re not alone in this endeavor. Many homeowners face issues when it comes to making their own kitchen cabinets. From measuring the space correctly to getting the right kind of wood to cutting it to size, there are a lot of factors that can lead to troubleshooting problems. With the right guidance and some patience, however, you can make your own kitchen cabinets and be proud of the final result.
To start, check that you have the right materials for the job. You’ll need wood, screws, hinges, and other tools depending on the type of cabinets you’re making. Measure the space properly and make sure you have enough wood to cover the area. Consider the type of wood you’ll be using and make sure it’s suitable for the job. If you’re using particleboard, make sure it’s cut to the right size and sealed properly.
When it comes to assembling your cabinets, make sure to follow the instructions carefully. If you’re using a pre-made kit, make sure all the pieces are included and fit together properly. If you’re crafting your own design, make sure the pieces fit together snugly and that the screws are tight. Also, make sure you measure and mark the cut lines correctly so that the pieces fit together properly.
Finally, make sure you sand and finish your cabinets properly. This will ensure that the cabinets are durable and look great in your kitchen. For sanding, use a power sander or sandpaper to smooth out the edges. For finishing, use a sealant or finish that’s suitable for the type of wood you’re using.
By following these steps, you can make your own kitchen cabinets and troubleshoot any common issues along the way. With proper planning, the right materials, and patience, you can create beautiful cabinets that will last in your kitchen for years to come.
Maintenance and Upkeep
Once you have your kitchen cabinets in place, it’s important to maintain and upkeep them to ensure they last. Cleaning your cabinets regularly is key, as grease, dirt, and grime can build up quickly and cause damage. Depending on the material of your cabinets, you may be able to use a mild detergent and warm water to clean them, or you may need to purchase a specialized cleaner from the store. Additionally, inspect your cabinets for any loose screws, hinges, or other hardware, and tighten them as needed. If you can, also try to use a sealant or finish on your cabinets to keep them in good condition. Finally, always be sure to keep your cabinets dry and away from moisture, as this can cause them to warp and crack. With the right care and maintenance, your new kitchen cabinets can last for years.
Conclusion
Making your own kitchen cabinets can save you money and give you the satisfaction of creating something with your own hands. It is important to take the time to plan out the design, gather the necessary tools and materials, and know your limitations. With a bit of patience, you can make your own kitchen cabinets that will last for years to come.

