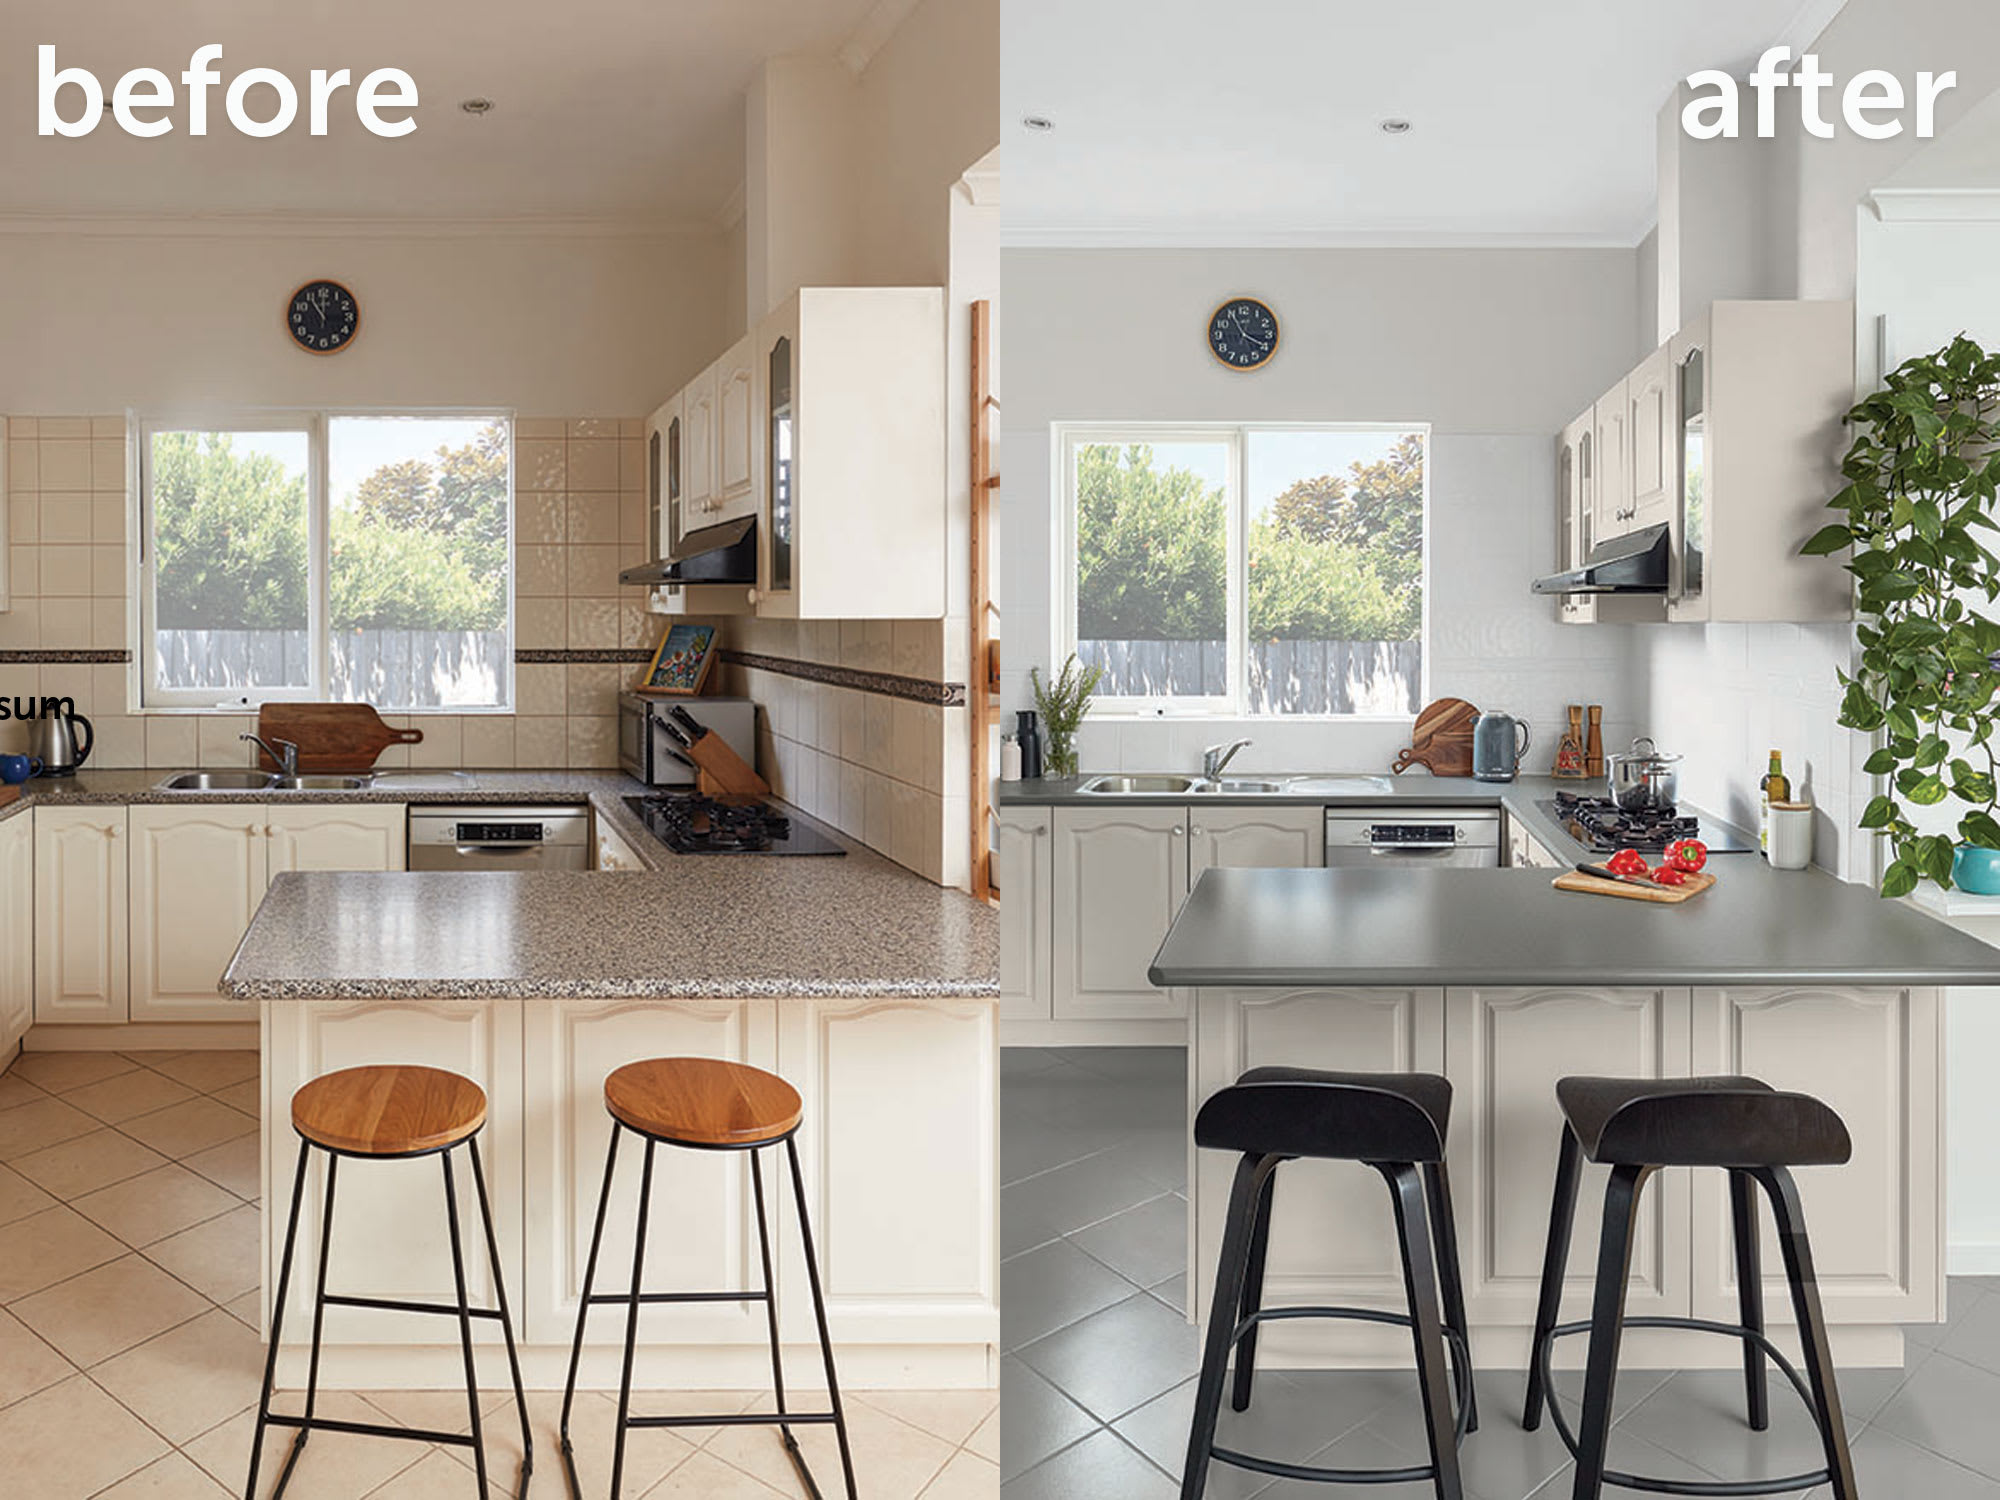
Painting your kitchen floor tiles is a great way to give your kitchen a quick makeover without spending a lot of money. It may sound intimidating, but it’s a relatively easy process that can be done on a weekend if you have the right tools and supplies. With a few simple steps, you can have a brand new look for your kitchen floor tiles that will last for years to come. This guide will show you how to paint kitchen floor tiles in a few easy steps.
Preparation
Preparing the kitchen floor for painting is the most important step to ensure a successful and durable finish. Start by removing any dirt, dust, and debris from the floor tiles with a vacuum cleaner. Then, scrub the floor with a mixture of warm water and mild detergent to remove any residue. Dry the tiles completely before proceeding. If the tiles have any existing wax, use a wax remover to clean them. Once the tiles are clean and dry, use sandpaper to rough up the surface and create a better bond with the paint. Remove any dust created by sanding with a damp cloth. Finally, apply a primer before painting the tiles. Following these steps will give you a beautiful, long-lasting finish.
Selecting the Right Paint
Painting kitchen floor tiles is a great way to give your kitchen a new look. But before you start, it’s important to make sure you select the right paint for the job. Depending on the material of your tiles, you may need to use a specific type of paint. For example, if your tiles are made of ceramic, you may need to use a water-based epoxy. If your tiles are made from vinyl, you should use a latex paint. Additionally, kitchen floors must be able to withstand high levels of foot traffic, so make sure to select a paint that is durable and able to withstand wear and tear. It is also important to consider the color of the paint you select. Bright colors may look nice, but may not be as durable as neutral colors. Be sure to consider the overall aesthetic of your kitchen when selecting your paint color. With the right paint, you can give your kitchen floor tiles a fresh new look and make them look as good as new.
Applying the Primer
Painting kitchen floor tiles is a great way to give your kitchen an instant makeover, but it’s important to use the right products to ensure a professional-looking finish. Before you can begin painting the tiles, you will need to apply a primer to the surface of the tiles. This will help the paint stick to the tiles and create a long-lasting finish.
When applying the primer, it’s important to use a brush or roller that has been designed specifically for use with tile. This will ensure that the primer is applied evenly and smoothly. Start in the corner of the room and work your way out, taking care to cover the entire surface. Once the primer has been applied, allow it to dry completely before moving on to the next step.
To make sure that the paint adheres correctly, it’s important to use a good-quality primer. Look for a primer that is designed to be used on tile, as this will provide the best results. Make sure that you read the instructions on the product before you begin, as the application process may differ depending on the item that you have chosen.
Once you have applied the primer, it’s important to allow it to dry completely before you begin painting. This will ensure that the paint does not smudge or run, allowing you to achieve a professional-looking finish. With the right preparation and the right products, you can give your kitchen floor tiles an instant makeover.
Painting the First Coat
Painting your kitchen floor tiles can be a daunting task, but it is possible with a few simple steps. Before starting, make sure you have all the necessary supplies: a roller, a paintbrush, paint, and a drop cloth. Once you have everything, you can begin to paint the first coat.
First, clean and prepare the surface of the tiles. This is important to ensure the paint adheres properly and lasts longer. Once the surface is clean, use a roller to apply the paint in even strokes. Begin in the corner and work outward in a smooth, sweeping motion. Make sure to avoid any drips or runs.
Once the first coat is applied, allow it to dry for at least 24 hours before applying a second coat. To ensure the paint is applied evenly, use a brush to go over any areas that may have been missed or covered unevenly. Check for any spots that may need a touch-up and apply a second coat if needed.
Painting kitchen floor tiles requires a bit of preparation and patience, but with the right techniques, it can be a simple task. After the first coat is applied, you will be one step closer to a beautiful kitchen floor.
Finishing Touches
Finishing touches are what bring the entire look together and make your kitchen floor tiles stand out. After the initial painting process, you can add additional details to make your floor unique. Consider adding stencils or patterns to give the tiles a custom look. You can also use a combination of colors and textures to make a one-of-a-kind design. Additionally, you can seal the paint with a sealer to ensure that it is protected from further wear and tear. With a little bit of creativity and patience, you can create a stunning kitchen design with painted kitchen floor tiles.
Cleaning Up
Painting kitchen floor tiles can be a daunting task, but with the right preparation and tools, it can be a surprisingly simple process. Before you begin, you’ll need to give the tiles a good cleaning to ensure that the paint will adhere properly. This can be done with a scrub brush and a mild detergent. Make sure to scrub any tough stains and allow the tiles to dry completely before moving on to the next step. Once the tiles are dry, use a vacuum or a dry cloth to remove any dirt or debris. Once the tiles are clean, you’re ready to begin painting.
Sealing the Paint
Preparing and painting kitchen floor tiles can give you a fresh, new look that can last for years. However, to ensure that your hard work pays off, it’s important to seal the paint after you’re finished. This will help protect the paint from wear and tear, as well as make it easier to clean. To seal the paint on your kitchen floor tiles, you’ll need to choose the right sealant for the job.
When selecting a sealant, look for ones that are water-resistant and will provide a protective layer to the tiles. Some popular sealants for tile floors are epoxy sealants, polyurethane sealants, and acrylic sealants. If you’re unsure which one is best for your flooring, you can consult with a professional for advice.
Once you’ve selected a sealant, make sure to read the instructions and properly prepare the surface of your tiles before applying the sealant. This includes cleaning the tiles of dirt, grime, and any other debris. Then, apply the sealant liberally with a brush or roller and allow it to dry completely before using the floor.
Sealing the paint on your kitchen floor tiles will help protect your hard work and maintain its beauty for years to come. With the right sealant and a bit of patience, you can enjoy the results of your hard work for years to come.
Maintaining Your Kitchen Floor Tiles
Do you have kitchen floor tiles that need some sprucing up? Don’t be intimidated by the task of painting them! With the right tools and products, you can easily transform your kitchen from drab to fab. To get started, you’ll need to assess the condition of your kitchen floor tiles. Are they chipped or cracked? If so, you’ll need to repair any damage before beginning. Next, thoroughly clean the tiles with a mild detergent and let them dry. Once that’s done, you can begin the painting process.
You’ll need to apply a high-quality bonding primer to the tiles before painting. This will ensure the paint adheres properly and lasts longer. After the primer is dry, you can apply a coat of paint. Choose a paint color that complements your kitchen decor. If you’re feeling adventurous, you can use stencils and create a unique design. Finally, seal the paint with a water-based sealer for added protection.
Painting kitchen floor tiles is a simple process that can make a big impact. With the right materials and a bit of patience, you can give your kitchen a much-needed update. Just remember to take your time and be meticulous!
Conclusion
Painting kitchen floor tiles is a great way to give your kitchen an updated look without having to replace the entire floor. With a few simple steps, you can have a freshly painted kitchen floor that will last for years to come. Choose a paint that is designed specifically for ceramic tiles and use a roller and brush to apply the paint evenly. Be sure to use painter’s tape to protect the walls and other surfaces to keep them clean while you work. Once the paint is dry, apply a clear sealant to protect the paint and provide extra durability. With the right supplies and a bit of time, you can easily paint your kitchen floor tiles and enjoy a fresh, updated look.

