Removing a kitchen sink drain can be a simple task if you have the right tools and know how. It is important to know how to remove a kitchen sink drain correctly to ensure it is properly sealed and not leaking. This guide will provide you with a step-by-step process on how to successfully remove a kitchen sink drain. You will need a few basic tools to complete this job, such as a screwdriver, pliers, and a drain snake. Following these steps should help you remove a kitchen sink drain quickly and safely.
Gather the Required Tools and Materials
Removing a kitchen sink drain can be a challenging task, but with the right tools and materials, you can tackle the project with confidence. Before getting started, it’s important to gather the necessary tools and materials. These include a basin wrench, adjustable wrench, pliers, adjustable pliers, screwdrivers, a putty knife, and a bucket. Additionally, you may need to purchase a replacement drain assembly, depending on the condition of the existing one. When gathering materials, it is important to ensure the new drain assembly is compatible with the existing sink setup. Once you have all the necessary tools and materials, you will be ready to begin the process of removing the kitchen sink drain.
Shut Off the Water Supply
Having a clogged or leaky kitchen sink drain can be a major inconvenience, and it’s important to know how to properly remove one. To start, be sure to shut off the water supply to the drain before beginning any work. This is an important safety measure, as it will prevent any water from leaking out and causing damage to the cabinets or floor. To do this, locate the shutoff valve located behind the sink. This is usually easy to find, as it will be the only valve connected to the sink drain. Once the valve is shut off, the water will be turned off and the drain can be removed.
Remove the Sink Drain Basket
Removing a kitchen sink drain basket is a relatively simple task, but it can be a bit daunting if you’ve never done it before. After all, you don’t want to cause any damage to your sink or the plumbing. Fortunately, removing the drain basket is a straightforward process. You will need a few basic tools, such as a wrench and pliers, and a few minutes of your time.
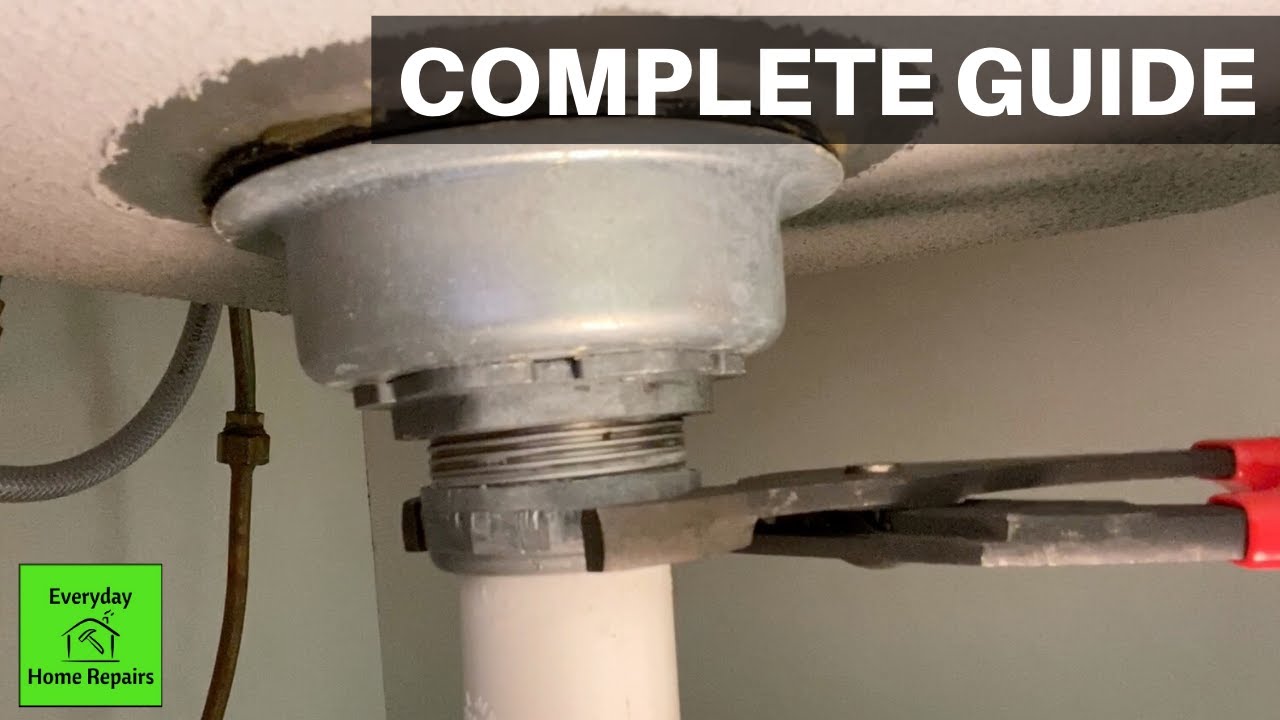
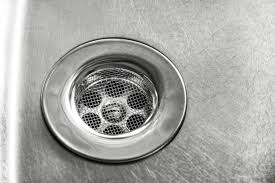
First, you’ll need to locate and remove the drain basket. This is usually located in the center of the sink, and it’s held in place with a nut or screw. Once you’ve located the nut or screw, use a wrench to loosen and remove it. Once the nut or screw has been removed, you can pull the drain basket out of the sink.
Next, you’ll need to disconnect the drain pipe from the sink. This is done by unscrewing the slip joint nut from the drain pipe. Once the nut has been removed, you can pull the drain pipe away from the sink. Finally, you can remove the drain basket and discard it.
By following the steps outlined above, you can easily and safely remove a kitchen sink drain basket. And with a few simple tools and a few minutes of your time, you can have your sink draining properly again in no time.
Unscrew the P-Trap
One of the most daunting tasks of any kitchen remodel is removing a sink drain. It can be a messy and time-consuming process, but with the right tools and a bit of patience, you can successfully remove your kitchen sink drain. The first step is to unscrew the P-Trap. This is the curved pipe beneath your sink that connects the sink drain to the wall. To do this, you’ll need an adjustable wrench and a bucket to catch any water that may leak out. Loosen the clamp that holds the P-Trap in place, then unscrew the nuts that hold it to the sink drain and wall. Once the P-Trap is removed, the sink drain should be easy to take out. Make sure to clean the P-Trap thoroughly with a wire brush and a degreaser before replacing it.
Disconnect the Drain Hose from the Drain Pipe
Removing a kitchen sink drain is a simple but essential task when it comes to maintaining a functional kitchen. The first step is to disconnect the drain hose from the drain pipe. This can be a bit tricky but with the right tools and a bit of care, it can be done quickly and safely. Start by locating the drain hose and disconnecting it from the drain pipe. Make sure to use a wrench and turn the hose counterclockwise until it is completely disconnected from the pipe. Once it is disconnected, you can then use a pair of pliers to remove the drain hose. Be careful when handling the hose as it may be full of water and it can be difficult to control. Once the hose is removed, you can now move onto the next step in removing the kitchen sink drain.
Disconnect the Dishwasher Drain Hose
If you’re planning to replace your kitchen sink drain, the first step is to disconnect the dishwasher drain hose. Depending on the type of sink you have, this may be a simple step or may require a little more effort. If the dishwasher drain hose is connected directly to the sink, all you need to do is loosen the clamps that secure it to the sink and then disconnect the hose. If the dishwasher drain hose is connected to the garbage disposal, you may need a wrench to loosen the mounting nut that secures it to the sink. Once the hose is disconnected, remove any debris or buildup that may be clogging the drain. Be sure to be careful not to damage the dishwasher drain hose or the garbage disposal. Finally, you can begin the process of removing the kitchen sink drain.
Remove the P-Trap from the Drain Pipe
Removing the kitchen sink drain can be a daunting task, but it doesn’t have to be. The first step in removing the sink drain is to remove the P-Trap from the drain pipe. The P-Trap is the curved pipe that connects the sink drain to the wall drain pipe. To remove the P-Trap, you will need a few tools including a pair of slip joint pliers, a pipe wrench, and a bucket. Begin by loosening the slip joint nuts that hold the P-Trap to the sink drain and wall drain pipe. Once the nuts are loose, you can carefully remove the P-Trap from the pipes and place it in the bucket. Be sure to wear protective gloves and safety glasses when removing the P-Trap to avoid any potential injury. Once the P-Trap is removed, the sink drain can be removed from the wall pipe.
Install the New P-Trap
Installing a new P-Trap is the last step in the process of removing a kitchen sink drain. A P-Trap is the curved portion of the drain pipes that prevents sewer gases from entering the home. Installing a new P-Trap is a fairly simple process, but it is important to make sure that it is properly sealed and connected to the other drain pipes for optimal performance.
To start, cut the drain pipe that will be connected to the new P-Trap. Make sure to use a hacksaw or a reciprocating saw to make clean cuts. Next, attach the new P-Trap to the drain pipes using the appropriate fittings. Make sure to use a Teflon tape around the threads of the pipe fittings to ensure a proper seal. Finally, use a pipe wrench to securely tighten all the connections.
Once the new P-Trap is installed, run some hot water down the drain to make sure that there are no leaks. If any leaks are present, tighten the connections and check for any other issues that may be causing the leaks. If everything is in order, you have successfully removed and replaced the kitchen sink drain.
Connect the Drain Hose and Dishwasher Drain Hose
Removing a kitchen sink drain is a task that many homeowners feel confident to tackle on their own. One of the most important steps in removing the drain is connecting the drain hose and the dishwasher drain hose correctly. This requires a bit of technical know-how but can be done by anyone with basic plumbing skills.
First, you’ll need to shut off the water supply to the sink and disconnect the drain hose from the sink drain. Then, you’ll need to remove the dishwasher drain hose from the sink and clean off any debris or grime. Once the hose is clean, you can reattach it to the sink drain using a rubber gasket and a clamp. Make sure to tighten the clamp securely to ensure a good seal.
Once the drain hose and the dishwasher drain hose are securely attached to the sink drain, you’ll need to connect the dishwasher drain hose to the sink drain trap. This is done by connecting a P-trap adapter to the end of the dishwasher drain hose and then connecting it to the sink drain trap. Make sure to secure the connection with a clamp.
By following these instructions, you can easily remove and replace your kitchen sink drain in no time. With a bit of preparation and some technical know-how, anyone can complete this task.
Reinstall the Sink Drain Basket
Removing a kitchen sink drain can be a tedious and messy task. Fortunately, reinstalling the sink drain basket is a relatively simple procedure. Before you get started, make sure you have all the necessary tools and supplies. You’ll need a drain wrench, a bucket, a rag, plumber’s putty, and a drain basket. Once you have everything you need, you can begin the process of reinstalling the sink drain.
First, you’ll need to remove the old drain basket. Using your drain wrench, loosen the locknut on the bottom of the drain and then gently remove the basket. If there is any old plumber’s putty on the sink, use a rag to clean it up. Once the drain basket is removed, you can install the new one.
Take the new basket and place it in the drain opening. Using plumber’s putty, form a seal around the rim of the basket and then press it into the sink. To secure it in place, you’ll need to tighten the locknut on the bottom of the drain. Make sure that it is tightened enough to form a good seal.
Test the New Sink Drain
Testing the new sink drain is an essential step in ensuring that your kitchen sink is properly installed and functioning correctly. After the new sink drain is installed, it’s important to test it for any leaks or blockages. This can be done by filling your sink with water and checking for any obvious signs of a leak. It’s also important to check the drain for any blockages or slow draining. To do this, you can either run hot water down the drain for several minutes or use a specially designed snake to clear any blockages. Once the new sink drain is tested, you can be sure that it is working correctly and ready for use.
FAQs About the How To Remove A Kitchen Sink Drain
1. How do I remove a kitchen sink drain?
A: The process for removing a kitchen sink drain depends on the type of sink you have. Generally, you’ll need to remove the sink stopper, unscrew the retaining nuts that secure the drain basket to the sink, and then pull the basket out.
2. What tools will I need to remove a kitchen sink drain?
A: You’ll need a wrench or pliers to loosen the retaining nuts, and a screwdriver to remove the sink stopper.
3. Is it difficult to remove a kitchen sink drain?
A: It can be, depending on the type of sink you have. If it’s an older sink, the retaining nuts may be corroded or difficult to access.
Conclusion
Removing a kitchen sink drain is not a difficult task and can be completed in a short amount of time with the right tools and techniques. After locating the drain and disconnecting the plumbing, the trap should be unscrewed and the drain removed. Finally, the new drain can be installed and the plumbing reconnected. With a little patience and a few simple steps, you can easily remove and replace a kitchen sink drain.

