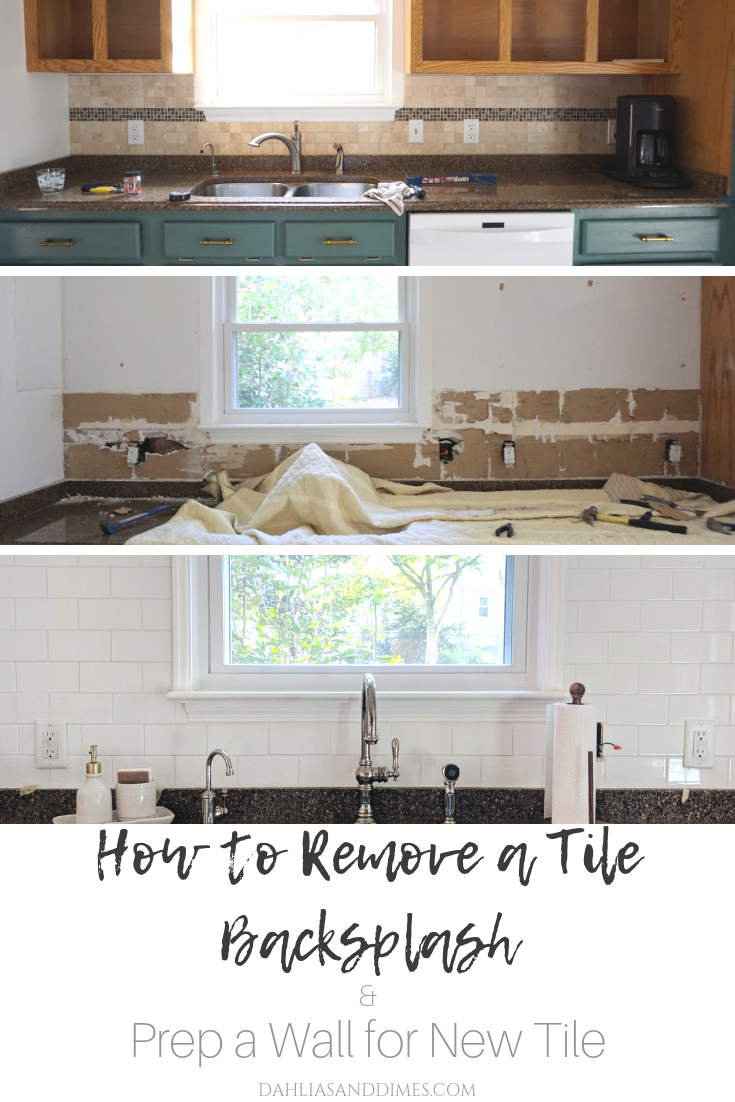
Removing kitchen tiles can be a daunting task. But with the right tools and a bit of patience, you can have your kitchen looking brand new in no time. This guide will tell you everything you need to know about how to safely and properly remove kitchen tiles, from the materials you need to the steps you should take. With this guide, you’ll be able to complete the project with ease and confidence.
Preparation for Tiling Removal
Removing kitchen tiles is a project that requires careful preparation. Before beginning, it’s important to assess the scope of the project, gather the necessary tools and materials, and ensure the area is ready to be worked on.
First, assess the area to be worked on and determine the best method for removing the tiles. Consider the number of tiles that will need to be removed, the condition of the existing tiles, and the type of tile adhesive used. This will help to determine the safest and most efficient way to remove the tiles.
Next, gather the necessary tools and materials, such as a hammer, chisel, drill, grout saw, screwdriver, putty knife, and tile adhesive remover. Make sure to wear protective gear such as gloves, goggles, and a dust mask.
Finally, prepare the area to be worked on. Remove all furniture, cover outlets and other fixtures, and cover the floor with a tarp. Remove the grout between the tiles with a grout saw, taking care not to damage the surrounding walls or floors. Carefully pry the tiles off the wall or floor, using the hammer and chisel when needed. Apply tile adhesive remover to any remaining adhesive and scrape it off with a putty knife.
By taking the time to prepare, the project of removing kitchen tiles can be completed with ease. Following these steps will ensure the project is done correctly and safely.
Assessing the Tiling Situation
Removing kitchen tiles is a job that can be a daunting task, but with the right knowledge and a bit of patience, it can be done in a few simple steps. Before beginning the project, it’s important to assess the tiling situation, including the type of tiles, the surface they are on, and the adhesive used to stick them in place.
The first step is to determine what type of tiles are installed in the kitchen. Tiles come in a variety of materials, such as ceramic, porcelain, glass, and natural stone. Depending on the type of tile, different methods may be used to remove them.
The next step is to determine the surface the tiles are installed on. This is important, as it will determine the type of tools and techniques needed to remove the tiles. For instance, tiles installed on drywall will require different tools and techniques than tiles installed on plywood or concrete.
Finally, it’s important to identify the adhesive that was used to stick the tiles in place. Different adhesives require different removal techniques. Once the adhesive is identified, the proper removal methods can be used.
By assessing the tiling situation in the kitchen, it will become easier to determine the best method for removing the tiles. With the right knowledge and a bit of patience, the job is achievable.
Choosing the Right Tools for the Job
Removing kitchen tiles is a labor-intensive endeavor, and the tools you choose can make a huge difference in the success of the job. It is important to know which tools to use when removing kitchen tiles, as the wrong tool can cause damage to the underlying materials or cause injury. The most important tool you will need is a tile-cutting wheel. This is the most effective way to remove tiles, as it allows you to cut through the grout and tile quickly and cleanly. You will also need a hammer and chisel to break up large pieces of tile, as well as a grout saw to cut out any grout that is still attached to the wall. Additionally, you will need safety glasses and heavy-duty gloves to protect your hands and eyes from any dust or debris that may be created during the process. It is also important to have a dust-extraction system to help reduce the amount of airborne debris created during the tile removal process. With the right tools, you can remove kitchen tiles quickly and safely.
Removing the Tiles
from Your Kitchen
Removing tiles from your kitchen can be a daunting and time-consuming task. But, with the right approach and the right tools, you can successfully remove the existing tiles and create a stunning new look for your kitchen. This article will provide you with the essential steps to follow when removing kitchen tiles, as well as helpful tips and tricks to make the process easier.
The first step you should take when removing kitchen tiles is to assess the space and determine the best approach. Consider how many tiles you need to remove and the size of the tiles, as well as the material and adhesive used. Once you have a clear idea of the scope of your project, you can begin to remove the tiles.
Before you start, make sure you have the necessary tools, such as a hammer, chisel, and screwdriver. You’ll also want to protect the surrounding surfaces with a drop cloth or old towels. Begin by loosening the grout around the tiles, and then gently prying them off the wall or floor. If you encounter any stubborn tiles, use a hammer and chisel to remove them.
Once all of the tiles have been removed, you can begin to clean the surface and prepare it for a new tile installation. Use a putty knife and vacuum to remove any remaining grout or adhesive. Then, use a roller or brush to apply a new adhesive to the surface. Finally, you can begin to lay the new tiles in place and grout them.
With the right approach, removing kitchen tiles can be a relatively straightforward process. By following these steps, you can easily and effectively remove the tiles from your kitchen.
Cleaning up the Area
Kitchen tiles can be tricky to remove, especially if they have been in place for a long time. But with the right tools and techniques, you can quickly and safely remove kitchen tiles without damaging the wall or the tile surface. The first step in removing kitchen tiles is to clean up the area. This involves removing any debris or dirt that has accumulated around the tiles and clearing away any furniture or appliances in the vicinity of the tiling. Additionally, you may want to cover nearby surfaces with a protective sheet or a drop cloth to keep them safe from debris or tile fragments. Once the area is cleared, you can begin the process of removing the tiles.
Disposing of the Removed Tiles
Removing kitchen tiles is a difficult process that requires a lot of time and effort. But once the job is done, disposing of the removed tiles presents a whole new challenge. While tile can be recycled, it is not as easy as throwing it in the recycling bin. Depending on the material, size, and condition of your old tiles, there are a few different ways to dispose of them.
One option is to donate the tiles to a local charity. Many charities accept tile donations that can be used as part of a home renovation project. Contact your local charity to find out if they accept tile donations.
If donating the tiles is not an option, you can take them to a recycling center. Most cities have recycling centers that accept tiles. You may need to break them into smaller pieces or cut them into more manageable sizes, but recycling centers will usually accept them.
You can also contact a local contractor to see if they will take the tiles. Many contractors are willing to take the tiles off your hands and use them in their own projects.
Finally, you can simply throw them away. If the tiles are too damaged to be reused or recycled, you may have to throw them away. Make sure to check with your local waste management department to find out the proper disposal methods.
By considering these options, you can easily dispose of the tiles you’ve removed from your kitchen. Donating, recycling, or finding a contractor are all great ways to ensure the tiles are disposed of safely and responsibly.
Repairing the Wall/Floor
Replacing your kitchen tiles can be a tedious job. But it doesn’t have to be if you know the right steps to take. Before you start, it’s important to understand the process of removing kitchen tiles and repairing the wall or floor underneath.
The first step is to carefully remove the existing tiles. This can be done by using a chisel and hammer to break them off. Wear protective gear such as safety glasses and gloves to ensure that you don’t get hurt. Make sure to remove all the pieces of tile, so that you don’t end up with any sharp edges. Once the tiles are all removed, you can start to repair the wall or floor underneath.
For walls, use a putty knife to scrape away any remaining adhesive and then fill in the gaps with a drywall compound. Allow the compound to dry before sanding it down so that it’s even with the surface. For floors, use a trowel to scrape away any remaining adhesive and then fill in the gaps with a cement-based mortar. Once the mortar is dry, it can be sanded down and sealed with a sealant.
Once the wall or floor is repaired, you can start installing the new tiles. Make sure to follow the manufacturer’s instructions for the best results.
Removing kitchen tiles and repairing the wall or floor underneath is a laborious task, but with the right steps and tools, it can be done quickly and effectively.
Preparing the New Surface
Once the old tile is removed, the surface must be readied for the new tile. Preparing the surface involves cleaning the area, filling any gaps, and adding a concrete board. Cleaning the area is essential to ensure that no grime or dirt remains that could prevent the tile from being firmly stuck in place. Filling any gaps is also important to prevent any tiles from becoming loose over time. Finally, a concrete board must be added to the surface, as this will provide the best foundation for the new kitchen tiles. With the surface ready, the new tiles can be installed.
Choosing the Right Replacement Tiles
When replacing kitchen tiles, it is important to choose the right replacement tile to ensure a successful outcome. Consider factors such as durability, ease of installation, cost, and style. Durable tiles, such as porcelain tiles, are a good choice for high-traffic areas, as they are less likely to chip or crack. Ceramic tiles are a great option if you are looking for a budget-friendly option that is still attractive. For a more stylish look, consider glass or stone tiles. Additionally, it is important to consider the installation process when selecting tiles. Some materials require special adhesive, grouting, and cutting tools, so make sure to research the installation process for the tiles you are considering. Once you know the tile material and installation process, you can then focus on choosing the perfect tile for your kitchen. Consider the size, shape, color, texture, and design of the tile to ensure it complements the overall look of the kitchen.
Installing the New Tiles
Remodeling your kitchen is an exciting job, and replacing old, worn-out kitchen tiles can be a great way to give your kitchen a fresh, new look. But before you get to the fun part of installing the new tiles, you’ll need to take out the old ones first. Removing kitchen tiles can be a daunting task, but with the right tools and a bit of patience, you can get the job done quickly and easily. Here are a few tips to help you remove your kitchen tiles successfully.
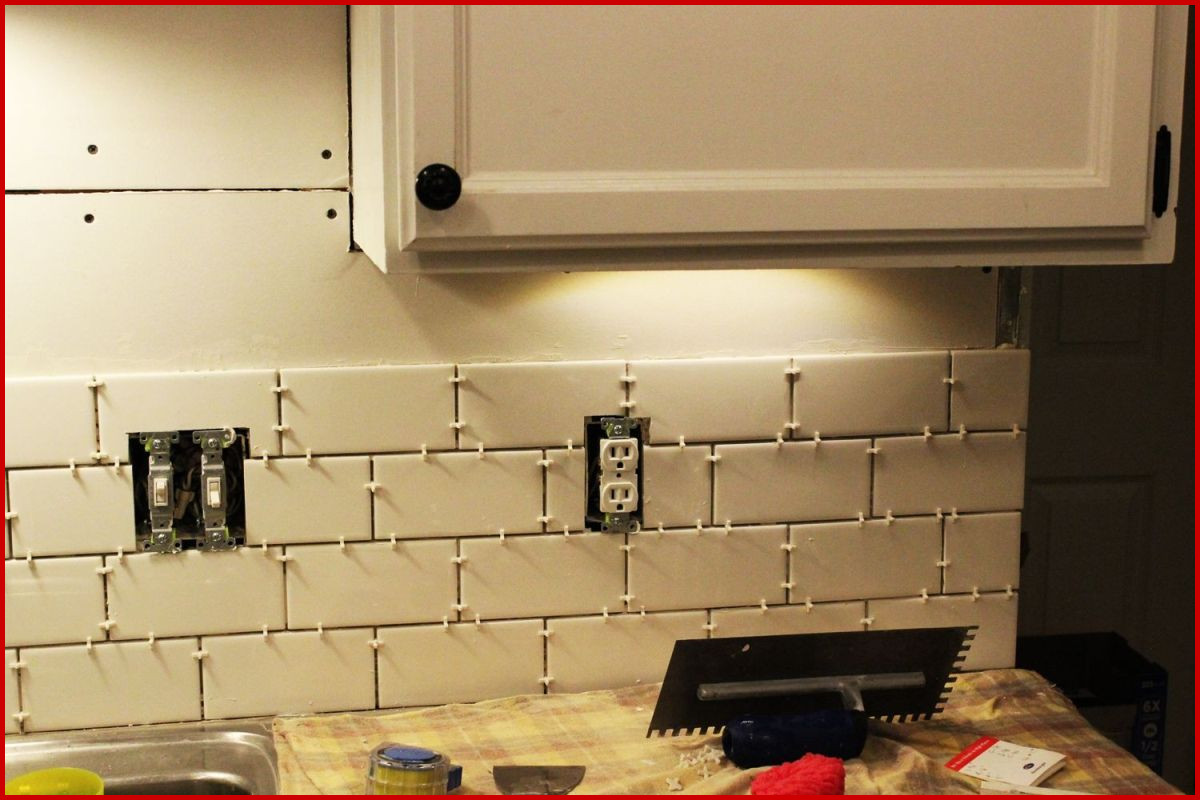
First, you’ll need to prepare the area you’re working on by covering the surrounding surfaces with drop cloths. This helps protect your cabinets and countertops from debris and damage. Next, you’ll need to carefully chip away at the grout surrounding the tiles with a small chisel and hammer. Keep your chisel at a shallow angle, and be careful not to break the tiles. Once the grout is loosened, use a putty knife to gently pry the tiles away from the surface.
If the tiles are stuck to the wall, you may need to use a heat gun or blow dryer to heat up the adhesive and make it easier to remove. Finally, once the tiles have all been removed, use a scraper to get rid of any leftover adhesive. With these simple tips, you’ll be able to remove your kitchen tiles quickly and easily, so you can start working on installing those beautiful new tiles.
Sealing the Tiles
Sealing kitchen tiles is an important step in the removal process and can help to keep the space looking attractive and protect it from further damage. Sealing the tiles ensures that water, dirt, and grime can’t penetrate and cause further damage or staining. It also helps to keep the tiles in place and prevents them from becoming loose or coming away from the wall. Sealing the tiles also helps to reduce the amount of maintenance required and keeps the space looking its best for longer.
To seal the tiles, you’ll need to prepare the surface by cleaning it thoroughly and making sure that it is dry. Then, apply a sealant or grout to the tiles, ensuring that you choose a product that is suitable for the type of tile you’re working with. Allow the sealant or grout to dry completely before applying a second coat. Once the second coat is dry, you’ll need to buff the tiles using a soft cloth before you’re ready to move on to the next step in the removal process.
FAQs About the How To Remove Kitchen Tiles
1. What is the best tool to use for removing kitchen tiles?
Answer: The best tool to use for removing kitchen tiles is a utility knife or an oscillating tool.
2. How do I know when the tiles are ready to be removed?
Answer: The most reliable way to tell when the tiles are ready to be removed is to gently push them with a putty knife or screwdriver. If they move easily, then they are ready to come off.
3. Is there a risk of damaging the wall when removing kitchen tiles?
Answer: Yes, there is a risk of damaging the wall when removing kitchen tiles. It is important to take extreme care when removing the tiles to ensure that the wall is not damaged.
4. Is there a way to prevent dust and debris from spreading when removing kitchen tiles?
Answer: Yes, there are ways to prevent dust and debris from spreading when removing kitchen tiles. Use a vacuum cleaner to reduce the amount of dust and debris that is released into the air. Additionally, cover any furniture and floors with a plastic sheet to catch any pieces of tile that may be dislodged.
5. How do I clean up the area after removing the kitchen tiles?
Answer: After the tiles have been removed, clean the area with a damp cloth or mop and a mild detergent. Vacuum up any dust and debris that has been left behind. Finally, use a sealer to seal the wall and prevent moisture from penetrating the area.
Conclusion
Removing old kitchen tiles can be a laborious task, but with the right tools and techniques, it can be done quickly and safely. Start by removing any grout and debris from around the edge of the tile, then use a chisel and hammer to remove the tile. Once all the tiles have been removed, use a trowel and tile adhesive to fill the space. With these steps, you’ll be able to safely and successfully remove your kitchen tiles in no time.

