Mold and mildew in the kitchen sink caulk can be a serious problem. Not only is it unsightly, but it can also cause health issues if not removed properly. Fortunately, there are some simple steps you can take to remove mold from kitchen sink caulk and keep it from returning. With the right supplies and a bit of know-how, you can have a clean and safe kitchen sink in no time.
Identifying Mold in Kitchen Sink Caulk
Mold can be a troublesome issue to deal with in any home, but it is particularly concerning when it is detected in kitchen sink caulk. While it may be difficult to spot, recognizing mold in kitchen sink caulk is the first step to getting rid of it. Fortunately, there are a few simple methods to identify mold in kitchen sink caulk.
The most obvious way to determine if mold is present is to examine the caulking. If it is discolored, cracked, or peeling, it may be a sign that mold is present. Additionally, if the caulking emits an unpleasant odor, mold is likely present. Furthermore, if there is any water pooling in the area surrounding the caulking that can also be an indicator of mold growth.
If any of these signs are observed, it is important to take action immediately. Mold can cause health problems, damage the structure of the home, and can become a costly issue if it isn’t taken care of. The best way to get rid of mold in kitchen sink caulk is to use a dry cloth to remove it, followed by an appropriate cleaning agent to ensure it is completely eradicated.
With the right knowledge and tools, it is possible to successfully remove mold from kitchen sink caulk. By identifying and treating the problem promptly, homeowners can reduce any potential risks and keep their homes in top condition.
Assessing the Severity of Mold Growth
When it comes to dealing with mold growth in the kitchen sink caulk, the most important step is assessing the severity of the issue. It is important to take the time to inspect the affected area and determine the extent of the mold growth. If the mold is extensive, it may be necessary to consult a professional for assistance. Additionally, it is important to identify the source of the mold, as this may help determine the best course of action.
The presence of mold in kitchen sink caulk can be a health hazard, especially for those with allergies or asthma, and should not be taken lightly. If the mold appears to be widespread or the area is too difficult to clean, it is best to contact a professional mold removal service. Additionally, it is important to wear protective gear such as gloves, goggles, and a face mask when cleaning the affected area. Proper ventilation should also be used to prevent the spread of mold spores.
When assessing the severity of the mold, it is also important to look for signs of moisture or water damage. This could be a sign that the underlying problem has not been properly addressed. If this is the case, it is important to investigate the source of the moisture and take steps to prevent further damage.
By assessing the severity of the mold growth, it is possible to determine the best course of action for removing it. Taking the time to properly evaluate the situation can help ensure that the mold is successfully removed and that the underlying problem is properly addressed.
Supplies Needed for Mold Removal
Mold can be a stubborn and unwelcome guest in the kitchen sink, and can often be difficult to remove without the right supplies. Fortunately, removing mold from kitchen sink caulk doesn’t have to be a daunting task. With the right tools, removing mold from the caulk of kitchen sinks can be done quickly and safely. Before getting started, it’s important to gather the right supplies.
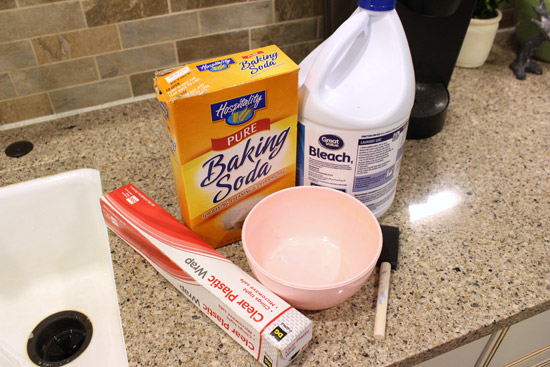
First, you’ll need a cleaning solution to remove the mold. This can be any surface-safe cleaning solution such as baking soda, white vinegar, or even a bleach-based cleaner. You’ll also need to have on hand a stiff-bristled scrub brush, a soft cloth, and a disposable rag. Safety goggles and gloves are also recommended, as mold can be hazardous to your health.
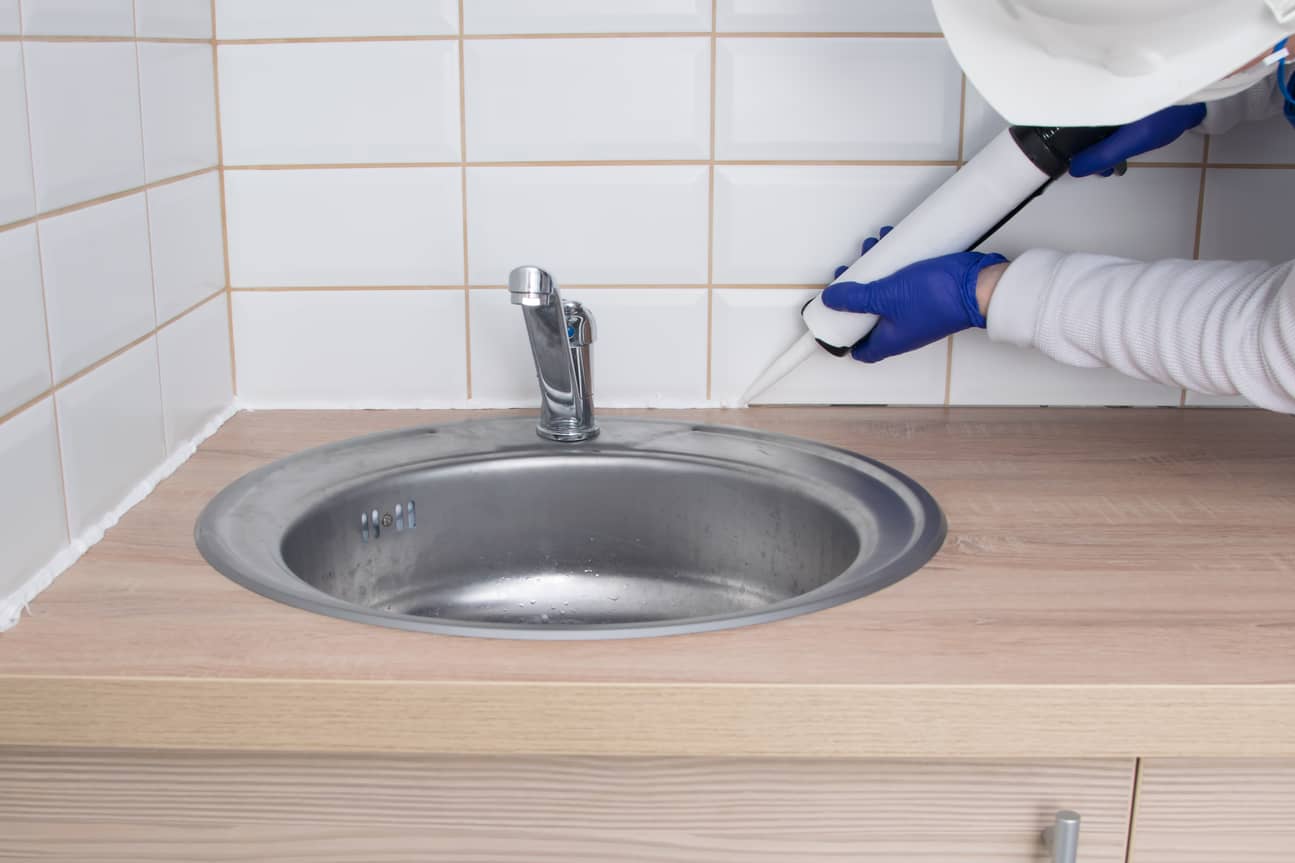
Finally, you’ll need a sealant to seal the caulk after the mold has been removed. This can be a silicone-based sealant or a paintable caulk, depending on your preference. With all the right supplies in hand, you’re ready to begin removing the mold from your kitchen sink caulk.
Preparing the Kitchen Sink Caulk for Mold Removal
Mold can be a particularly difficult problem to tackle, especially when it has taken hold of the caulking around a kitchen sink. Left untreated, the mold can spread quickly, posing a serious health hazard to those living in the home. To ensure that the mold is completely removed, it is important to prepare the kitchen sink caulk before mold removal.
The first step is to clean the area around the kitchen sink caulk with a mild detergent and water solution. This will help loosen the mold spores from the caulking, allowing them to be more easily removed. It is important to use a non-abrasive cleaner, as abrasive cleaners can damage the caulk. Once the area is clean, it is important to make sure that the caulking is completely dry before attempting to remove the mold.
Once the area is dry, it is time to apply a mold remover. These can be found in most home improvement stores, and they are effective at killing mold spores. It is important to follow the directions on the product carefully, as some products may require the area to be covered with plastic wrap or some other type of barrier before application. After the product has been applied, it is important to allow it to sit for the recommended amount of time before rinsing the area with water.
Once the mold has been removed, it is important to make sure that the area is completely dry before reapplying new caulk. This will help ensure that the mold does not return in the future. With the proper preparation, it is possible to effectively remove mold from kitchen sink caulk and keep it out for good.
Removing the Mold from the Caulk
on Your Kitchen Sink
Mold is an unwelcome guest in our homes. It can cause health problems, create an unpleasant odor, and damage surfaces. Kitchen sinks are particularly prone to mold because moist conditions are created when water is left to collect in the caulk around the sink. If you notice mold on the caulk of your kitchen sink, it’s important to take steps to remove it as soon as possible. In this article, we’ll provide you with a step-by-step guide to safely removing the mold from your kitchen sink caulk.
First, it’s important to prepare your workspace. Open the windows in the room to increase ventilation and protect yourself by wearing gloves and a mask. Next, create a bleach-water solution. Mix one part bleach to ten parts water and use either a spray bottle or a sponge to apply the solution to the affected area. Allow the solution to sit for at least 10 minutes before scrubbing the mold away with a stiff brush. Once you have scrubbed the area, rinse it with clean water and pat it dry.
Finally, make sure to apply a mildew-resistant sealant to the area to prevent the mold from returning. This will help keep your kitchen sink looking and smelling its best. With these steps, you can quickly and safely remove the mold from your kitchen sink caulk.
Cleaning the Kitchen Sink Caulk After Mold Removal
Mold can be a difficult problem to take care of, and it can be even more difficult to remove from kitchen sink caulk. It is important to take the necessary steps to clean the caulk after mold is removed to ensure it doesn’t return. Here are a few steps you can take to ensure your kitchen sink caulk is back to its original, clean, and safe state.
First, clean the caulk with bleach and water solution. Mix a cup of bleach with two cups of warm water and use a soft brush to clean the caulk. Make sure to rinse the brush often and use a clean cloth to wipe up the solution. This will help remove any mold spores that may be lingering on the caulk and will help to prevent a recurrence.
Second, apply a sealant to the caulk. After the caulk is cleaned and dried, you can apply a sealant to the caulk. This will help create a protective barrier against the growth of mold in the future. Sealants come in a variety of colors and are easy to apply.
Third, use a mildew inhibitor. There are many mildew inhibitors available on the market that can be used to help prevent the growth of mold and mildew on the kitchen sink caulk. Follow the instructions on the product and make sure to use it regularly to ensure the caulk remains mold-free.
By following these steps, you can help ensure that your kitchen sink caulk stays clean and free of mold. Cleaning the caulk after removing the mold is an important step in keeping your home safe and free of mold.
Preventing Future Mold Growth
in the Kitchen
Mold in the kitchen can be an unpleasant and worrisome problem. Not only can it cause odors and discoloration of surfaces, but it can also be a health hazard. Although it may seem like a daunting task, it is possible to remove mold from kitchen sink caulk and prevent future mold growth.
The key to mold prevention is proper ventilation and moisture control. Make sure that all areas of the kitchen are well-ventilated and that any areas of high humidity, such as the sink, are dried regularly. Additionally, use dehumidifiers and exhaust fans to reduce excess moisture.
Cleaning and maintaining the kitchen regularly is also essential in preventing mold. Clean surfaces with a solution of bleach and water and keep all surfaces dry. Additionally, use mold-resistant materials such as caulking and paint in areas of high humidity.
Finally, keep an eye out for any potential sources of mold growth. Be sure to inspect the kitchen for any visible signs of mold, such as discoloration or a musty smell. If you do find mold, take the necessary steps to remove it immediately.
By following these tips, you can take the necessary steps to remove mold from kitchen sink caulk and prevent future mold growth. With proper maintenance and a little effort, you can keep your kitchen clean and mold-free.
Troubleshooting Common Mold Removal Issues
Mold can be a major problem in the kitchen sink caulk, causing unsightly discoloration and even health concerns. Unfortunately, it’s also notoriously difficult to get rid of. To help you navigate the task of removing mold from your kitchen sink caulk, here’s a guide to the most common issues and solutions.
First, it’s important to understand the cause of the mold. Most often, moisture and poor ventilation are to blame. To prevent mold from returning, you’ll need to address the underlying issue. That means fixing any leaks, installing a fan, or using a dehumidifier to keep the area dry.
Next, you’ll need to take steps to get rid of the mold. Start by using a mixture of bleach and water and scrubbing the area with a bristle brush. If that doesn’t work, consider using a commercial mold removal product. For especially tough cases, you may need to use a professional mold remediation service.
Finally, it’s important to take preventative measures to keep the mold from coming back. That means regularly checking for leaks and moisture, and using a mold-resistant sealant when caulking around the sink. With these tips, you can keep your kitchen sink caulk mold-free and looking its best.
Conclusion
Removing mold from kitchen sink caulk is an important step in maintaining a healthy and clean kitchen. With the right products and tools, it is possible to get rid of mold and mildew from the caulk in your kitchen sink. The process is simple, and it can help you keep your kitchen clean and free from mold for a long time.

