A kitchen backsplash is a great way to add visual interest and practical protection to your kitchen walls. However, over time, the backsplash can become outdated or simply start to look worn and tired. Replacing the backsplash is a relatively straightforward DIY job that can easily be completed in a weekend. This article outlines the process of replacing a kitchen backsplash, including the materials and tools needed, how to remove the old backsplash, and how to install the new one. With the right tools and approach, you can quickly and easily freshen up your kitchen with a brand-new backsplash.
Preparing the Area
Replacing your kitchen backsplash is a rewarding DIY project that can completely change the look of your kitchen. Before starting the project, you must first prepare the area. This includes removing the existing backsplash, cleaning the wall, and measuring the space.
Removing the existing backsplash can be intimidating, but it is relatively straightforward. Start by cutting away any grout lines with a utility knife. Once the grout is removed, use a putty knife to carefully pry the tiles from the wall. Have a bucket and sponge nearby to clean up any mess and debris.
Once the area is cleared, it’s important to clean the wall and remove any residue from the old backsplash. Use a mild cleaner and a damp sponge to scrub the wall and remove any grout or dirt. This will help ensure the new backsplash adheres to the wall properly.
Finally, measure the area to determine the amount of tile and adhesive needed. Measure from the countertop to the bottom of the upper cabinets and add an extra tile for any outlets or odd shapes. Write down your measurements and double-check them before heading to the store.
Now you’re ready to install your new backsplash! Follow these steps to ensure the area is properly prepared before beginning the project.
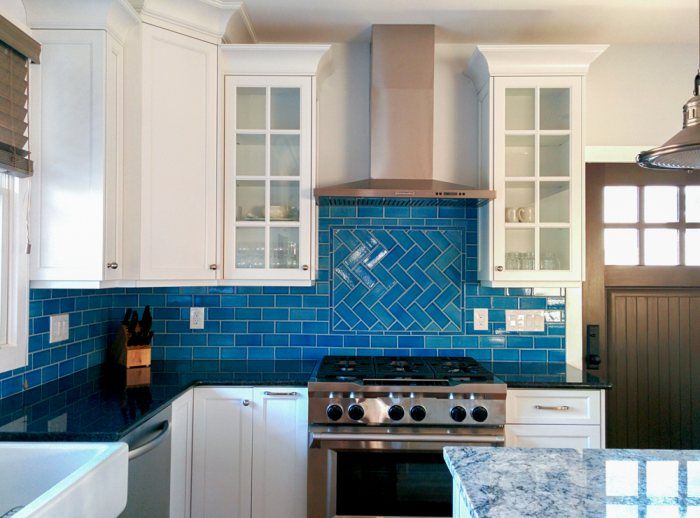
Choosing the Right Tile
When it comes to choosing the right tile for your kitchen backsplash, it’s important to take into account the size, shape, and material of the tile you’ll be using. Consider your existing kitchen décor and the size of the wall space you’ll be covering. Depending on your design style, you might choose something bold and daring, or something more subtle and neutral. Don’t forget to factor in the amount of maintenance and cleaning you’ll need to do for each type of tile. If you choose ceramic or porcelain, you’ll need to be more meticulous with your cleaning routine. If you’re looking for a low-maintenance option, glass or metal tiles are great alternatives.
In addition to the type of tile, you’ll also want to consider the color and pattern. Choose a color that complements the other colors in your kitchen and a pattern that draws the eye and adds to the overall aesthetic of the room. To make sure your tile stands out, you can add a border or even mix and match different colors and shapes.
Once you’ve selected the tile, you’ll want to make sure you have the right tools to install it. Tiles can be installed in a variety of ways, so you’ll need to make sure you have the proper tools and materials. If you’re not sure how to install it yourself, many professionals can help you get the job done.
Replacing your kitchen backsplash can be a fun and rewarding project. By taking the time to choose the right tile, you’ll be sure to create the perfect look for your kitchen.
Gathering the Necessary Supplies
Replacing a kitchen backsplash can be a great way to freshen up the look and feel of your kitchen. Before beginning the project, it is important to gather the necessary supplies to complete the job. When choosing supplies, you’ll need to consider the size of the backsplash, the material you wish to use, and the tools you’ll need to complete the project.
Depending on the size of the area you plan to cover, you may need to purchase wallpaper, ceramic tile, or stone tile. You should also consider the type of adhesive required to adhere the material to the wall, as well as any grout or sealant you may need. Lastly, you’ll need to purchase the tools required to complete the project, such as a tile saw, grout float, and grout mixer.
By gathering the necessary supplies, you can ensure that your kitchen backsplash is installed correctly and with ease. Additionally, you’ll save time and energy by having all the supplies you’ll need for the project on hand. Take the time to research the different materials and tools available, and you’ll be on your way to having a beautiful new kitchen backsplash.
Removing the Old Backsplash
Removing the old kitchen backsplash is the first step in replacing it with a new one. Depending on the type of backsplash you have, the removal process can vary. If it is a tile backsplash, you must remove the tiles one by one, carefully preserving the grout and examining the wall for any damage. If you have a solid backsplash, such as a sheet of stainless steel, you will need to cut it free from the wall using a hacksaw or other cutting tool. Once the old backsplash has been removed, you can begin preparing the wall for the installation of a new one.

Installing the New Backsplash
Installing a new backsplash in your kitchen can give it a fresh, modern look and help protect the walls from spills and splashes. Replacing a backsplash is a straightforward DIY project, and with the right materials and tools, it can be completed in just a few hours. Whether you’re installing tile, glass, or metal, the process of replacing a kitchen backsplash is the same.
Start by preparing the area. If there’s an existing backsplash, it should be removed. In most cases, this involves scraping off the old tile and removing any adhesive residue. Make sure the wall is clean and dry before you begin. Once the area is prepped, you can begin installing the new backsplash. Measure the area to make sure you have enough material, then cut and attach the new material to the wall with mastic adhesive and a notched trowel. After the material is in place, apply grout to the seams with a rubber float. Once the grout is dry, you can wipe away the excess with a damp sponge.
With a few simple steps, you can easily replace your kitchen backsplash and give your kitchen a new look. Make sure to shop around for the best materials and tools for the job, and always follow the manufacturer’s instructions for installation.
Sealing and Grouting the Tile
Replacing a kitchen backsplash is a great way to give your kitchen a quick and affordable facelift. After choosing the right tile for your kitchen backsplash, the next step is to begin the installation process. One of the most important steps is sealing and grouting the tile.
When sealing and grouting your tile backsplash, it is important to choose the right sealant and grout for the job. The wrong sealant or grout can cause the tile to chip, crack, or even worse, grow mold. Make sure to consult with a professional or do research on the best type of sealant and grout for your kitchen backsplash.
To begin the sealing and grouting process, start by applying a thin layer of sealant with a paintbrush. Once the sealant has dried, you can begin to apply the grout. This should be done in small sections to ensure that it is applied evenly and smoothly. Make sure to use a damp sponge to wipe off any excess grout and to avoid smearing any of the grout.
Finally, after the grout is completely dry, you can seal it with a sealant. This will help to protect your tile and grout from water damage and staining. Once the sealant dries, your kitchen backsplash is complete. Sealing and grouting your tile will help to ensure that it is properly installed and will last for many years to come.
Finishing up the Installation
When it comes to replacing a kitchen backsplash, the finishing touches are the most important. To ensure a professional-looking finish, it’s important to pay attention to details like grout spacing and the edges of the backsplash.
For the grout, most people use epoxy grout because it’s waterproof and easy to work with. When applying the grout, it’s important to use the right consistency and to leave a small gap between the tiles. Once the grout is dry, you can use a damp sponge to wipe away any excess grout.
When it comes to the edges, you can either go with a bullnose edge, which will give the backsplash a softer look, or you can use metal trim for a more modern look. Once you have the edging in place, you can caulk the edges to make sure the backsplash is securely sealed.
Finally, you can use a sealer to protect the backsplash from moisture and discoloration. After the sealer is applied, your new backsplash is ready to be enjoyed for years to come. With careful preparation and attention to detail, you can easily replace a kitchen backsplash yourself and save money in the process.
Maintaining the Backsplash
Maintaining a kitchen backsplash is not a difficult task, but it does require some regular upkeep to keep it looking its best. Proper maintenance helps the backsplash stand up to the wear and tear of everyday use, and it also helps to prevent mold and mildew from forming. Here are some tips to help you maintain your kitchen backsplash:
• Clean the backsplash regularly with a mild detergent and warm water. Wipe away any spills or splashes as soon as they occur to prevent them from staining the surface.
• Use a microfiber cloth and mild detergent for regular cleaning, as this will help to prevent scratches and other damage.
• If some streaks or stains won’t come off with regular cleaning, use a soft scrub brush and a mild abrasive cleaner to remove them.
• Use a sealant on the backsplash to help protect it from water damage and stains.
• Avoid using cleaners that contain bleach or ammonia, as these can damage the surface.
With proper maintenance, your backsplash should remain looking fresh and new for years to come. Follow these tips to help you get the most out of your backsplash and keep it looking its best.
Conclusion
Replacing your kitchen backsplash is a great way to spruce up your kitchen and make it look brand new. With a few simple tools, you can easily install a new backsplash in a few hours. You can choose from many different materials and colors to create a custom look that is unique to your kitchen. With the right materials, proper preparation, and careful installation, you can have a beautiful new backsplash in no time.

