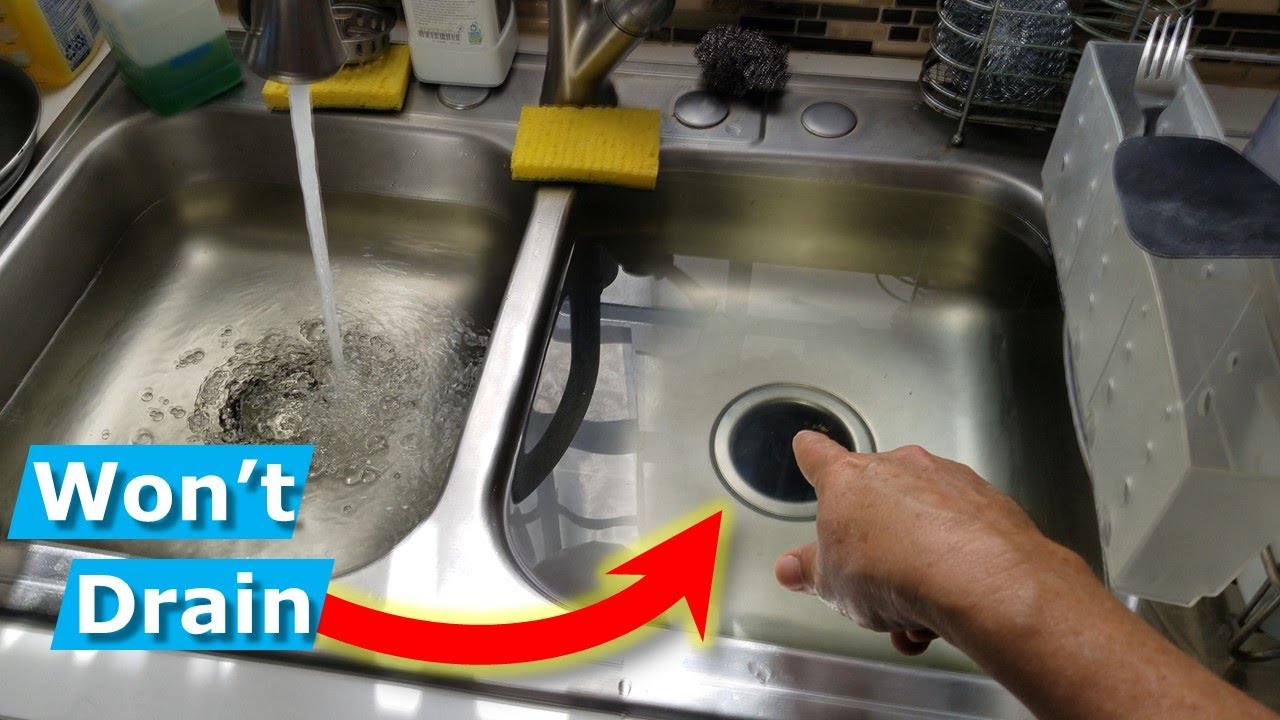
A clogged kitchen sink is a common and frustrating problem, but luckily, it is possible to snake a kitchen sink to clear the clog. Snaking a kitchen sink is a relatively simple process and can be done quite easily with a few simple tools. This article will provide a step-by-step guide on how to snake a kitchen sink, so you can get your sink running smoothly again.
Supplies Needed for Snaking a Kitchen Sink
Snaking a kitchen sink is a great way to clear out clogs that are too stubborn for other methods. To successfully snake your kitchen sink, you’ll need a few supplies. These include a snake auger, a bucket, a pair of rubber gloves, safety glasses, and a flashlight.
The snake auger is the most important tool for snaking a kitchen sink. It’s a long, flexible cable with a corkscrew-like tip that can be inserted into the drain line and rotated to break up stubborn clogs. Be sure to choose the right size auger for your sink; too small and it won’t be able to break through the clog, too big and it might damage the pipe.
The bucket is used to catch any water or debris that may come out of the drain when you’re snaking it. The rubber gloves and safety glasses are for your own protection, as the water and debris may contain harmful bacteria or chemicals. Finally, you’ll need a flashlight to help you see into the drain line if the clog is too far down to reach with the auger.
With the right supplies, you can easily and safely snake your kitchen sink. Be sure to take the necessary precautions and always use a snake auger that’s the right size for your sink. With a few simple steps, you’ll have your kitchen sink unclogged in no time.
Preparing the Kitchen Sink for Snaking
If you have a clogged sink in your kitchen, snaking the drain is often the best way to unclog it. It is relatively simple to snake a kitchen sink, but there are a few key steps that should be taken to ensure that the job is done correctly and safely.
Before you begin snaking the kitchen sink, you will need to gather the necessary materials. These include a drain snake, a bucket, protective gloves, a flashlight, and a screwdriver. You should also wear protective eyewear to protect your eyes from debris that may be dislodged during the process.
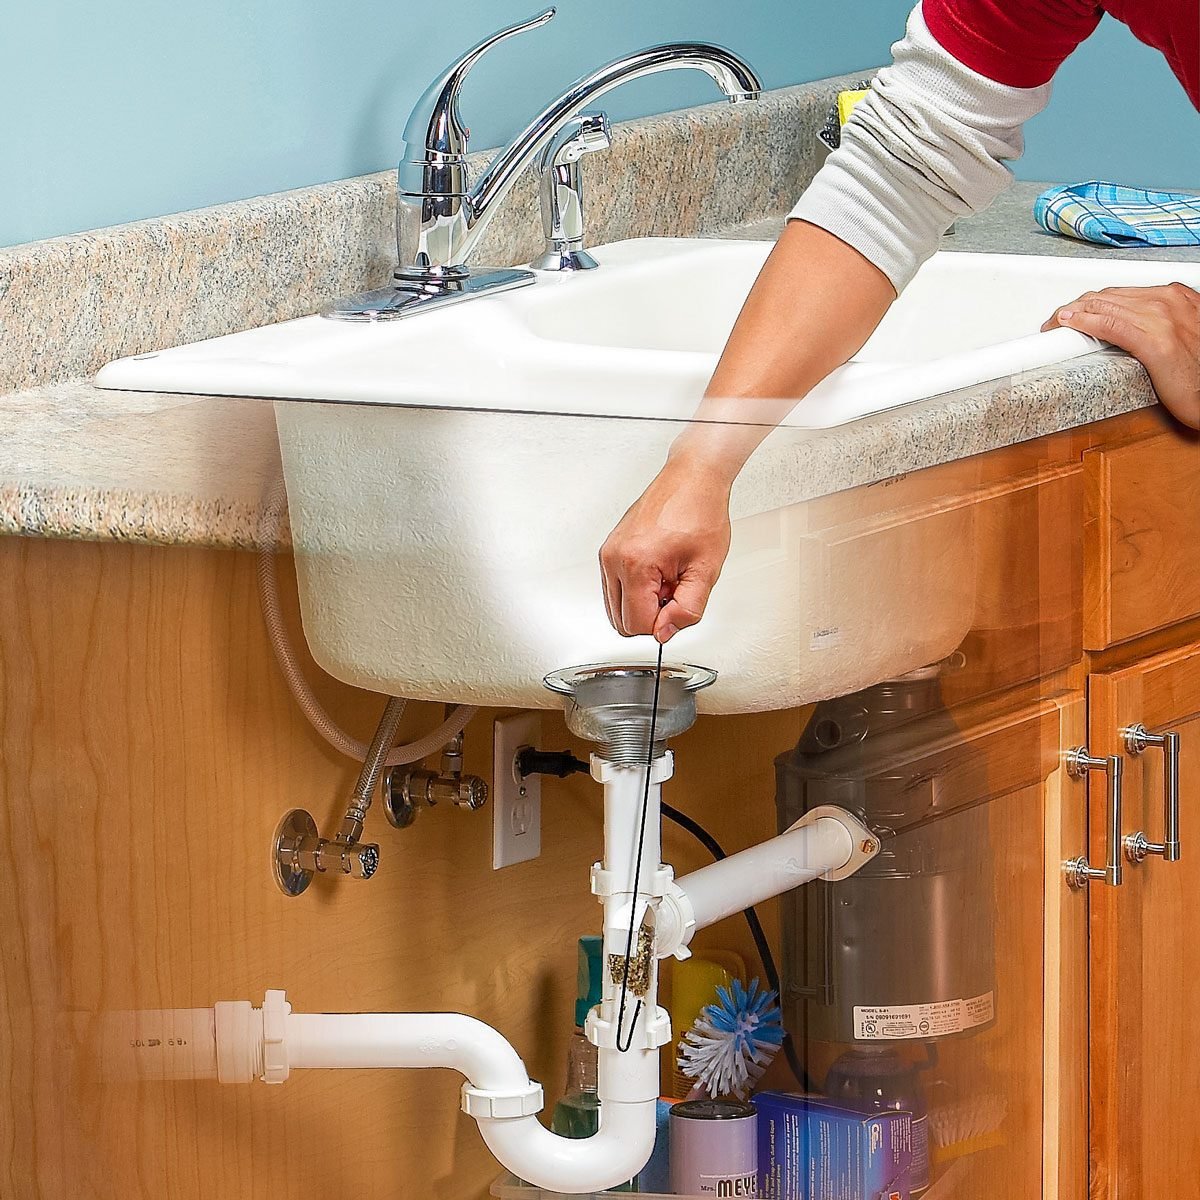
Next, you will need to locate the clean-out plug, which is typically located underneath the sink. This is the access point for the drain snake, and it is important to make sure that it is not clogged before you begin snaking the sink. If there is a clog in the clean-out plug, you should use a screwdriver to carefully remove it before proceeding.
Once you have found and cleared the clean-out plug, you will be ready to begin snaking the kitchen sink. You will need to feed the drain snake into the opening, slowly twisting it as you push it further down the drain. As you do this, you should be on the lookout for any blockages. If you find one, you will need to carefully remove it before continuing.
By following these steps, you should be able to snake your kitchen sink with relative ease. However, if you are not confident in your ability to do it yourself, it is always a good idea to call a professional plumber.
Snaking the Kitchen Sink
Snaking the kitchen sink is an effective way to clear a clogged drain. It is an inexpensive and easy solution that can be done by anyone with minimal experience in plumbing. To snake the kitchen sink, you’ll need a drain snake, which is a long, narrow metal coil with a handle at one end. Start by removing any debris from the sink, then insert the snake into the drain until you feel resistance. Twist the snake as you push it further into the drain, and when you feel it catch on the obstruction, turn the handle to break it up. Pull the snake out and check to see if the obstruction has been cleared. If not, repeat the process until you are successful. When you are done, flush the drain with hot water to finish the job. With a few simple steps, you can easily snake your kitchen sink without having to call a plumber.
Troubleshooting Common Snaking Problems
When it comes to snaking out a kitchen sink, it can be a daunting task. It requires a bit of know-how and patience to snake out a kitchen sink correctly. However, if done correctly, it can save you a lot of time and money in the long run. To make sure you get it right the first time, it is important to understand the common snaking problems and how to troubleshoot them.
Clogs are one of the most common snaking problems. When a sink clogs up, it is essential to identify the cause of the problem. It could be due to a build-up of food scraps, greasy residue, hair, soap scum, or other debris. Once the source of the clog is identified, the snaking process can begin. To snake out a sink, use a plumbing snake or a specialized kitchen sink snake. To ensure that the clog is cleared, it is important to use the right length of snake for the sink’s depth.
Another common snaking problem is a drainpipe that is not draining correctly. This is often caused by an obstruction in the pipe. To identify the obstruction, use a plunger to clear the blockage. If the plunger fails, then it is necessary to use a plumbing snake. To ensure that the pipe is cleared, be sure to use a snake that is long enough to reach the obstruction.
Finally, an incorrectly installed sink can cause snaking problems. When a kitchen sink is installed, it is important to follow the manufacturer’s instructions carefully. If the sink is not installed correctly, it can lead to problems with drainage. If the sink is not draining correctly, it is important to check the installation and assess whether or not the sink needs to be re-installed.
By understanding the common snaking problems and how to troubleshoot them, you can save time and money in the long run. With the right knowledge and tools, snaking out a kitchen sink can be a simple and painless process.
Maintenance Tips for Keeping a Kitchen Sink Clog Free
Having a clogged kitchen sink can be more than an inconvenience; it can cause significant damage to your home. Fortunately, there are some easy maintenance tips that you can follow to keep your kitchen sink clog-free. By taking the time to regularly inspect and clean your kitchen sink, you can help to ensure that it is functioning properly and that it remains clog-free.
First and foremost, be sure to inspect the sink and its drainage system regularly. Make sure to look for any signs of corrosion or damage, and if there are any, take the necessary steps to repair or replace the affected components. Additionally, make sure to clean out the sink strainer and the drain pipe regularly to remove any debris or buildup that could cause a clog.
It is also important to be mindful of what you put down your kitchen sink. Avoid pouring grease, coffee grounds, egg shells, or other food scraps down the drain, as these can accumulate and cause a clog. Additionally, you should avoid using chemical-based drain cleaners, as these can be corrosive and can damage your pipes.
Finally, if your sink does become clogged, make sure to use appropriate plumbing tools to snake it. If you are unfamiliar with how to do this, make sure to consult a professional plumber for assistance. With the right maintenance and care, you can help to ensure that your kitchen sink remains clog-free and functioning properly.
Alternatives to Snaking a Kitchen Sink
If you have a clogged kitchen sink, snaking it is one of the most effective ways to clear out the obstruction and get your sink flowing again. But it’s not the only way! There are several alternatives to snaking a kitchen sink that may be worth exploring.
One of the first alternatives to snaking a kitchen sink is to use a plunger. A plunger can effectively dislodge small clogs from the drainpipe, as the suction created by the plunger can push the obstruction through the drain. However, if the clog is large, a plunger may not be able to do the job.
Another alternative is to make a vinegar and baking soda solution. This solution is effective for breaking down organic matter that may be clogging your sink. To make the solution, pour 1 cup of baking soda down the drain, followed by 1 cup of white vinegar. Allow the solution to sit for at least an hour before flushing with hot water.
Finally, you can use a commercial drain cleaner or an enzyme cleaner. This type of cleaner is designed to break up organic matter clogs, and can be used in place of snaking the drain. However, you should take caution when using these cleaners as they often contain harsh chemicals that can corrode or damage your pipes.
These are just a few alternatives to snaking a kitchen sink. If you’re dealing with a clogged sink, don’t forget to explore all of your options before reaching for the snake!
Safety Precautions for Snaking a Kitchen Sink
Having a clogged sink can be incredibly frustrating, not to mention a major inconvenience. If the plunger and chemical solutions don’t do the trick, it may be time to try snaking your kitchen sink. This process can be intimidating, but with the right safety precautions in place, it is possible to snake your kitchen sink and restore it back to working order.
Before attempting to snake a kitchen sink, it is important to wear protective gear. This includes gloves, safety goggles, and a dust mask. These items will help protect you from any potential hazards that may be present during the process. Additionally, it’s important to make sure the area is well ventilated and to turn off any electrical appliances that can be found nearby.
Additionally, make sure you use the correct tools for the job. Specialty snakes are available for kitchen sinks, and these will be more effective than using a regular snake for different types of drains. It is also important to take special care when using the snake and avoid putting too much pressure on the pipe, as this can cause further damage.
Finally, after snaking the kitchen sink, it is important to test the sink to make sure it functions properly. This can include running water through the sink and checking for any signs of a clog. If the water is draining properly, you can be sure that the snaking process was successful.
In conclusion, snaking a kitchen sink can be a daunting task, but with the right safety precautions and the correct tools, it is possible to unclog your kitchen sink and restore it back to working order.
Common Causes of Clogged Kitchen Sinks
Having a clogged kitchen sink is a common problem that can be easily solved. If you’ve tried all the traditional methods of unclogging your kitchen sink, like plunging, chemical drain cleaners, and boiling water, and you’re still not getting results, then it’s time to snake your sink. Snaking a kitchen sink is a relatively easy DIY project that can help to dislodge the clog and get your sink running properly again.
But before you dive into snaking your kitchen sink, it’s important to understand what may be causing the clog in the first place. Common causes of kitchen sink clogs include grease, hair, food particles, and soap scum. Grease can build up over time and create a thick, sticky film that will eventually clog the drain. Hair can become tangled in the drain and create a blockage. Food particles, such as rice, pasta, and coffee grounds, can also create a blockage. Finally, soap scum buildup can also clog your kitchen sink.
Once you’ve identified what is causing your clogged kitchen sink, you can start the snaking process. Snaking the kitchen sink can help to gently dislodge the clog and get your sink draining properly again. With the right tools and knowledge, snaking a kitchen sink is a straightforward process that is well worth the effort.
How to Choose the Right Snake for Your Kitchen Sink
When it comes to snaking your kitchen sink, there are a few key things you need to consider. Choosing the right snake for the job can make or break the success of your plumbing project. Knowing what type of snake to use, the right length, and the correct way to use it are all important factors in getting the job done efficiently and correctly.
When selecting a snake for your kitchen sink, it’s important to consider the type of sink you have and the type of clog you’re dealing with. A small, handheld snake is ideal for smaller sinks and minor clogs, while a larger, powered snake is better suited for tougher clogs in larger sinks. The right length of snake is also important. If the snake is too short, it won’t be able to reach the clog, while an overly long snake can be difficult to maneuver.
Using the snake correctly is also important. Feed the snake into the pipe slowly and carefully; if it’s forced in too quickly, it could cause damage to the pipe. Once the snake is in place, turn the handle clockwise and apply pressure to the snake to push the clog through. Be sure to take your time and be careful with the snake, as you don’t want to cause any damage to the pipes.
By taking the time to choose the right snake, the correct length, and use it correctly, you can be sure that your kitchen sink will be unclogged and running smoothly in no time.
Cleaning Up After Snaking the Kitchen Sink
If your kitchen sink has become clogged, snaking can be an effective way to remove the blockage. However, snaking comes with its own set of unique challenges. After snaking the kitchen sink, it’s important to properly clean up the mess. Cleaning up after snaking the kitchen sink can be tricky, but with the right techniques and supplies, it doesn’t have to be a hassle.
Start by disposing of any debris, clogs, or objects that have been cleared out of the sink. Use a towel or a paper towel to wipe away any standing water and other residue. Next, use a mild cleaning solution and a sponge or cloth to wipe down the sink and plumbing fixtures. If the pipe is metal, use a steel wool pad or abrasive cleaner to remove any stubborn debris.
After you’ve cleaned the sink and fixtures, use a disinfectant to kill any bacteria that may be present. Once you’ve wiped down the sink with the disinfectant, rinse it with hot water. To prevent future clogs, run hot water through the sink for several minutes. This will help to flush out debris and build-up.
By following these steps, you can ensure that your kitchen sink remains clean and clog-free for years to come. With the right knowledge and supplies, cleaning up after snaking the kitchen sink doesn’t have to be a hassle.
DIY or Professional Service? Pros and Cons of Snaking a Kitchen Sink
If your kitchen sink is clogged, you may be considering snaking it yourself or calling a professional service for help. To make an informed decision, it’s important to understand the pros and cons of both methods.
DIY snaking is generally the less expensive option, but it will require some basic plumbing knowledge and a few tools. To snake your kitchen sink, you’ll need a plumbing snake or auger, a bucket, and a pair of gloves. Once you’ve gathered the necessary supplies, you’ll need to turn off the water supply, remove the trap, and insert the snake into the pipe. If the clog is within reach of the snake, you should be able to clear it out. If the clog is further down the line, you may need to use a specialized tool to access it.
Hiring a professional to snake your kitchen sink may cost more upfront, but it’s often the better option. Professional plumbers have the experience and equipment to identify and clear clogs quickly and safely. They can also detect underlying issues that may be causing the clog and address them accordingly. Plus, if something goes wrong, you’ll have the peace of mind that comes with knowing the job was done correctly.
No matter which route you choose, snaking your kitchen sink can help keep your plumbing system running smoothly and prevent further clogs from occurring. Be sure to weigh the pros and cons of each option carefully before deciding which is best for your particular situation.
FAQs About the How To Snake Kitchen Sink
Q1: What tools do I need to snake a kitchen sink?
A1: You will need a plunger, an auger, and a bucket.
Q2: How do I use an auger to snake a kitchen sink?
A2: To use an auger, insert the tip of the auger into the drain and twist it to push the blockage down the drain.
Q3: How do I know if I need to use a plunger or an auger?
A3: If the blockage is close to the drain opening, a plunger should be used. If the blockage is further down the pipe, a longer auger should be used.
Q4: Can I snake a kitchen sink myself?
A4: Yes, with the right tools and a bit of patience you can snake a kitchen sink yourself.
Q5: Is snaking a kitchen sink dangerous?
A5: If done properly and with the right tools, snaking a kitchen sink is not dangerous. However, it is recommended to use caution when using an auger and to be aware of any sharp edges.
Conclusion
Snaking a kitchen sink can be a difficult task, but following the steps provided and taking the necessary precautions, it can be done safely and successfully. With a few easy steps, you can quickly and easily clear a clogged kitchen sink. Be sure to take all necessary safety precautions, have the right tools on hand, and be patient when snaking a kitchen sink. With the right knowledge and preparation, you can snake a kitchen sink with ease.

