Taking apart a kitchen faucet spray head is a relatively simple process that anyone with basic plumbing skills can do. The process requires very few tools and can be done in a short amount of time. Before starting the process, it is important to have all of the necessary tools on hand, including a pair of adjustable pliers, a flathead screwdriver, and a pair of channel locks. Additionally, it is recommended that a small bucket or bowl be placed near the sink to catch any water that may drip out during the process. Once everything is in place, the following steps should be followed to successfully take apart a kitchen faucet spray head.
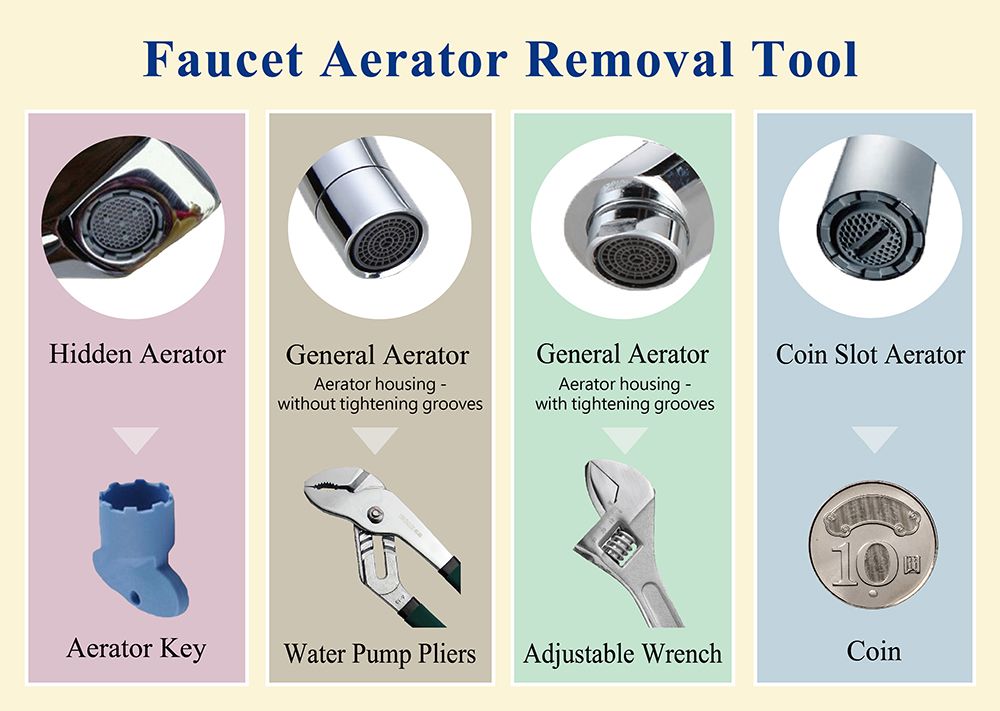
Tools Required for the Job
When it comes to taking apart a kitchen faucet spray head, it’s important to have the right tools for the job. A few essential items you’ll need include a flat-head screwdriver, an adjustable wrench, and a pair of pliers. If any nuts or bolts are holding the spray head in place, you’ll need the screwdriver and wrench to loosen them. The pliers will come in handy if you need to grip the spray head and pull it off. It’s also a good idea to have a bucket or container handy to collect any water that may come out during the process. With the right tools, you’ll be able to easily and safely take apart a kitchen faucet spray head.
Shutting Off the Water Supply
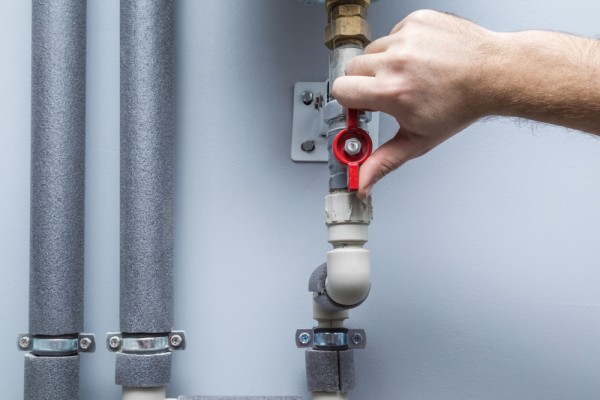
Before starting any repair on a kitchen faucet spray head, it is important to shut off the water supply. The water supply to the faucet can be shut off by turning the shutoff valve located underneath the sink. This will ensure there is no water pressure in the pipes and you will be safe from any unexpected water spraying out. If you do not see a shutoff valve underneath the sink, the main water supply to the house can be turned off.
Unscrewing the Spray Head
After turning off the water, you can now unscrew the spray head. Many spray heads are secured to the faucet with a Phillips head screw. If the spray head is stuck, use a pair of pliers to loosen it up and then unscrew it with your hands. In some cases, the spray head might be held on by a snap-on fitting. If that is the case, pry the spray head off with a flathead screwdriver.
Once the spray head is removed, you should be able to access the interior components of the kitchen faucet spray head. Carefully inspect the components and replace any worn-out parts, if necessary.
Taking apart a kitchen faucet spray head is a relatively easy job. With the right tools and a little knowledge, you can get the job done in no time.
Unscrewing The Handle
Taking apart a kitchen faucet spray head is an easy task with the right tools and a little patience. The first step is to unscrew the handle. Depending on the model of your faucet, the handle may be held in place with a decorative cap or dome. If so, use a flathead screwdriver to remove it. If not, use an adjustable wrench to grip the nut or bolt that holds the handle in place and turn it counterclockwise until it comes off. Once the handle is removed, the inner parts of the faucet are exposed, including the valve stem.
Taking Apart the Spray Head
If you’re faced with a clogged or malfunctioning kitchen faucet spray head, don’t panic. Taking it apart is a simple task that requires minimal tools and a bit of patience. To begin, you’ll need a flat-head screwdriver and a pair of slip-joint pliers. First, identify the screws that secure the spray head to the faucet. Then, using the flat-head screwdriver, unscrew and remove the screws. Once the screws are removed, use the pliers to gently pull the spray head away from the faucet.
The next step is to locate the stem of the spray head using the pliers. Carefully grip the stem and twist it until it comes free of the spray head. Once the stem has been removed, the spray head should come apart easily in two pieces. You can then inspect the inside of the spray head for any clogging or debris. Clean the inside of the spray head with a soft brush before reassembling the pieces. Lastly, when reassembling the spray head, make sure to use the screws to secure it firmly to the faucet. Following these simple steps will help you get your kitchen faucet spray head working like new again.
Cleaning the Components
Cleaning the components of a kitchen faucet spray head is an important step in the disassembly process. This ensures that all the parts are free of dirt, grease, and grime that can impede the functionality and performance of the faucet spray head. To clean the components, you will need to use a variety of tools and cleaning supplies. Start by using a soft brush to gently remove any debris or buildup from the surface of the components. For tougher stains, you may need to use a mild abrasive cleaner or white vinegar. After the components have been cleaned, rinse them off with a damp rag or cloth and let them air dry. Make sure to clean all the components thoroughly before re-assembling the spray head.
Reassembling the Spray Head
Reassembling the spray head of a kitchen faucet is the final step in the process of taking apart the faucet. To reassemble the spray head, the individual pieces must be put back together in the right order. This process requires the use of pliers, a small screwdriver, and a few other tools.
The first step in reassembling the spray head is to attach the O-ring to the back of the spray head. This O-ring helps to create a watertight seal that is necessary for the spray head to function properly. Once the O-ring is in place, the individual pieces should be lined up according to the diagram that came with the spray head.
The next step is to attach the plastic cover. This cover helps to protect the internal components from damage. It is important to make sure that the cover is properly placed before tightening the screws. Once the plastic cover is in place, the internal components can be reattached.
Finally, the handle of the spray head should be reattached. The handle is the part that the user interacts with when using the spray head. It is important to make sure that the handle is properly tightened and that the handle functions correctly. Once the handle is in place, the spray head is ready to be put back in place on the kitchen faucet.
Following these steps will ensure that the spray head is properly reassembled and ready for use. Taking apart and reassembling kitchen faucet spray heads is a straightforward process that anyone can do with the right tools and knowledge. Taking the time to do this process properly will ensure that the kitchen faucet spray head is functioning correctly and safely for years to come.
Reattaching the Handle
Reattaching the handle after taking apart a kitchen faucet spray head is an important part of any repair job. To do this, start by locating the handle’s mounting screws. These can usually be found on the underside of the handle. Once the screws are found, use a screwdriver to loosen them and carefully remove the handle. Next, locate the two O-rings, which should be located around the base of the handle. Place them aside and then attach the O-rings back to the handle, being sure to place them in the correct orientation. Now, reattach the handle to the faucet base, using the mounting screws. Tighten the screws, and then make sure the handle is securely attached. Finally, turn the water back on, and test the faucet to make sure it works properly. With these steps, you should now have a fully functioning kitchen faucet spray head.
Turning the Water Supply Back On
Turning the water supply back on is a crucial step once you have successfully taken apart the kitchen faucet spray head. Before you open the valves to restore the water supply, make sure that all the parts are in the right place and that the faucet is properly connected. To turn the water supply back on, locate the shut-off valves, usually located under the sink. Once you find the shut-off valves, open them slowly and watch for any leaks. If everything is in order, the water supply should now be restored. If you are unsure of how to turn the water back on, contact a professional plumber to help you with the task.
Testing the Faucet Spray Head
Taking apart a kitchen faucet spray head can be a daunting task for the average homeowner, but with the right tools and some patience, you can make quick work of the job. Before beginning, it’s important to make sure you have the right tools on hand. You’ll need a flathead screwdriver, an adjustable wrench, a plumber’s tape, and possibly a pair of pliers. Once you have the right tools on hand, you can begin testing the faucet spray head.
Start by locating the screws or clips that attach the faucet spray head to the hose. Depending on the type of faucet, the screws or clips may be located at the base of the spray head, or they may be located on the sides of the hose. When you have the screws or clips in hand, loosen them using the flathead screwdriver or adjustable wrench. Once the screws or clips are removed, you can pull the spray head away from the hose.
Once you have the spray head removed from the hose, you can begin testing it. To do this, attach the plumber’s tape to the end of the hose and then insert the spray head back onto the hose. Turn on the water and check to see if the spray head is functioning properly. If the spray head is not working, you may need to replace it. If the spray head is working, you can reattach it to the hose with the screws or clips you removed earlier. With that, you have successfully tested and taken apart a kitchen faucet spray head.
FAQs About the How To Take Apart A Kitchen Faucet Spray Head
1. What tools do I need to take apart a kitchen faucet spray head?
A: You will need a flathead screwdriver, a pair of pliers, and a wrench.
2. How do I remove the spray head from the faucet?
A: You will need to loosen the retaining nut at the base of the spray head with a wrench and then pull it off.
3. Is it difficult to take apart a kitchen faucet spray head?
A: No, it is not difficult. With the right tools and a little patience, it can be done in a matter of minutes.
4. Can I replace the spray head with a new one?
A: Yes, it is possible to replace the spray head with a new one.
5. How do I reinstall the spray head after I have taken it apart?
A: You will need to reattach the spray head to the faucet and then tighten the retaining nut with a wrench.
Conclusion
Taking apart a kitchen faucet spray head is not as difficult as it may seem. With the right tools and a little bit of patience, you can easily remove the spray head and replace it with a new one. First, you need to identify the type of faucet you have, then use a wrench or pliers to remove the retaining nut. After that, you can pull the spray head off and use a screwdriver to remove the retaining clip. Once the clip is off, the spray head will easily slide off. Finally, you can install the new spray head and secure it with the retaining nut. With a few simple steps, you can successfully take apart a kitchen faucet spray head.

