Taking apart a Moen kitchen faucet can be a daunting task, but it doesn’t have to be. With the right tools and patience, you can easily take apart and repair your Moen kitchen faucet. This guide will walk you through the steps of taking apart a Moen kitchen faucet, including how to remove the handle, the aerator, and the cartridge. After following these steps, you will be able to repair or replace any parts of your Moen kitchen faucet.
Tools & Supplies Needed
Taking apart a Moen kitchen faucet requires the right tools and supplies. First, determine what kind of faucet you have, as some models need different tools. Then, have a basin wrench, an adjustable wrench, and a screwdriver on hand. Additionally, you’ll need a new set of O-rings and seals if you plan on replacing them.
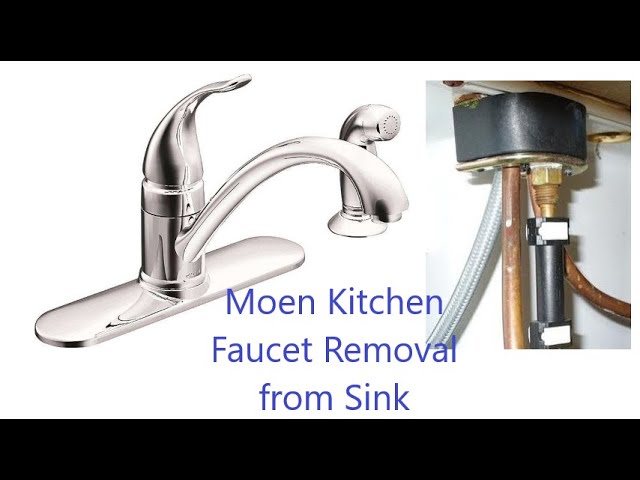
Before disassembling the faucet, turn off the water supply. Then, use the basin wrench to unscrew the nuts that secure the faucet to the sink. Use the adjustable wrench to loosen the nuts that secure the water supply to the faucet. Once the nuts are removed, gently pull the faucet from the sink and place it on a towel.
Next, you’ll need to remove any caps, escutcheons, and handles. Use the screwdriver to unscrew them. Carefully remove the entire assembly from the faucet body and place it aside. At this point, you should be able to access the O-rings and seals.
Once you have the necessary tools and supplies, taking apart a Moen kitchen faucet is a straightforward process. With the right tools and supplies, you can quickly and easily replace the O-rings and seals, or disassemble the faucet for cleaning.
Removing the Handle
Removing the handle of a Moen kitchen faucet is a straightforward process. First, locate the set screw, which is typically located under the handle. The set screw may be covered by a decorative cap or plug. Once the set screw is exposed, use a flathead screwdriver to remove it. Next, gently remove the handle and set it aside. Depending on the model, you may need to use a wrench to loosen the collar nut. You may also need to use a pair of pliers to remove the handle. Once the handle has been removed, you can begin to take apart the faucet.
Locating the Faucet Stem Assembly
Taking apart a Moen kitchen faucet can be a daunting task for even the most experienced DIYer. However, it’s possible to do it yourself with the right knowledge and tools. The first step is to locate the faucet stem assembly. This is the part of the faucet that controls the water flow. It is usually located behind the handle or beneath the sink. To access it, you may need to remove the handle or access panel. Once you’ve found the faucet stem assembly, you can use a flathead screwdriver to unscrew the screws that hold it in place. You might need an adjustable wrench to loosen the packing nut and loosen the stem assembly. Once you’ve removed the stem assembly, you can remove the washers and O-rings. The O-rings should be replaced with new ones if they’re damaged. To ensure a good seal, apply a bit of the plumber’s grease to the new o-rings before re-assembling the faucet. With the right tools and knowledge, you can easily take apart a Moen kitchen faucet and make any necessary repairs or replacements.
Removing the Faucet Stem
Removing the faucet stem from a Moen kitchen faucet is the first step in taking apart the faucet. To begin, turn off the water supply to the faucet and open the faucet to relieve any residual pressure. Once the water is off, you can loosen the stem screw by turning it counterclockwise with a screwdriver. Once the screw is loose, the bonnet nut can be unscrewed with an adjustable wrench. After the nut is removed, you’ll be able to pull the stem out of the faucet housing. It may require a few twists and pulls, as it may be stuck in place. To finish, you can pull off the stem’s O-ring and washer for cleaning. Reassembling your Moen kitchen faucet is as easy as reversing the steps!
Replacing the O-Ring
Replacing the O-Ring on a Moen kitchen faucet can be a bit tricky, but with the right tools and guidance, it’s a simple repair job. Before you begin, make sure you have the right O-rings and lubricant for your specific Moen faucet. Once you have the parts, here’s what you need to do: First, remove the handle from the faucet and the O-Ring. Use a flathead screwdriver to remove the handle’s set screw, then slide the handle off. You can then remove the O-Ring from the faucet’s stem. Next, apply a light coating of lubricant to the O-ring and the faucet’s stem. Place the O-Ring onto the stem and press it in firmly. Finally, reattach the faucet handle, and you’re done! With a few simple steps, you can easily replace the O-Ring on a Moen kitchen faucet and get your faucet running like new.
Reassembling the Faucet
Reassembling a Moen kitchen faucet is a straightforward process that is just as easy as taking it apart. Before reassembling the faucet, be sure to test all of the parts to make sure they are working properly. Once you have checked that all parts are functioning properly, you can begin the reassembly process. Start by reinserting the O-ring and bonnet nut onto the stem. Make sure the O-ring is seated properly and that the bonnet nut is tightened securely. Next, reattach the handle assembly to the stem and secure it using the set screw. Finally, reattach the water supply lines to the faucet. Once all components are securely fastened, you can turn the water back on and test the faucet. With these easy steps, you can have your Moen kitchen faucet reassembled and ready to use.
Troubleshooting Common Issues
Troubleshooting common issues with a Moen kitchen faucet can often be a daunting task for DIYers. Fortunately, there are a few simple steps you can take to diagnose and repair common issues. First, you’ll need to know how to take apart a Moen kitchen faucet. This will allow you to diagnose the problem and make any necessary repairs or replacements. Once you have the faucet taken apart, you’ll be able to identify any worn-out parts or corroded components. In addition to identifying the issue, you’ll also need to know which parts need to be replaced and how to properly reassemble the faucet after repairs are complete.
By following these steps, you can quickly and easily identify and repair any problems with your Moen kitchen faucet. However, if you’re still having difficulty after taking apart and reassembling your faucet, it may be best to contact a professional plumber for assistance. With the right tools and knowledge, you can have your Moen kitchen faucet working like new in no time.
Maintenance Tips
Maintaining your Moen kitchen faucet is essential for long-term use. Taking apart your Moen kitchen faucet is the first step in doing so. Proper disassembly of a Moen kitchen faucet allows you to clean, inspect, and repair it. Fortunately, taking apart a Moen faucet is relatively simple and can be done without the help of a plumber. Here are some tips to help you take apart a Moen kitchen faucet.
First, make sure to turn off the water supply lines. Then, remove the handle and spout with a wrench, being careful not to damage any of the parts. Next, use a screwdriver to remove the seal plate and gasket. Then, use a wrench to remove the faucet stem and cartridge. Finally, use a flathead screwdriver to remove the valve seat and O-ring.
By following these steps, you can take apart a Moen kitchen faucet with ease. Doing so will allow you to inspect, clean, and repair the faucet so it works as well as new. Furthermore, it’s important to regularly take apart and maintain your Moen kitchen faucet to ensure it continues to work properly. Following these maintenance tips will help keep your Moen faucet in good condition for years to come.
Conclusion
Taking apart a Moen kitchen faucet is relatively straightforward and can be done without the need for a professional. By following the instructions outlined in this article, you should be able to easily and safely remove the handle, cartridge, and other faucet components. With a few common tools, some basic instructions, and a bit of patience, you can successfully take apart a Moen kitchen faucet.

