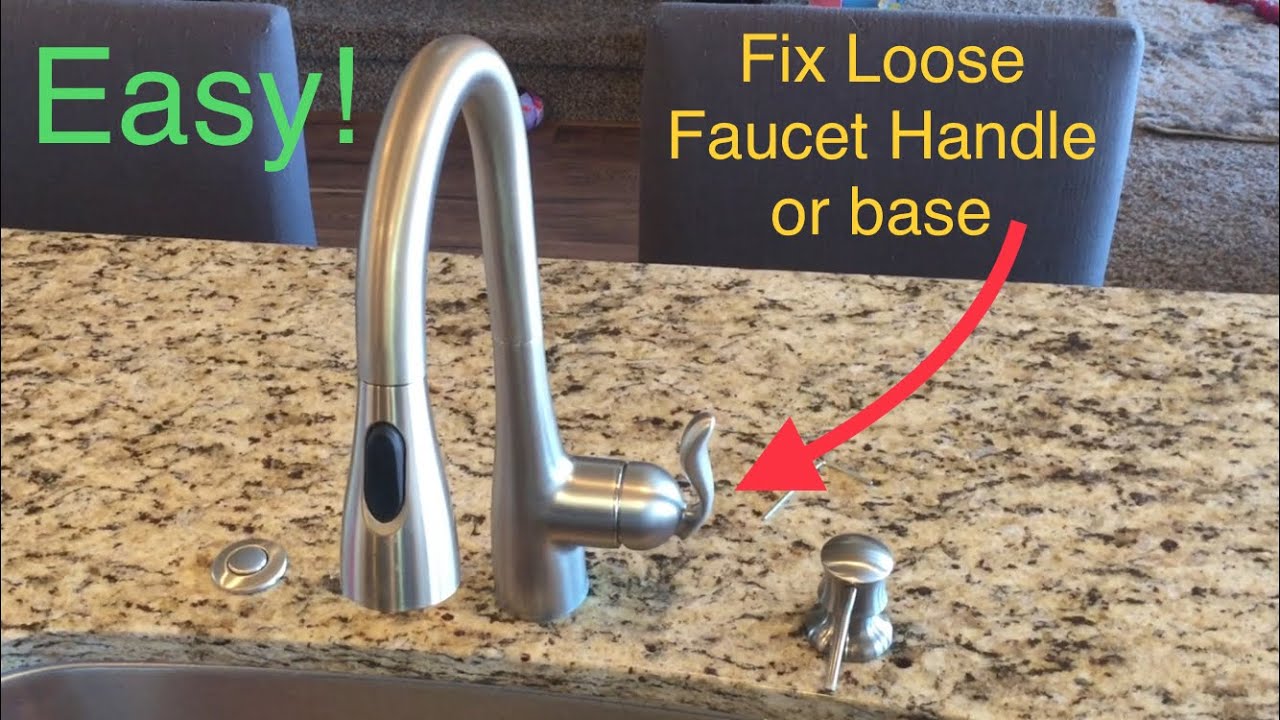
If you are having problems with a loose kitchen sink faucet handle, it can be frustrating. Fortunately, this is an easy fix with just a few simple steps. This guide will show you how to tighten the kitchen sink faucet handle, so you can get back to using your sink with ease.
Identifying the Problem
The kitchen sink is a hub of activity in any home. Unfortunately, over time, faucet handles can become loose and begin to leak. Fortunately, identifying the problem and tightening the faucet handle is relatively easy and can be done without professional help. Before starting the process of tightening the faucet handle, it is important to identify the type of handle your sink has. There are two main types of handles for kitchen sinks, compression and cartridge. Compression handles are the traditional handles with a round knob at the top, while cartridge handles are flat and have a slot at the base. Knowing how to identify the type of handle is the first step to tightening the faucet handle.
Choosing the Right Tools
In order to effectively tighten a kitchen sink faucet handle, the right tools are essential. To start, the correct size of wrench or a pair of adjustable pliers will be necessary to loosen the handle. An adjustable wrench is the most preferable tool for this job as it is the most versatile. It can be used to grip different shapes and sizes of nuts, bolts, and other hardware. When using a wrench, be sure to take extra care not to damage the faucet handle or the surrounding area.
In addition to the wrench, a screwdriver may also be required. If the handle is secured with screws, the correct size can be used to remove them. Similarly, if the handle has been glued to the faucet, a flat-head screwdriver can be used to pry it off. It is important to use the right screwdriver to ensure that no further damage is done to the faucet.
Although tightening a kitchen sink faucet handle is a relatively simple task, it is important to use the right tools for the job. Using the wrong tools can damage the handle, or even the entire faucet which could be costly to replace. With the right tools in hand, it is easy to tighten a kitchen sink faucet handle and get the job done properly.
Removing the Old Handle
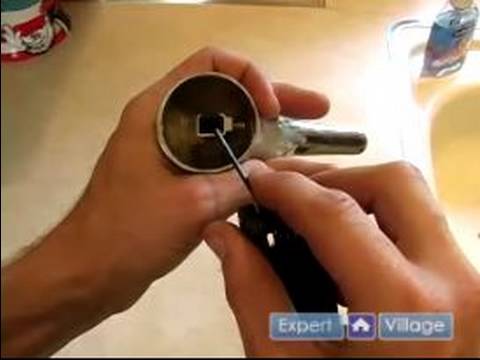
Removing the old handle can be a tricky and daunting task when it comes to tightening a kitchen sink faucet handle. It might seem like an overwhelming task, but with the right tools and a little know-how, it’s actually a relatively easy job. The process begins with turning off the water supply to the faucet. Then, remove the knob or handle and decorative cover plate, if there is one. You’ll need an adjustable wrench to loosen the screws that hold the faucet’s handle to the pipe. To avoid damaging the finish, use a cloth to protect the handle. Next, turn the handle to the left to remove it. Once the old handle is removed, you’ll have a better idea of what type of handle you need to replace it, as well as the size and type of screws required. With the right tools and know-how, you can easily replace a kitchen sink faucet handle and give it a much-needed tightening.
Replacing the Handle
of a Kitchen Sink Faucet
If you’re looking for a quick and easy way to update the look of your kitchen while also ensuring your plumbing is up to par, then replacing the handle of your kitchen sink faucet is a great solution. With just a few simple tools, you can easily tighten the handle of your kitchen sink faucet, making it look and function like new. In this guide, we’ll walk you through the process step-by-step so that you can experience the benefits of a secure and stylish kitchen sink faucet handle.
First, you’ll need to locate the screw that attaches the handle to the faucet. This is typically found on the underside of the handle. You’ll need to use a flathead screwdriver to loosen the screw until it’s completely detached. Then, you’ll be able to wiggle the handle off the faucet.
Next, you’ll need to assess the condition of the handle and the faucet. You can do this by checking for any rust, corrosion, or other damage. If everything looks good, you can move on to the next step.
Now, you’ll need to attach the new handle to the faucet. To do this, you’ll first want to tighten the handle with your fingers. Once it’s secure, you can use a screwdriver to tighten the screw that attaches the handle to the faucet. Make sure to not overtighten, as this can cause damage.
Finally, you’ll want to test the handle to ensure it’s secure and functioning properly. You can do this by turning the handle on and off several times. If the handle is functioning correctly, then you’re all done!
Replacing the handle of your kitchen sink faucet may seem intimidating, but it’s actually quite easy. With the right tools, you can easily tighten the handle of your kitchen sink faucet and make sure it looks and functions like new.
Securing the Handle
Tightening a kitchen sink faucet handle is an essential part of routine maintenance. Not only does a secure handle make it easier to turn the faucet on and off, it also helps to prevent water from leaking out of the spout and onto the countertop. Fortunately, tightening a kitchen sink faucet handle is a relatively easy task that can be completed in just a few simple steps.
Before beginning, turn off the water at the shutoff valve beneath the sink, or the main shutoff valve for the entire home. Once the water is turned off, use a screwdriver to remove the screws holding the handle in place. If the handle is stuck, use a wrench to loosen it. Once the handle has been removed, examine the mounting nut and verify that it is properly secured. If the nut is loose, tighten it with an adjustable wrench. Once the nut is securely in place, reinstall the handle and screws.
Finally, turn the water back on and test the handle. It should turn easily and securely without any water leakage. If at any time the handle feels loose, turn the water off and repeat the steps above. With a few simple tools and techniques, it is easy to tighten a kitchen sink faucet handle and keep your kitchen in good working order.
Testing the New Handle
After the new kitchen sink faucet handle has been installed, it is important to test the handle to ensure it is functioning correctly. To do this, first turn on the water supply and check for any leaks. If no leaks are present, then turn the handle to the on position and observe the flow of water. The flow should be consistent and should not be too strong. If the flow is too strong, the handle may need to be adjusted to reduce the water pressure. If the handle is not functioning correctly, it may need to be re-installed. Once the new handle is properly installed and tested, it is ready to use.
Troubleshooting Common Issues
If you are having problems with your kitchen sink faucet handle, it can be a frustrating experience. Fortunately, it does not have to be. With a few simple troubleshooting steps, you can have your faucet handle working properly in no time.
One of the most common problems is a loose handle. This is typically caused by a worn-out rubber washer or O-ring. Replacing the washer or O-ring is a relatively simple process and can be done with the help of a few tools, including pliers and a flat-head screwdriver.
Another common issue is a leaky handle. This is usually caused by a loose connection between the handle and the valve stem. Tightening the connection with a wrench or pliers should resolve the issue. If the connection is corroded, however, you may need to replace the entire valve stem.
Finally, if your handle is difficult to turn, it may be due to a buildup of sediment or calcium deposits. Cleaning the handle with a mild detergent and a soft-bristled brush should do the trick. If the handle still won’t turn, then you may need to replace it.
Tightening a kitchen sink faucet handle is not as difficult as it may seem. With the right tools and a bit of knowledge, you can quickly and easily resolve any issues you may be having.
Maintaining the Faucet Handle
It’s important to maintain the faucet handle of your kitchen sink to ensure it remains in working order. Over time, the handle may come loose or become difficult to turn. Fortunately, there are a few simple steps you can take to tighten the handle of your kitchen sink.
First, you’ll need to locate the screw that is holding the handle in place. This is usually found on the underside of the handle. Once located, use a Phillips or flathead screwdriver to tighten the screw. If the screw is too tight, use a pair of pliers to help loosen it.
Next, you’ll need to make sure the handle is placed correctly. If the handle is not aligned correctly, it may be difficult to turn or may come loose. Check to make sure the handle is pointing in the right direction and is not loose.
Finally, it’s important to make sure the handle is secure. Use a wrench to tighten the nut that is holding the handle in place. This will help ensure that the handle is secure and won’t come loose.
By following these simple steps, you can ensure that the handle of your kitchen sink is tight and secure. A well-maintained faucet handle will last a long time and help to keep your kitchen sink running smoothly.
FAQs About the How To Tighten Kitchen Sink Faucet Handle
1. What tools do I need to tighten a kitchen sink faucet handle?
A: Generally, a pair of adjustable pliers and/or a wrench are needed to loosen or tighten the faucet handle.
2. How do I know if the faucet handle is too tight?
A: You may notice that the handle is difficult to turn or that it won’t turn at all. You may also hear a creaking sound when the handle is turned, which is a sign that it is too tight.
3. Is it possible to fix a kitchen sink faucet handle without replacing it?
A: Yes, it is possible to repair the handle without replacing it. All you need to do is to tighten the nuts that hold the handle in place. If the handle is too loose, you may need to replace the entire faucet.
Conclusion
Overall, tightening a kitchen sink faucet handle is an easy process that requires few tools. First, you need to remove the old handle. Once the handle is removed, you can then access the mounting nut and screw. Using a wrench, you can then loosen the mounting nut and remove it. Finally, you can replace the old mounting nut with a new one and secure it in place. With the new mounting nut in place, you can then reattach the handle to the faucet and your faucet handle should be nice and tight.

